

Active Fine Art Posts


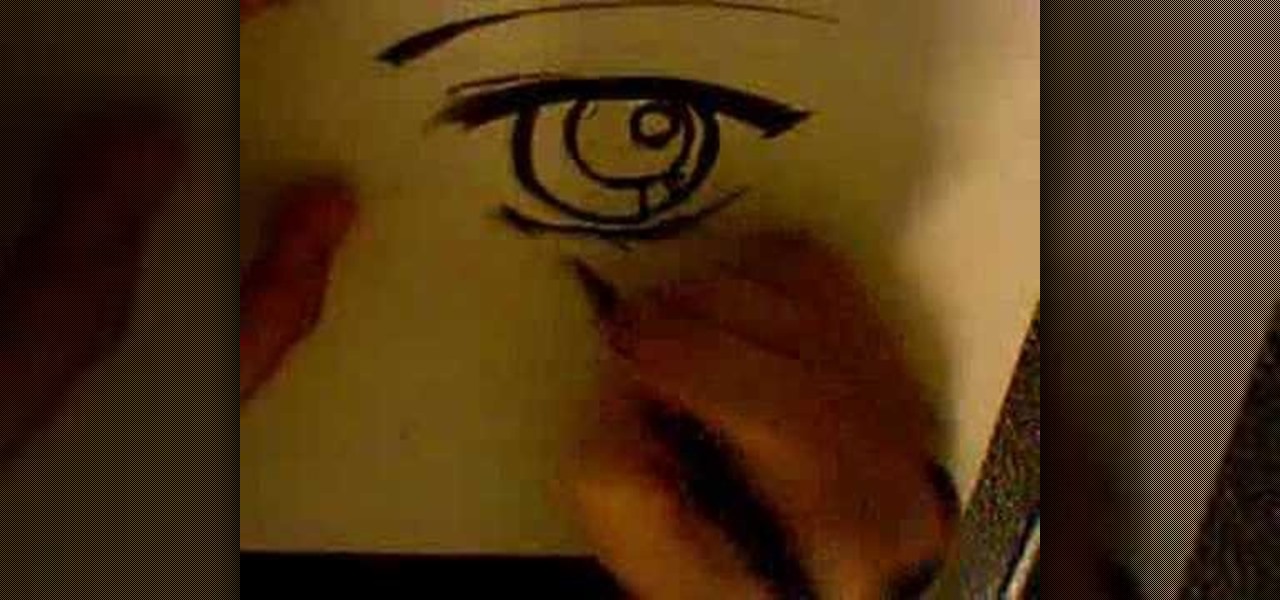
How To: Draw an anime eye
Anime is a funky style of cartooning. Japanese animation is increasingly popular these days but takes a bit of practice to draw.

How To: Protect your camera lens
This video shows us the method to protect your lens. This can be done by putting the lens caps. The cap for the part of lens going into the camera can be screwed on to the lens. It stops dust from getting on to the lens surface. The front part of the lens can be protected by a lens cap which can be put into the position and pulled out when needed. You can also put a filter on the lens. The filter can be used to protect the lens in case you drop it in the sand and any other similar condition. ...

How To: Draw a nice witch on a broom for Halloween
In this how to video, you will learn how to draw a witch. First, draw three oval shapes for the head and body. Next, draw the basic out line of the witches and legs. From there, you can add the arms, cape and broom. You can also add a bat and cat if you want. From here, you can go back into the drawing with more detail. Add the buckle and band of the witches hat. Next, draw in the curls of the hair and the eyes, nose, and mouth. Next, add in the folds of the cape. If you drew the cat, add fur...
How To: Make bleached skinny jeans from old ones
ThreadBanger demonstrates how to make recycled bleached skinny jeans. First, put on the jeans and if they are too big, pinch them at the back and mark them with tailor's chalk. Fold under the jeans at the bottom and mark the desired length with the chalk. Open up the seam of both pant legs with a seam ripper. Seam rip the back part of the jeans and the top band. Cut along the chalked lines. Redraw the seam and pin the pants. Sew along the chalk lines. Use pinking shears to cut away the excess...

How To: Draw the Cookie Monster cupcake
In this how to video, you will learn how to draw a Cookie Monster cupcake. First, draw two circles for the eyes. Follow this with a furry texture oval shape for the face. Add a mouth with a cookie in it and draw the bottom as a cupcake wrapper. Draw the pupils of the eyes. Next, color the face a blue color. You can draw the cookie inside of the mouth a brown color. Use a black color to outline the areas around the mouth. Fill in the chocolate chips of the cookie with a darker brown color, and...
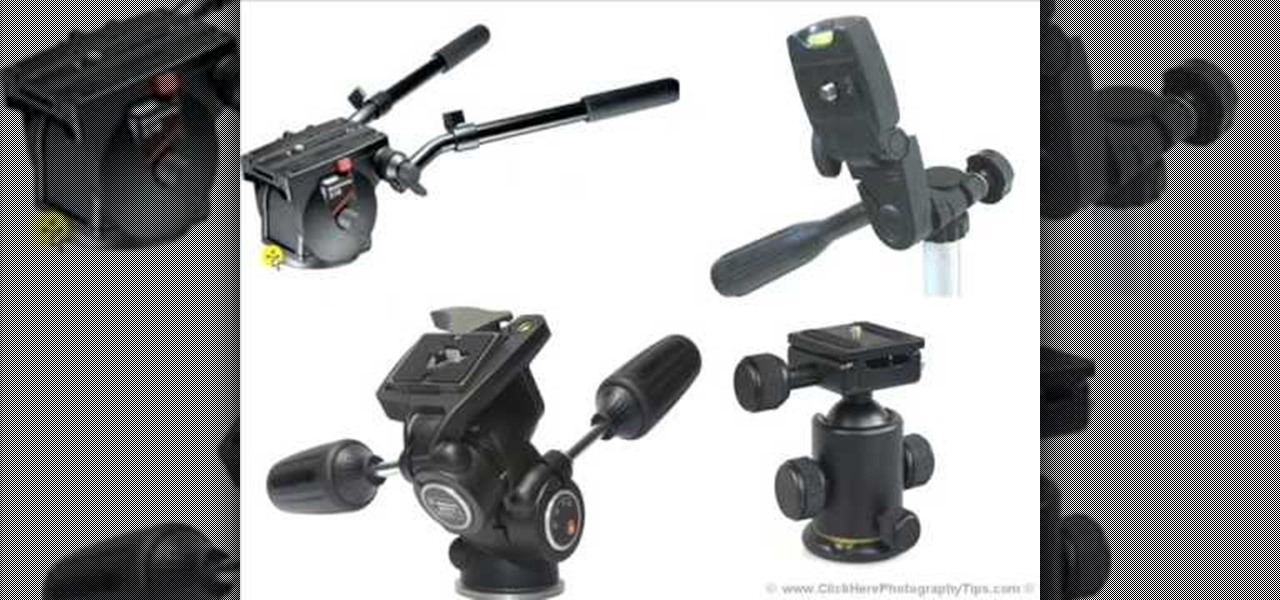
How To: Use a tripod to improve your photography
In this video tutorial, viewers learn how to use a tripod to improve photography. There are many different tripod manufacturers, but the operation of most tripods is similar. Look for a tripod that is easy to use. Make sure that the tripod can tilt forward, backward and side to side easily. It should be able to rotate at a 360 degree angle. This video also provides 4 different types of tripods in an image. Each tripod has different functions, size and movement. This video will benefit those v...
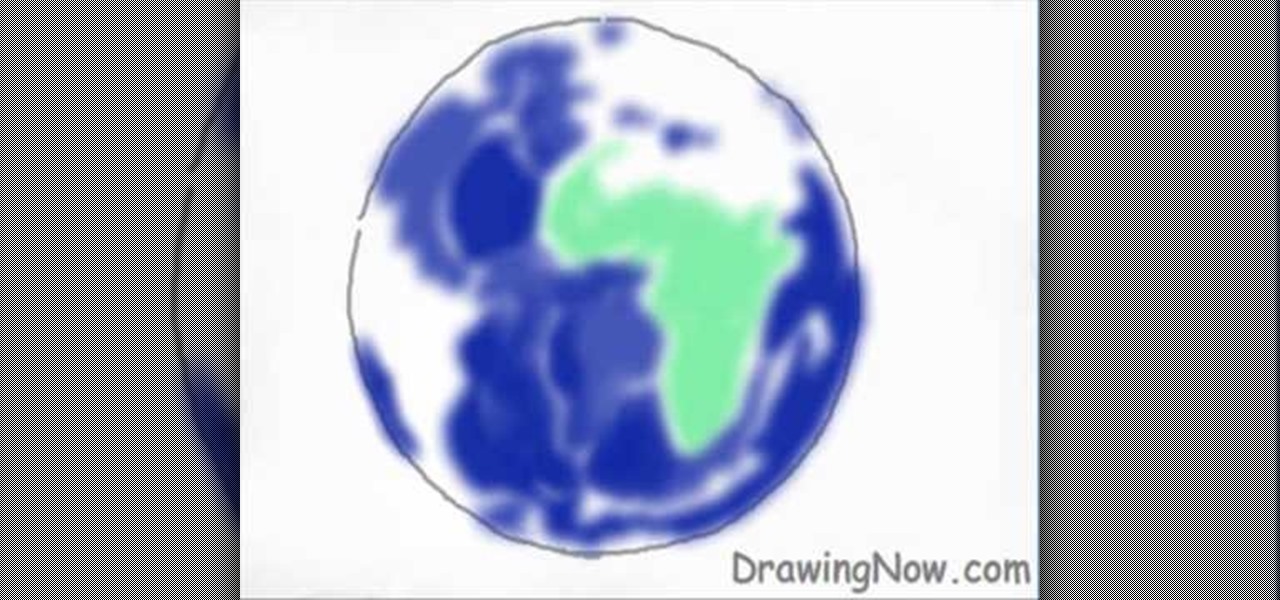
How To: Draw the Earth
This video shows how to draw a picture of the Earth. First draw a rough circle in black. Add blue sea areas inside the circle but leave a white space in the shape of Africa and a white space for Europe above it. On the left leave a white space for a part of America. Fill all the land areas in green. Draw an outline in turquoise round all the land areas. Add some lighter blue smudges on the sea and some yellow on the land. Add a few small brown touches at the poles and on some of the land area...

How To: Write numbers in Copperplate style
This video shows how to write the numbers 0, 1, 2, 3 and 4 in Copperplate style. Special marked paper is used, with slanted verticals and regular horizontals, so that the numbers are even in size. The number 0 is drawn slowly, showing how the nib rests on the paper and is drawn anticlockwise. Then the number 1 is drawn, and again the up strokes are thin, while the down strokes are thick. The number 2 is drawn in two steps, starting with the top part. Numbers 3 and 4 follow in a similar fashio...
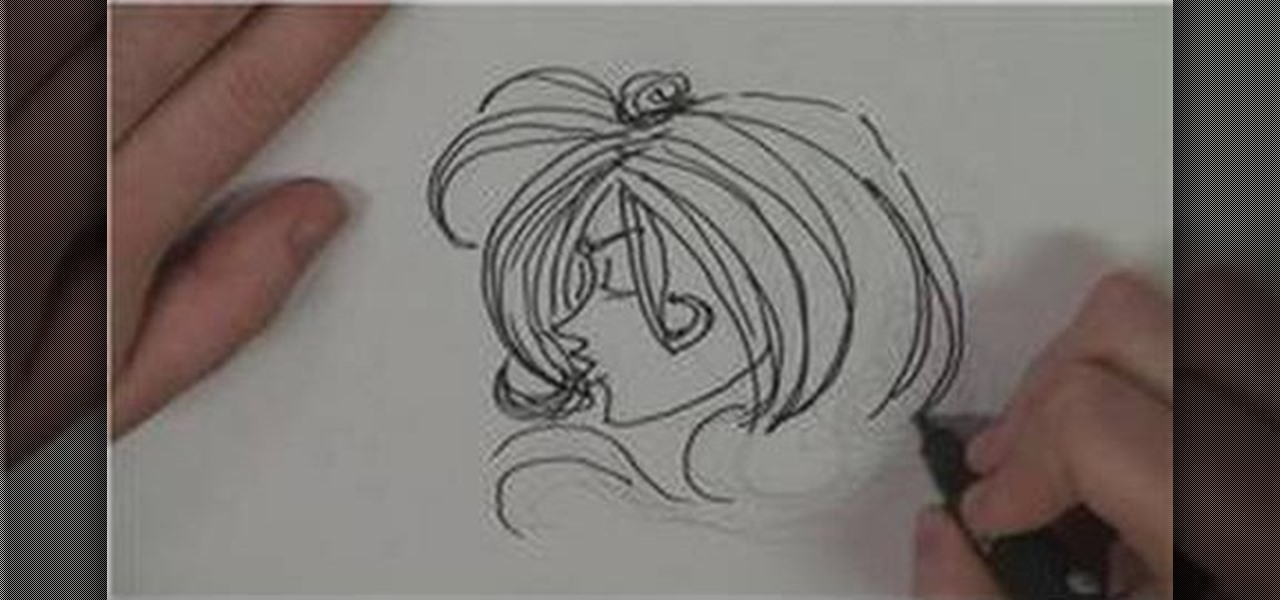
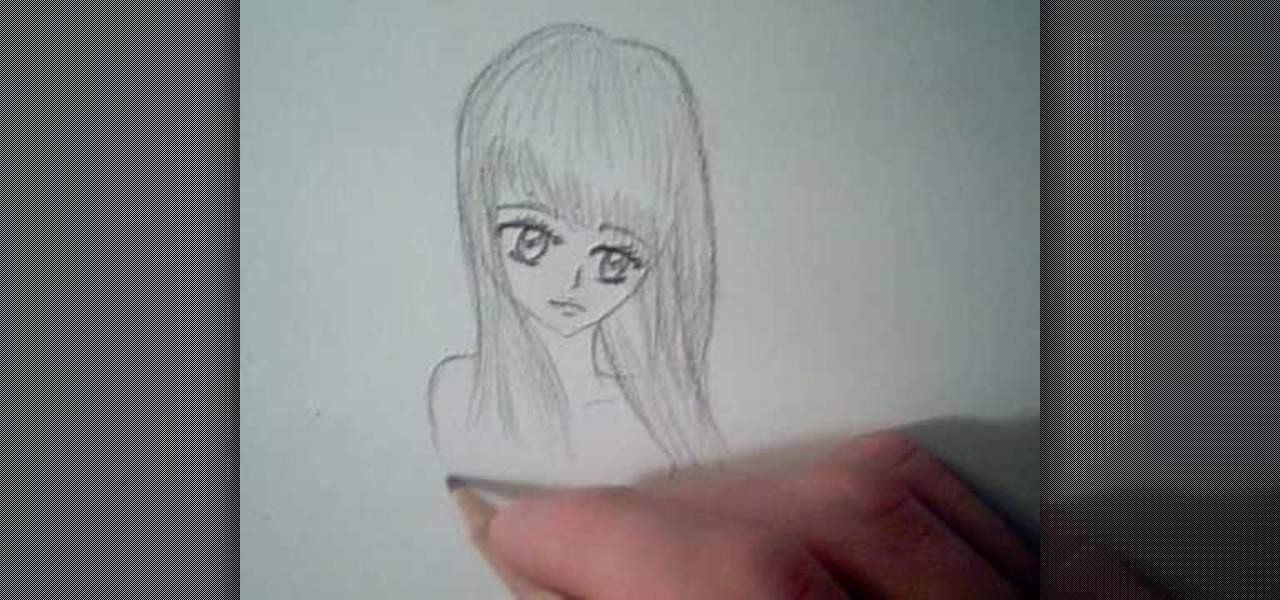
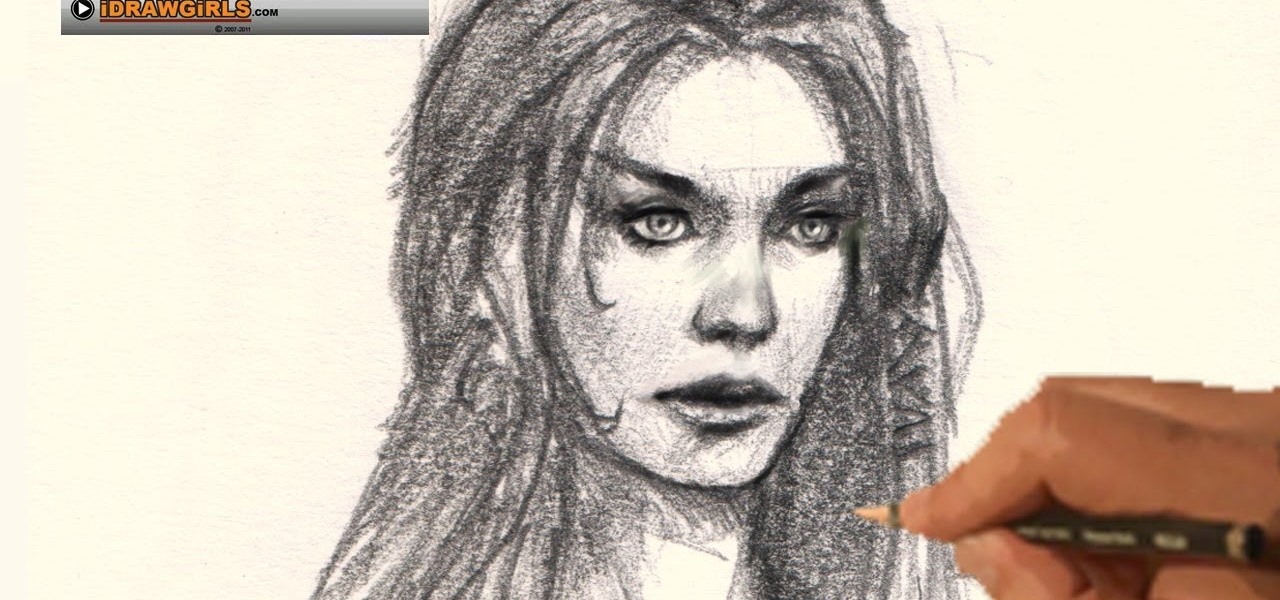
How To: Draw people's hair realistically with Michael Weisner
In this video tutorial, viewers learn how to draw human hair. This video shows viewers how to draw long hair. Begin by outlining the shape of the hair. Then start building upon the outline of the hair. Hair is very wavy and branches out. The hair outline should be organic and not straight to look more realistic. Once you have finished designing the hair, you can add extra details such as accessories or hair. This video will benefit those viewers who are interested in art and drawing, and woul...
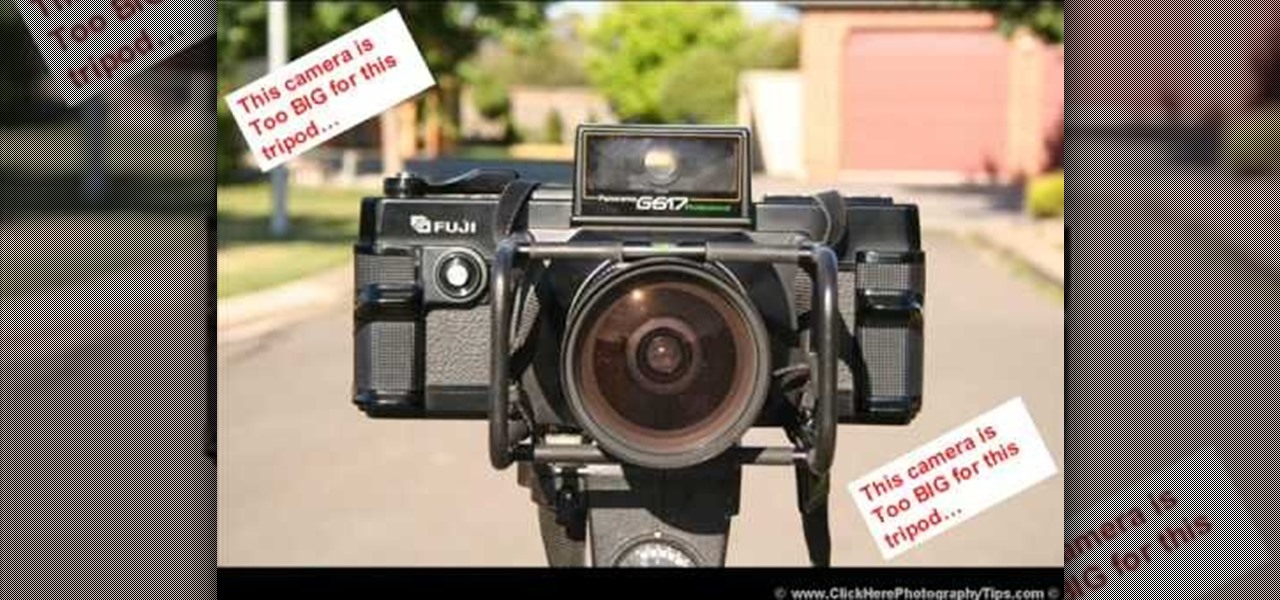
How To: Discover if your camera the correct size for your trip
This video is about determining the right camera for the tripod.The video begins by explaining the ways of doing this, that is by ensuring that the camera is neither too large nor too small for the tripod and also by ensuring that the tripod is able to withstand the weight of the camera.When the camera is placed on the tripod it should be a right match for the base ply of the tripod and should not be lager or smaller than the base ply.This video is excellent for those who want to select the r...
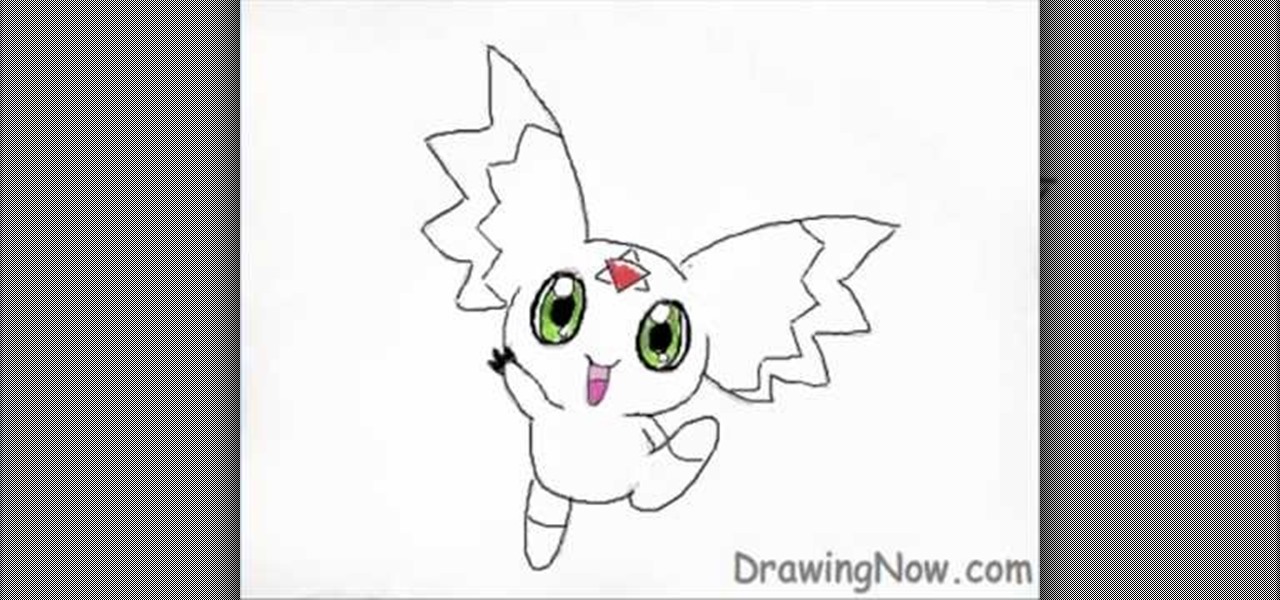
How To: Draw Calumon from Digimon
In this how to video, you will learn how to draw Calumon from Digimon. First, start off with two circles for the head and body. Next, add the ears and oval shapes for the feet. From here, you can trace these shapes to create a more accurate depiction of Calumon. Go into the face and two ovals for the eyes. Draw two ovals inside the ovals for the pupils. Fill it in with black. You can also add a circle at the top of each eye to create a highlight. Next, draw a border in the interior of the ear...
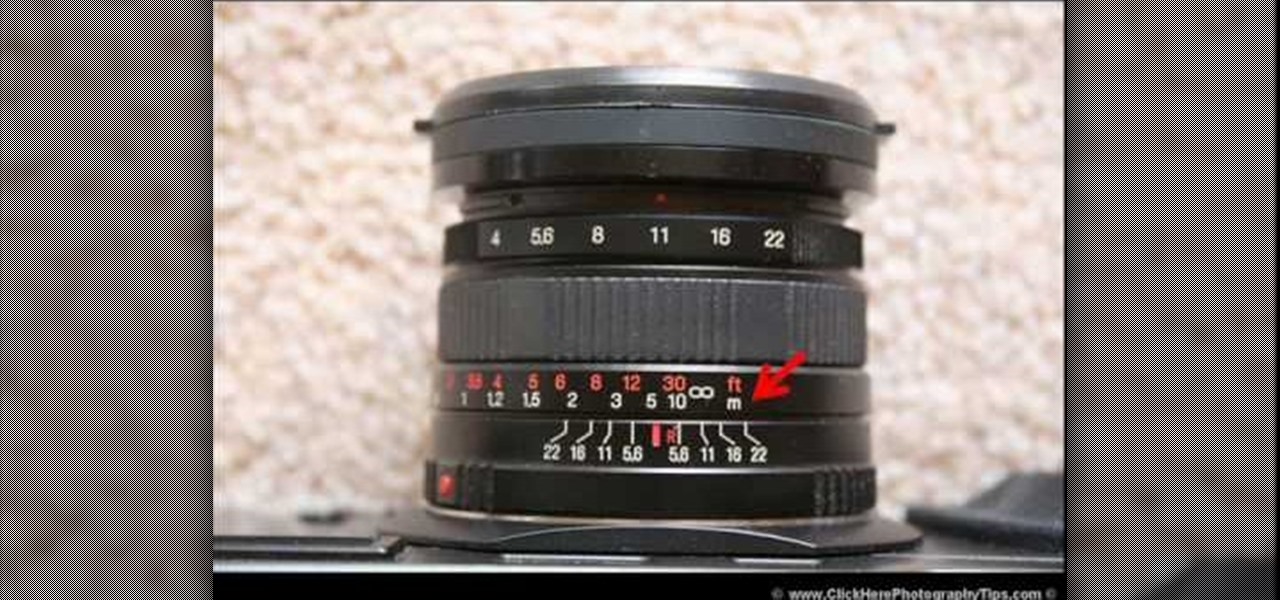
How To: Relate the information on your camera to the lens
This is a video tutorial showing its audience how to relate the information that is displayed on your camera lens to your actual camera. The first step is to grab your camera and begin studying your lens. Next look at the mm reading on your lens and the aperture reading. These settings will assist you with setting your depth of field. Next look for your focus ring. Your focus ring will allow you to focus your photos in manual mode. Next look for the focus reading, this will tell you how far a...

How To: Use snow shoes for your camera's tripod
This video teaches how to increase the surface area of the support under your tripod by using snow shoes. You can get snow shoes from various manufacturers. The bottom of the snow shoe has a very wide surface area. You can compare this with the width of the tripod base. The snow shoe makes the tripod more stable on the ground when you are using it on mud or snow or on sand. The snow shoe stops your tripod from sinking into the ground. On top of the snow shoe, you have a little rubber strap an...

How To: Get more out of spray paint cans
In this how-to video, you will learn how to get more out of your spray cans. This is useful if you want to make the most out of the money spent on these purchases. These spray cans are very useful for painting objects that would be harder with the traditional bus. First, follow the directions on the spray can. It should say to turn it upside down and spray it until it runs clear. This keeps the tips clear. If the can is old, you can carefully remove the tip from the can and drop it in paint t...
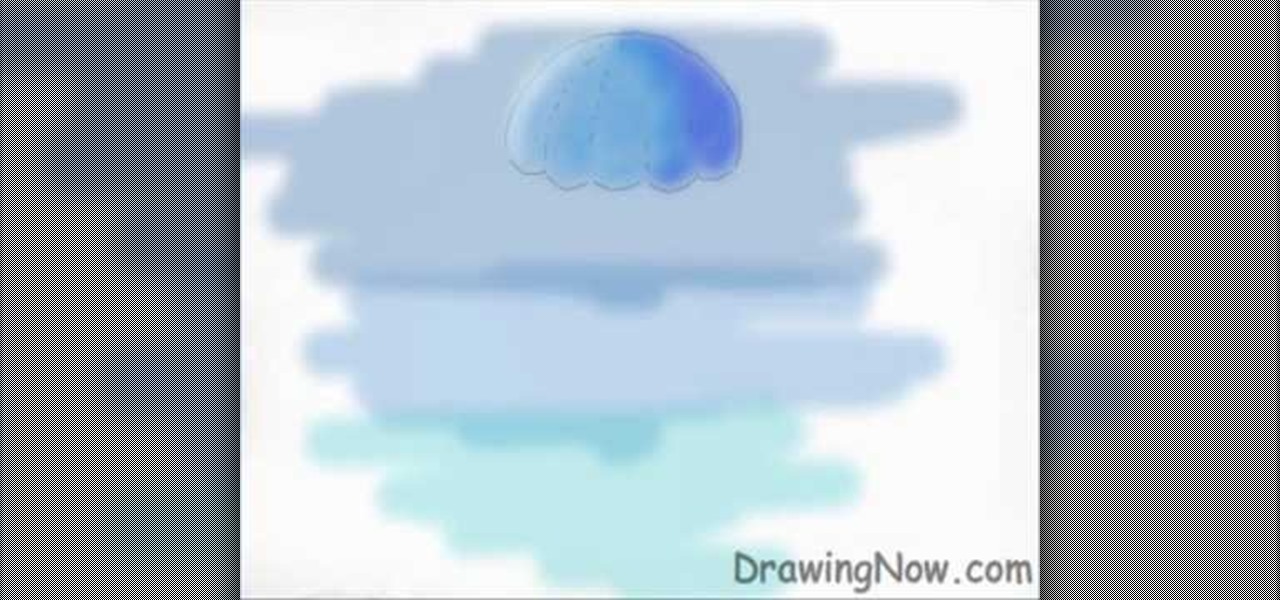
How To: Draw a jelly fish
Drawingnow.com shows us how to draw and colour a jellyfish. First make an outline of the body of the jellyfish by drawing a dome with verticl sections like a parachute or an umbrella. Join the sections at the bottom of the dome like a skirt. Colour the background blue in three sections from top to bottom. Darker blue is used for the top-most section, a medium blue used for the middle section and a lighter blue for the lower section. Next colour the umbrella mass of the jellyfish in a blue ton...
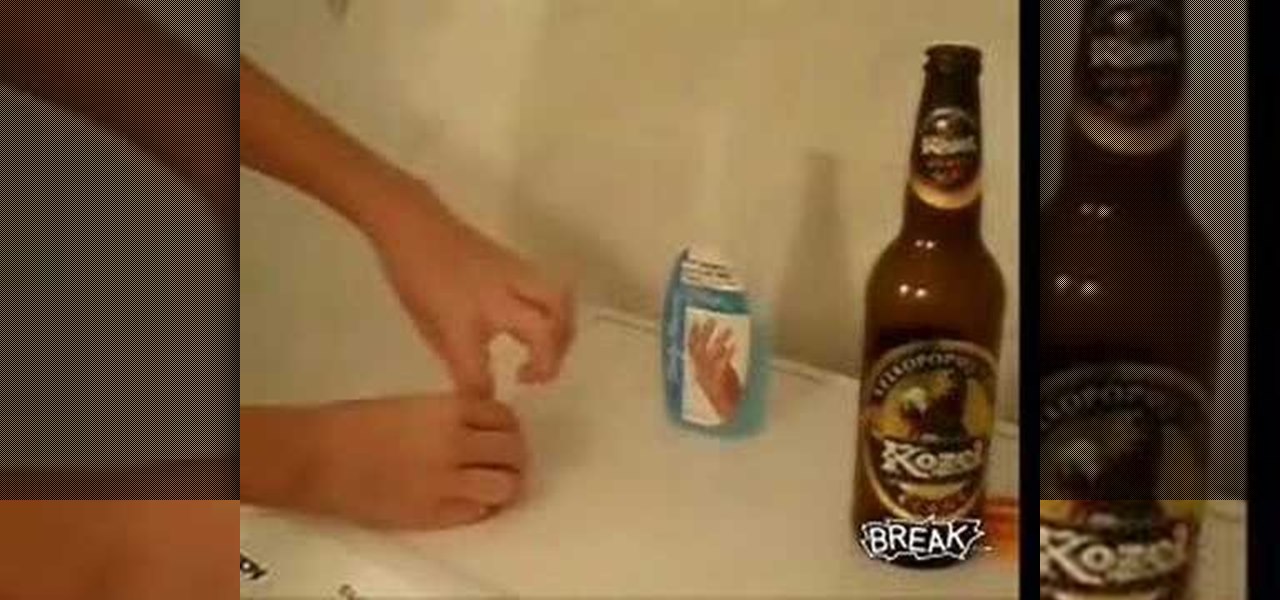
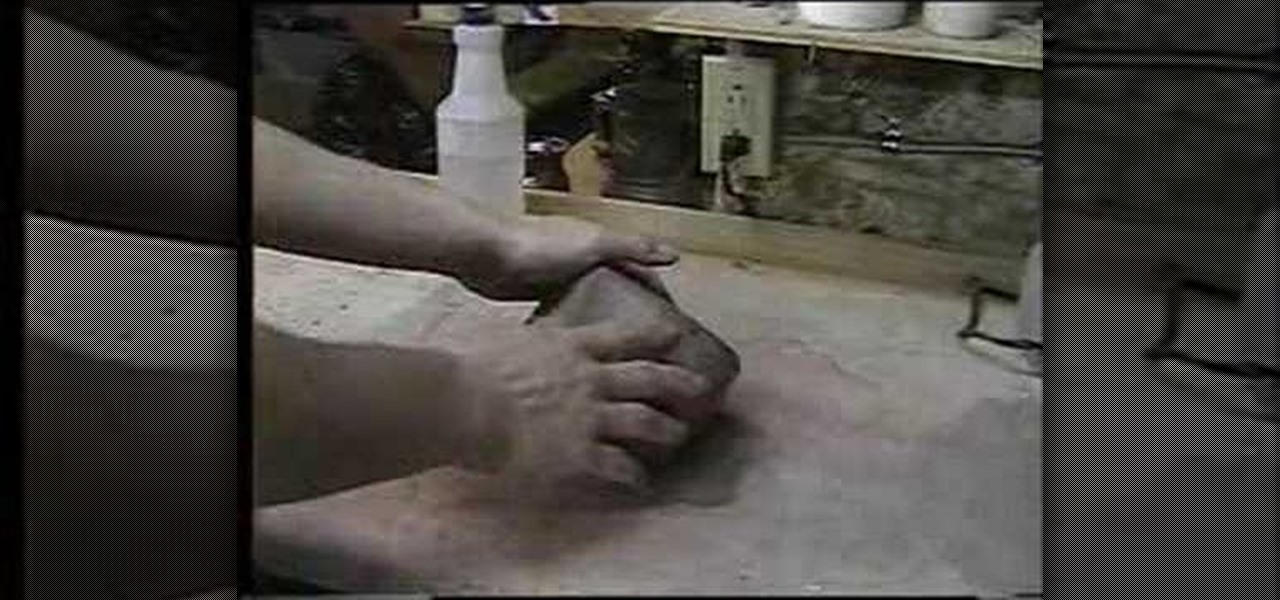
How To: Cut a glass bottle with a string
This video describes the process of cutting a beer bottle in half. First a piece of string is tied around a glass beer bottle to gauge the proper length that the string should be. Next, excess string is cut off and the tied string loop is slid up and off of the bottle. Next, the cap of a bottle of nail polish remover is unscrewed and the cap is filled with nail polish remover. The string is then wadded up and dipped into the nail polish remover for a couple seconds. The string is slid back on...

How To: Draw the moon
Drawingnow.com not only shows you how to draw the moon, but also shows what could be described as, drawing everything but the moon. Since your paper is white and so is the moon you will start off by drawing your circle and adding light shading in the bottom half of your moon. Now you can start with your black marker, pastel or drawing instrument of your choice, blacking out the rest of the paper around the moon. With the rest of your page blacked out, it really accentuates your moon and almos...
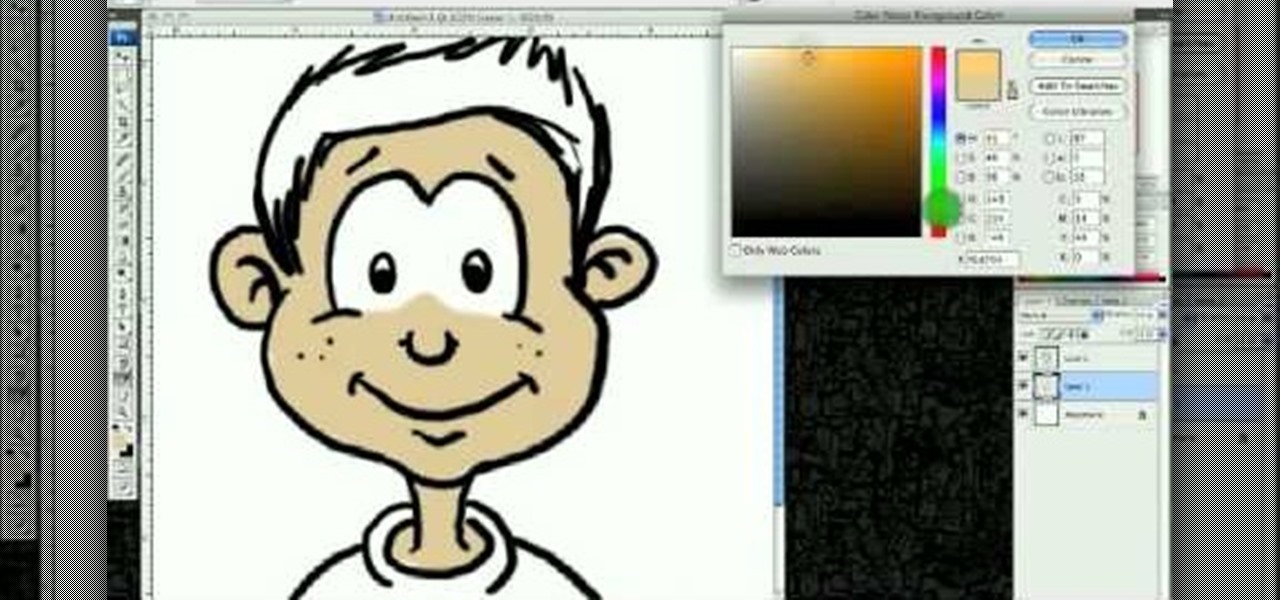
How To: Draw a cartoon boys face in Adobe Photoshop
This video illustrates how to draw a cartoon boys face in Adobe Photoshop.Here are the following steps:

How To: Draw a simple strawberry
This video illustrate us how to draw a simple strawberry. Here is the procedure for the following: Step 1: First of all take a sheet of paper, pencil color and pencil.
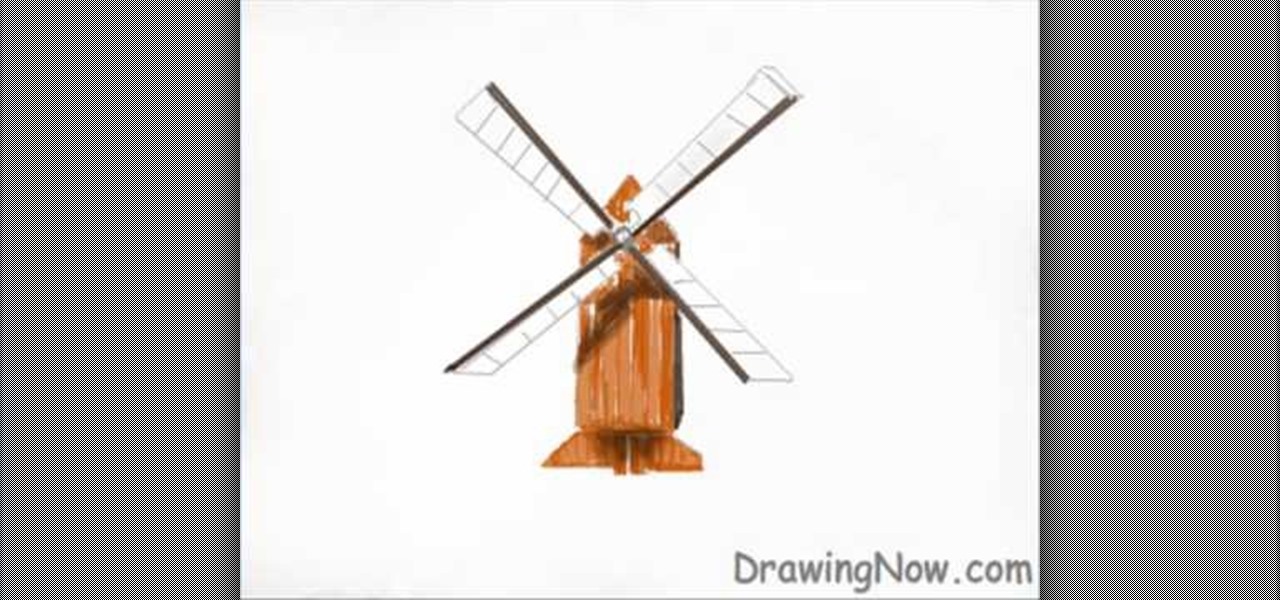
How To: Draw a windmill
In this how-to video, you will learn how to easily draw a wind mill from scratch. First, start off with the building of the mill. Next, draw the arms of the wind mill. Include the flaps on the arms. Next, fill in the smaller details such as the center of the rotation. Next, you can fill in the color of the building. In this case, brown was used. Next, fill in the arms of the wind mill. Add appropriate shading on top of the building. You can also add shading to the arms. Next, fill in the back...

How To: Draw a 56 Chevy truck with a flame paint job
In this how to video, you will learn how draw a '56 Chevy truck with flames. First, draw the outline of the car. Next, go into it with the windshield and driver side window. Next, draw the two wheels on the side. Also draw the lines for the fenders of the car. Add in the grill and head lights of the car in the front. Finish the basic outline with the vents on the hood of the car and the details of the back of the truck. Next, draw the flames in with a red marker. Outline the flames with a yel...
How To: Make mimi loofah for your dollhouse
This is a video tutorial describing how to construct a mini loofah for your dollhouse. The first step is to gather your supplies. You will need a needle, scissors, thread, and tulle. The tulle and the thread should be the same color. Next your tulle should be cut to be 1.5 feet long. Then bunch up the tulle so that it is small and compact just like a loofah. Next you should thread your needle. Next sew the tulle so that it stays in the shape that you would like it to be in. Finally cut off al...

How To: Draw V for Vendetta
In this how to video, you will learn how to draw V for Vendetta. First, start out with the legs of the character. Draw the outline as if the character is squatting. Next, draw the outline of the cape and the hands. Next, draw the face of the character. Note that he wears a hat. You can also fill in his mask. Note that the mask has a mustache and a grin. Once the outline of the character is complete, add the basic details of his suit. This includes the areas of the highlights and shading. Make...
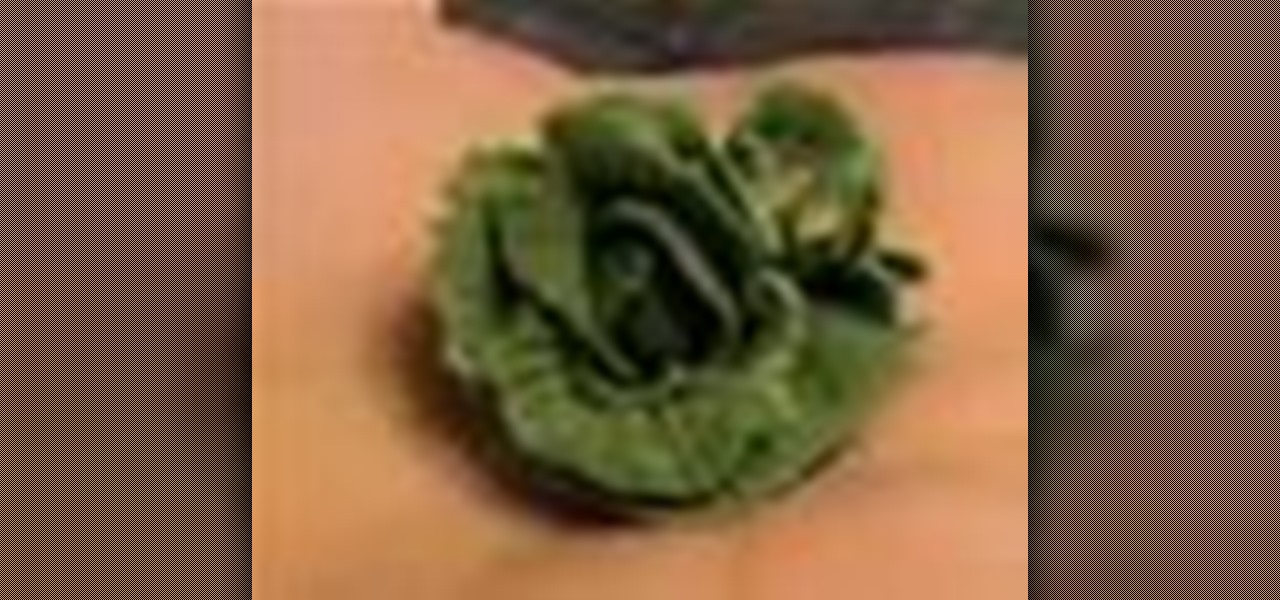
How To: Make lettuce or cabbage for your dollhouse
How to Make Lettuce or Cabbage from Polymer Clay for Miniature Doll House.
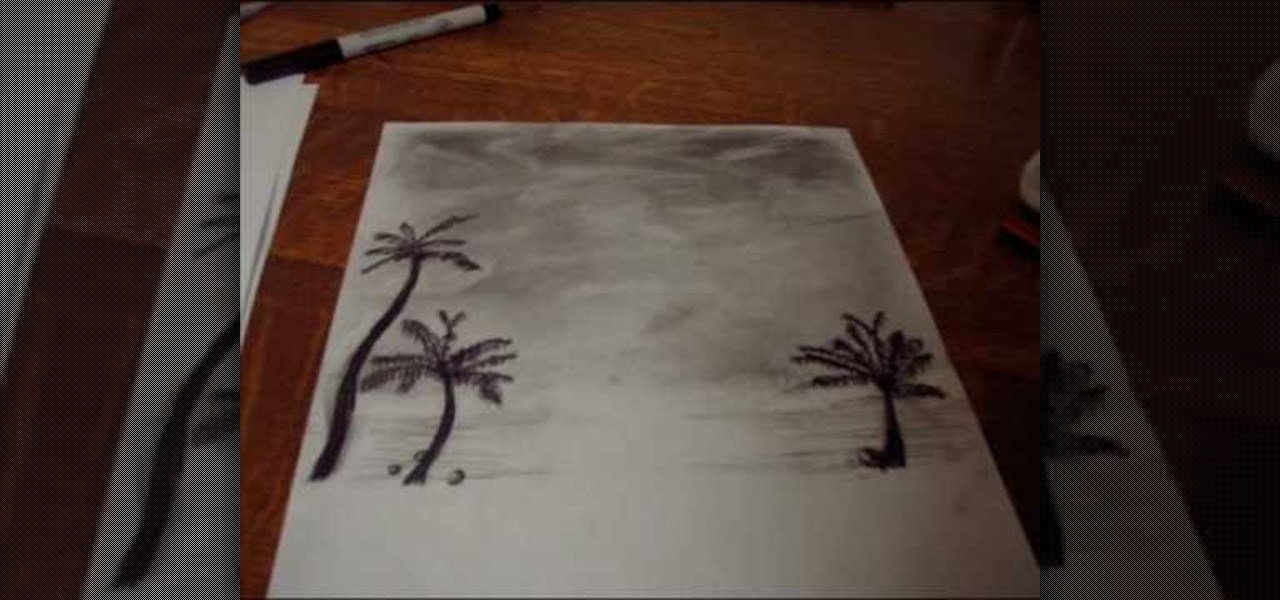
How To: Draw a palm tree landscape
In this how-to video, you will learn how to create a drawing of a palm tree setting. First, you will need two pieces of paper, charcoal, and cotton. Use the one piece of paper to add charcoal to your cotton. Next, cover the piece of paper you are using for the drawing with a wash of charcoal. Next, use an eraser to create images of clouds. Next, draw the palm tree with the charcoal on the lower half of the paper. Add as many palm trees as you feel necessary. Finish the drawing by doing the fi...

How To: Speedpaint
How to Speedpaint using Digital Painting.
How To: Draw a manga/anime angel
This video illustrate us how to draw a manga animated angel. Here are the following steps: Step 1:First of all take a sheet of paper and pencil and start drawing the character.

How To: Draw a shy chibi angel character
In this "how to" video, we learn how to draw a "chibi" form of an angel. Chibi is a Japanese term meaning "short person" or "small child". It has become a style of art in which Japanese Anime and Manga artists attempt to make all of their characters into "cute", childlike characters (with small bodies, large heads, and large eyes). The artist in this video shows his/her step by step process of drawing a small "chibi" angel holding tightly onto a heart. The artist starts with the eyes, then wo...

How To: Draw a cartoon alien
This how to video shows you hot to draw a cartoon alien. First, draw a circle and another circle inside. Draw two oval on the inner circle for the eyes. Draw an oval shape for the body. Next, add simple feet and arms. Make sure one arm is sticking out. You can add an antenna shape to the top of the large circle. Fill in the details of the inner circle, such as a mouth, nose, eyebrows, and pupils. Draw a gadget with an antenna sticking out in the hand that is sticking out. You can also draw a ...
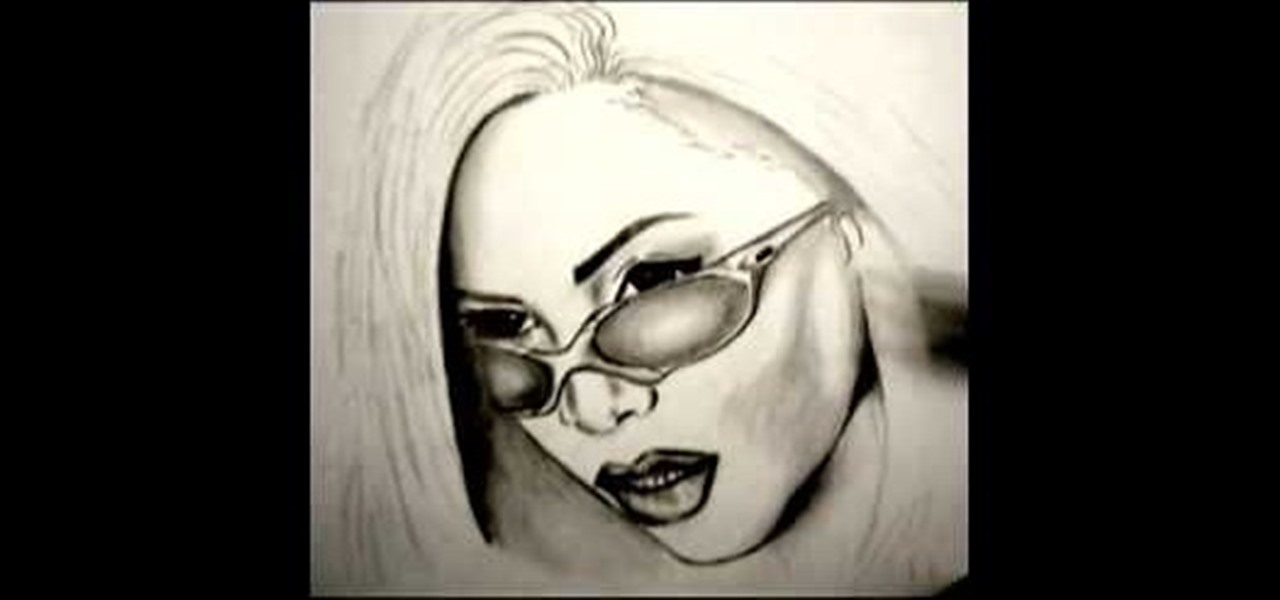
How To: Draw a face in graphite
First of all you need to draw the complete outline sketch by drawing very light color rough lines. Now you have to take your pen to start sketching the outline. First you have to start by drawing the sun glasses. Now draw the left eye. Now you have to draw the right eye, nose, the lips and the teeth. Now you have to draw the hair. Make the hair long. Then you have to darken the eyes and the eye lines. Now darken the eyebrows. Then draw the screws of the sunglasses at the side and then shade t...
How To: Draw realistic hands
In this how-to video, you will learn how to easily draw hands step by step. First, you will need a pencil and a piece of paper. Next, draw the top outlines of the fingers. Follow this with the folds of the skin at the joint of the fingers. Next, move on down to the thumb of the hand. Once you make the basic outline, move on to the rest of the hand. This includes the knuckles and the finger nail details. Go into the fingers to create more wrinkles and shading. Do this for the thumb as well. Ne...
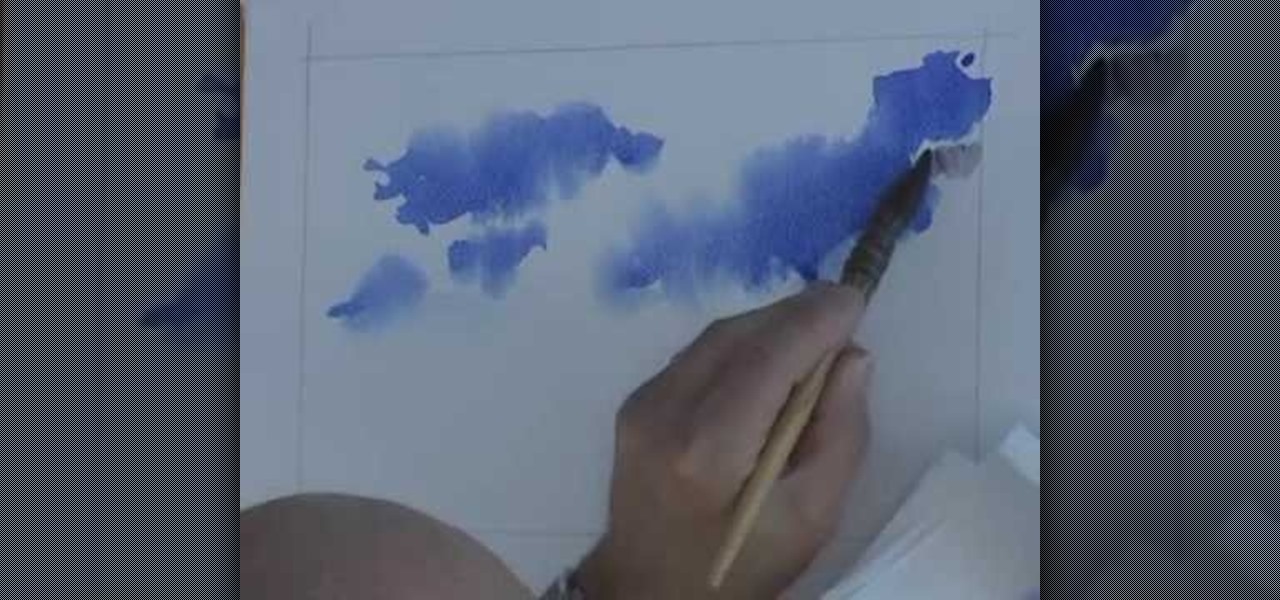
How To: Paint a breezy sky in watercolors
This video illustrate how to paint a breezy sky in watercolors.Here are the following steps: Step 1: First of all take sheet of paper,pencil and watercolors.

How To: Make a peasant (or gypsy) blouse
This video shows how to make a peasant blouse, using a T-shirt pattern from a previous video. Take the front of the T-shirt pattern and cut it out of your fabric. You will need two pieces the same, one for the front and one for the back of the blouse. Save the extra fabric from the neckline to add length to the sleeves. Place the two pieces right sides together and sew the side and shoulder seams.

How To: Make a gum paste anemone
In order to make a gum paste anemone you first should roll out the gum paste onto a flat surface and cut out about 13 circles of this with a cookie cutter. Use thin foam and ruffle 12 of the petals leaving the last flat. Place your ruffled petal on thick foam and drag a ball tool over the bottom half of the petal. This will give it an oval shape. Now, put these into a flower former. Now let the 13th petal that is flat down to dry. Let these dry for about 2-6 hours but not until they are rock ...

Start Your Own Sneaker Biz: Design-It-Yourself and Sell
You may have already heard of Zazzle, an online service that allows you to print on a variety of goods (tees, mugs, posters, etc.). You can design-it-yourself, or choose from Zazzle's library of available designs.

How To: Draw Master Chief from the video game, Halo
First of all you have to draw the rough sketch using light color lines. You have to draw blocks to the size of helmet, chest, two arms, legs and boots. Now start from the helmet and draw the outline. Draw the glass for viewing. Draw the lines as shown on the helmet. Also darken the spots as shown. Now draw the chest guard. Draw the lines to make all the different straps and marks over the armor. You also have to draw a tank at behind. Make the arm and the gloves. Now draw the outline of a gun...

How To: Draw Donald and Goofy
Donald Duck and Goofy are two classic Disney characters. If you are learning to sketch and want to draw these adorable cartoon friends, check out this tutorial. In this video, you will learn the simple steps you need to take to sketch these Disney classics.
How To: Draw a face
This video illustrate us how to draw a face. Here is the procedure for the following: Step 1: First of all take a sheet of paper and start by drawing a oval representing the outline of the face.

How To: Draw a baby panda bear
In this tutorial, learn some basic sketching techniques and draw a baby panda bear. This little guy is adorable and easy to draw, and will look so polished you'd think you took a photograph at the zoo.
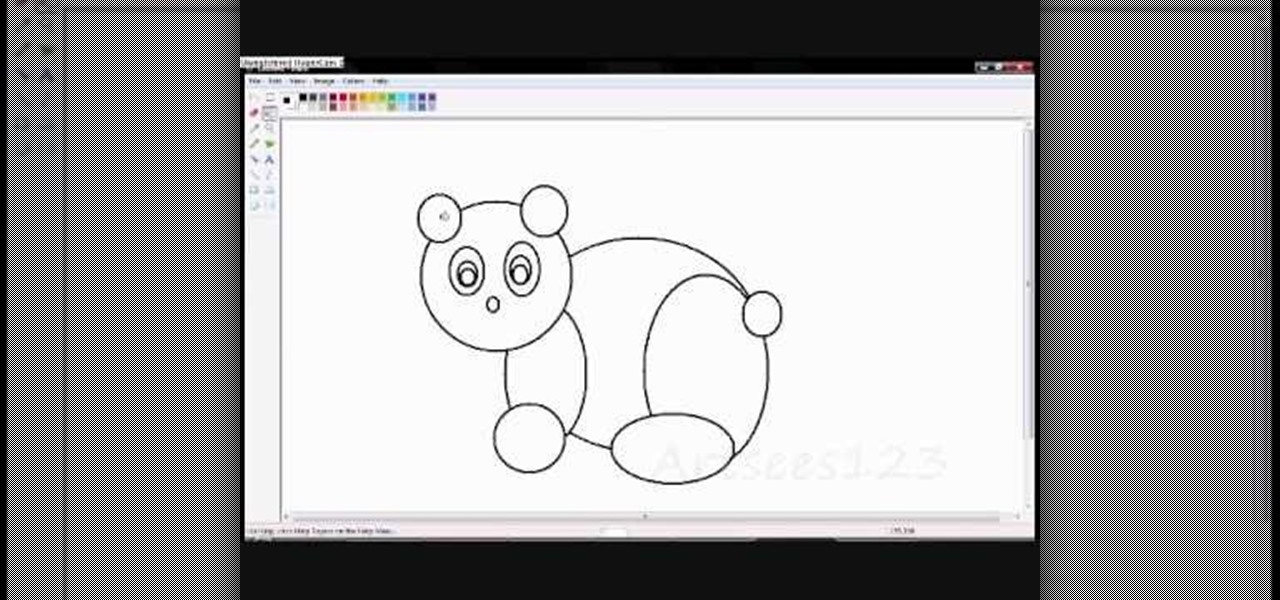
How To: Draw a panda bear using only circles
Have you decided to learn how to draw? Are you looking for a cute new character to doodle during math class? Well, you have clicked on the right video!