

Active Fine Art Posts


How To: Use packing tape to seal duct tape art designs
If you've ever sewn or worked with fabric, you know what no matter how great that shirt turns out it must be hemmed (raw edges sealed with a stitch) in order for your work to last. The same principle goes for delicate duct tape art.
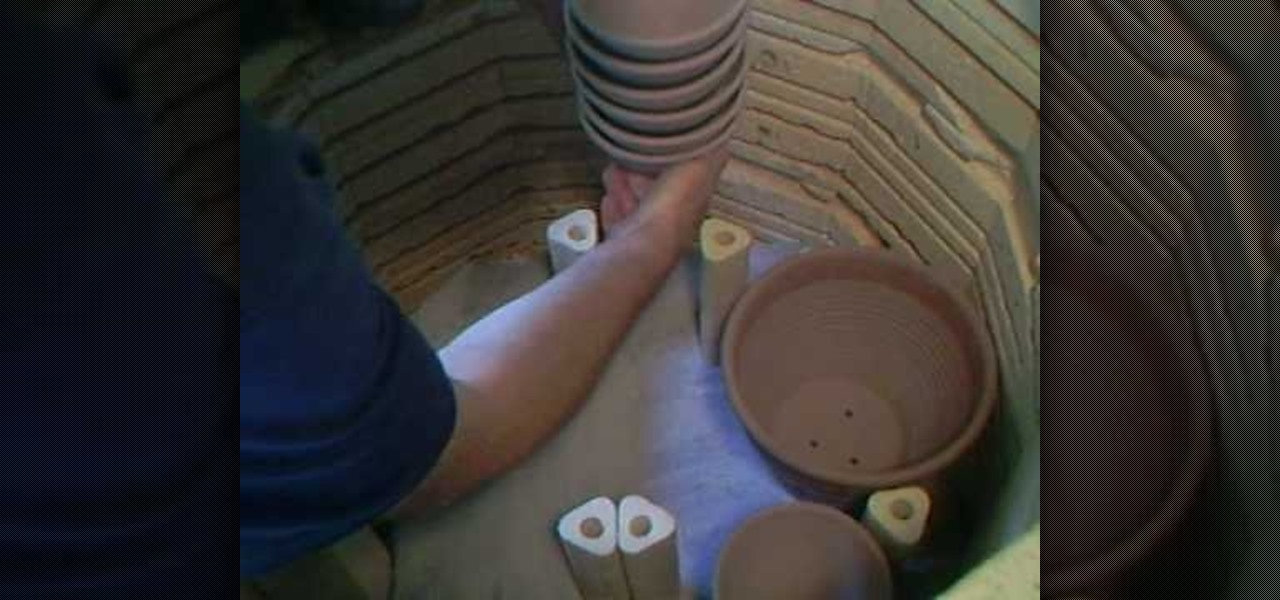
How To: Pack or convert a bisque kiln with Simon Leach
Are you a budding potter who's looking for a skilled tutor but can't afford taking pricey classes every week? Then watch this kiln conversion tutorial by master potter Simon Leach.
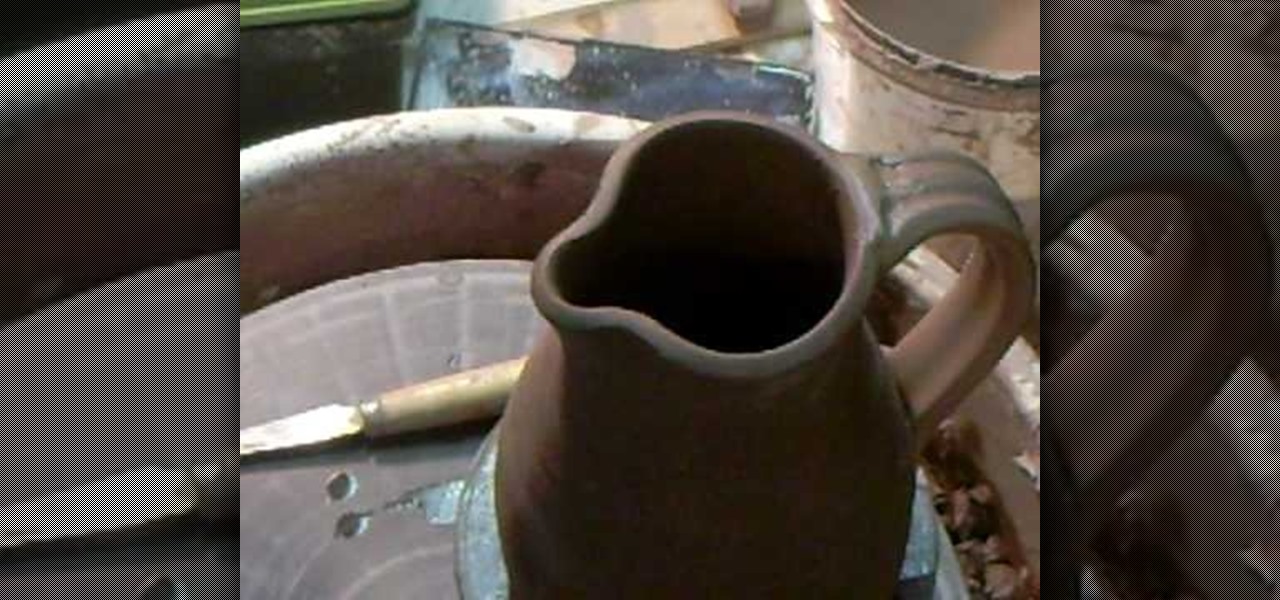
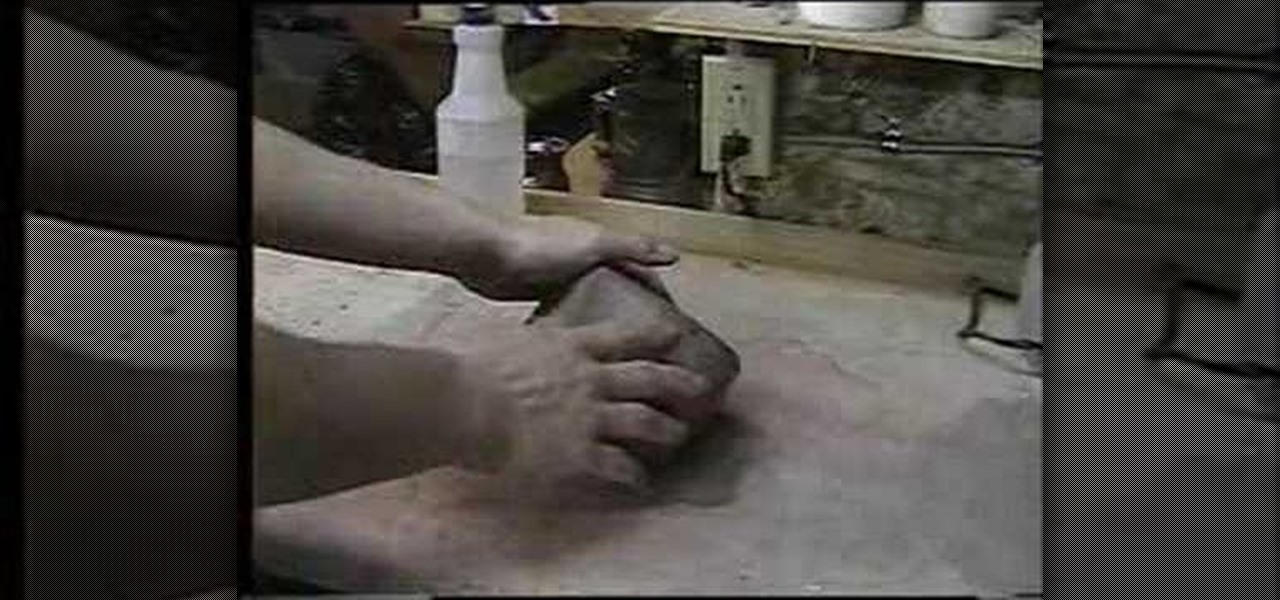
How To: Take care of drying pitchers and pouring lips
Once you've mastered the difficult task of shaping and sculpting a clay pitcher into perfection, you must learn how to handle the pitcher once you leave it to dry. For the most part, the actual pouring lip must be kept damp as they dry.
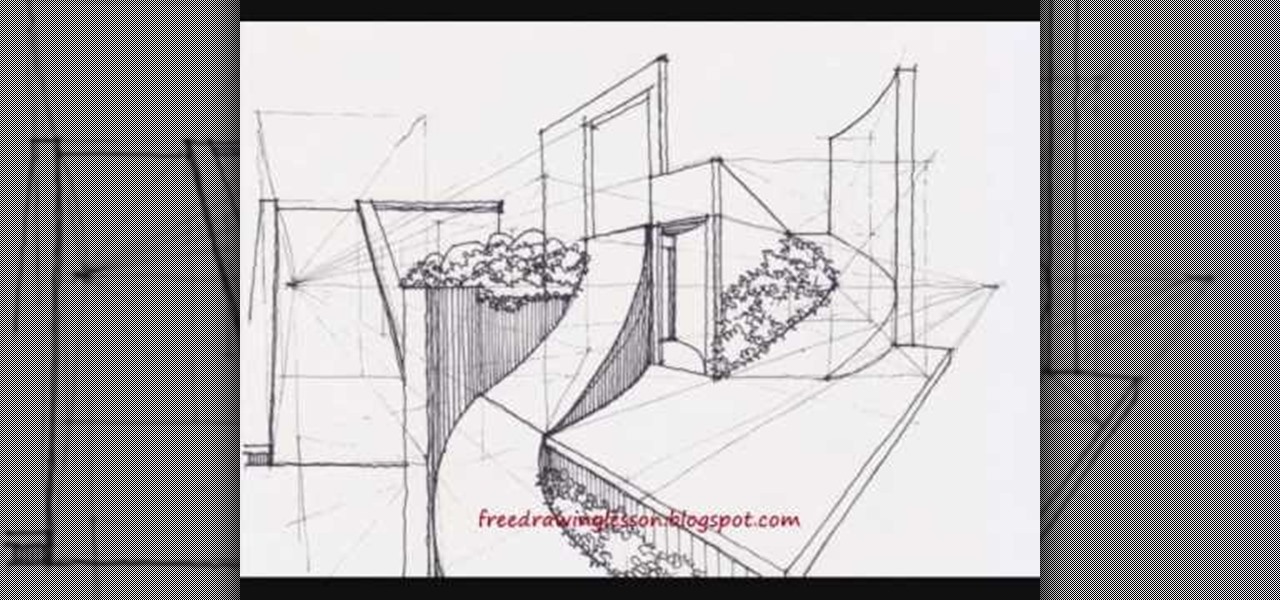
How To: Draw a modern complex levels garden
Feng shui out your drawing skills by doing something a little different this time: rather than focus on architectural buildings and stairways, why not sketch out a soothing garden to ease your tired soul?
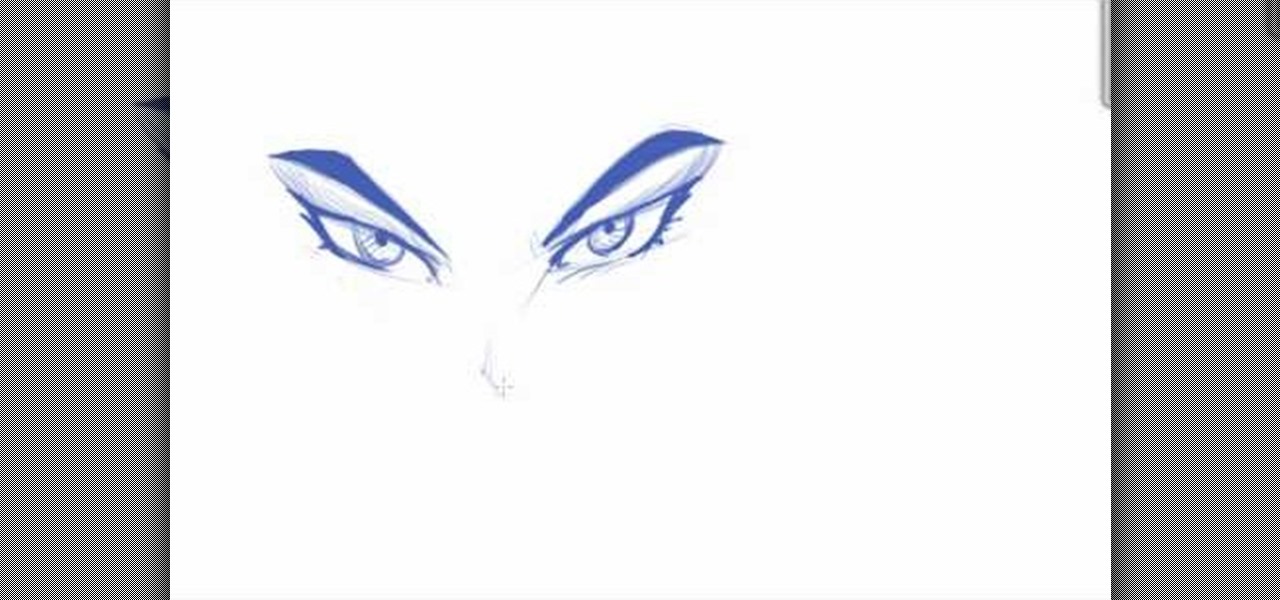
How To: Draw matching cartoon eyes and eyebrows
Drawing eyes is often the most difficult part of nailing down a comic book or manga character, but also the most vital part. Eyes really animate a face, so it's important to master all types of eyes if you wish to become a good artist. This tutorial will teach you how you can contain the eyes and eyebrows in the same plane, or basic shape, to make sure they align evenly. When this sort of method isn't used, often people will draw eyebrows that are disconnected from the rest of the eye.
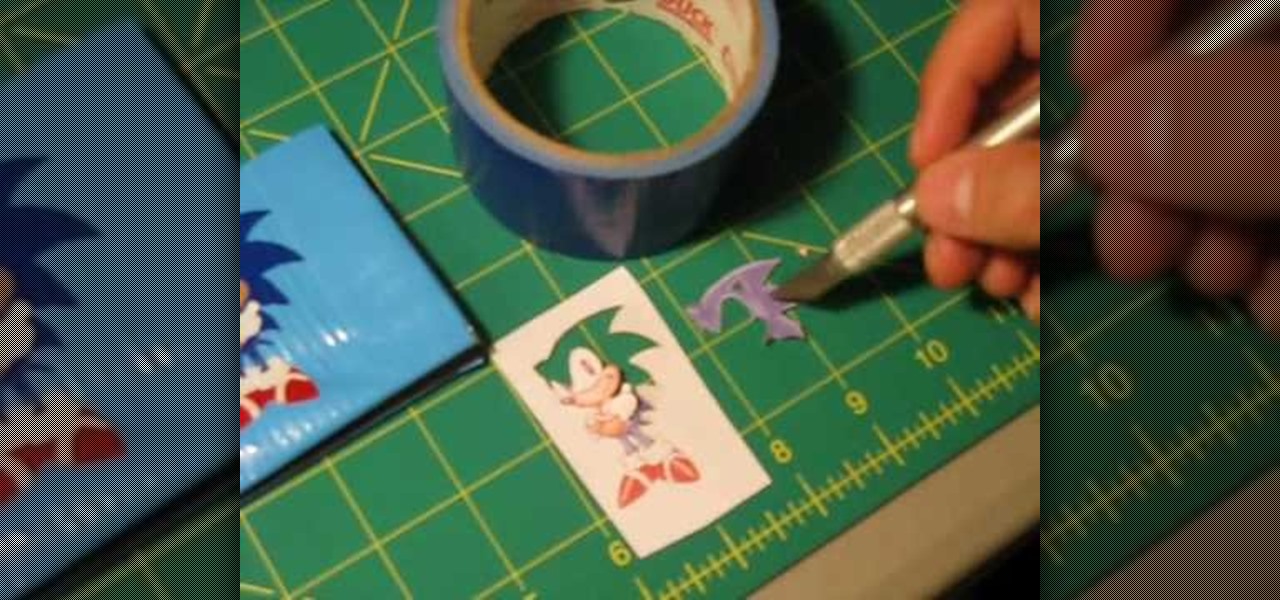
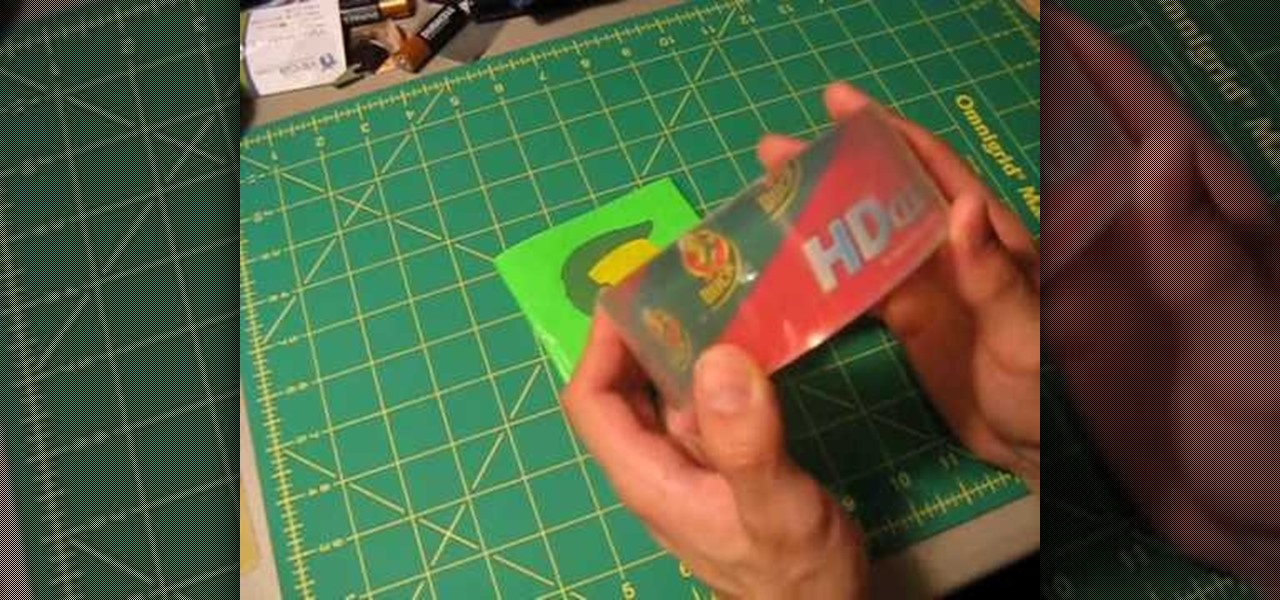
How To: Create designs using duct tape puzzle decoration
Those who have never worked with duct tape before don't know just how versatile and painterly the medium can be. While duct tape serves its practical purpose well as a Priority Mall package sealer and prom dress maker, it has great artistic ability as well.
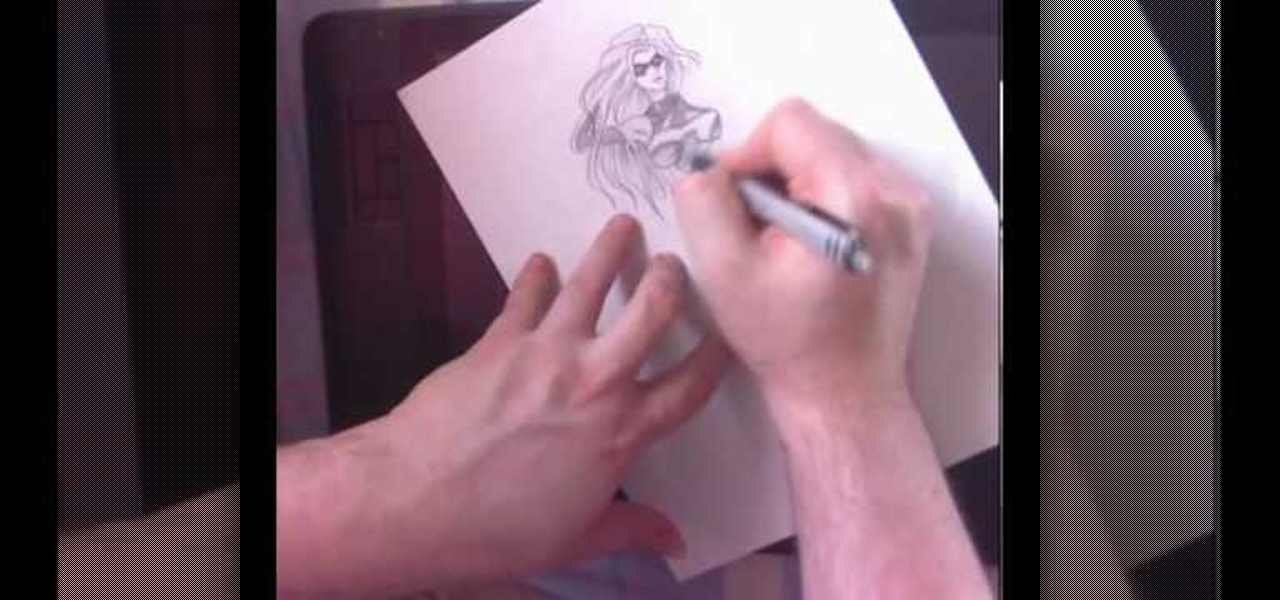
How To: Draw Marvel comic books character Ms. Marvel
As with most female comic book heroines, Ms. Marvel, created by artist Gene Colan in the 1960s, is a bodacious babe with killer curves and an even more killer abilities of superhuman strength, stamina, flight, and precognition.
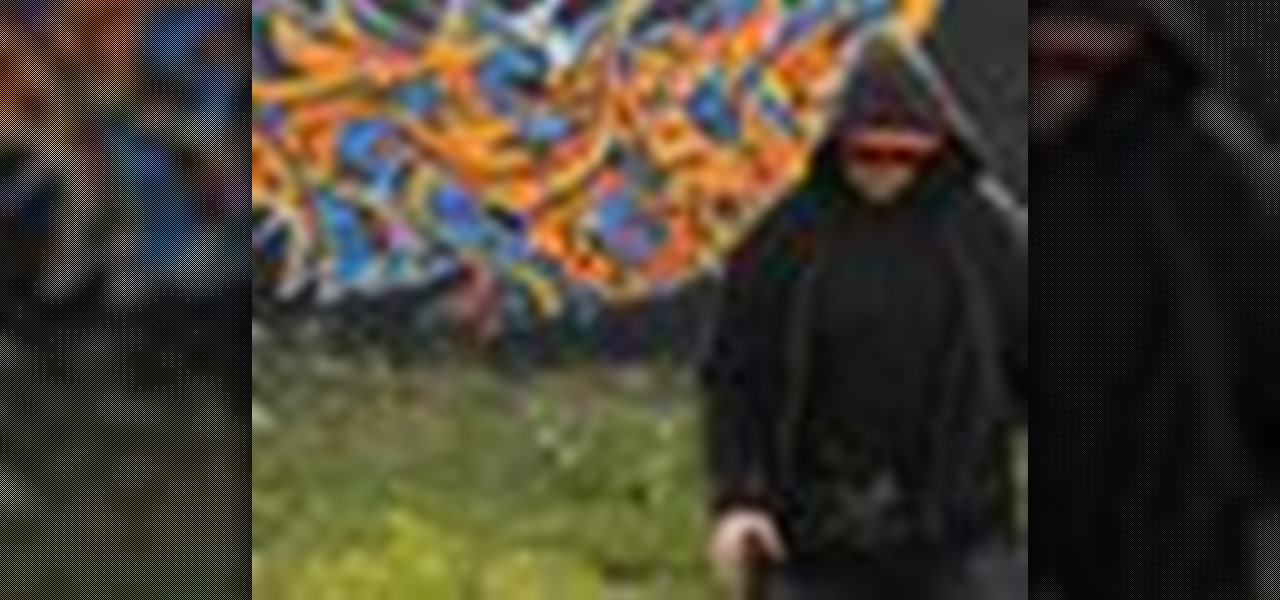
How To: Tag like a real graffiti artist
Graffiti— do you have the guts to get out there and tag some property? There's a whole lot more than just spray paint involved. To be great, you'll need things like a sketchbook, pencils, pens, markers, spray can tips, latex gloves, legal (or illegal) wall, and most importantly… creativity. If you think you’ve got what it takes to be an urban graffiti artist, follow these steps to become da ’hood’s next da Vinci.
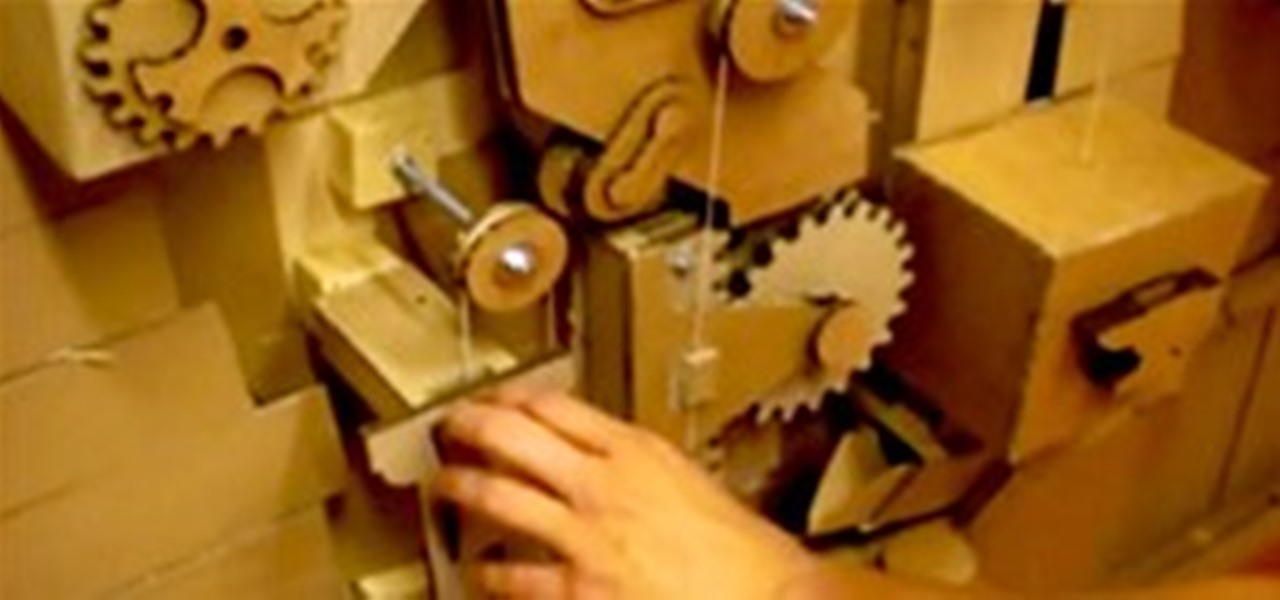
News: Cardboard Mechanics
We love it when everyday material is used in a new and unexpected application. Cardboard is something most of us take completely for granted. We need it when we're moving, and that's about it. When Frank Gehry created the cardboard chair in 1972, he blew the minds of both the furniture and the design world. So strong. So durable. So fluid.
How To: Organize comic book panels
When you are organizing the panels of your comic, you should keep in mind the way you want eyes to follow it. With multiple panels on a page, your spacing between them will determine where the eyes will go. If you want the reader to read up and down and from left to right, then you should create columns, by leaving more space in the middle.
How To: Draw with basic shapes
In this Fine Art video tutorial you will learn how to draw with basic shapes and apply them. The four basic shapes are spheres, cubes, cylinders and cones. A sphere is a three dimensional circle. On paper it will look flat without shading. Make sure you practice all kinds of circles. A cube is a three dimensional square. You can make a basic cube by drawing two squares and then join the corners. Cylinders are tubes or pipes. Draw two ellipses and join them by lines. If you are just starting o...

How To: Draw a deer from a triangle
This video tutorial is in the Fine Art category which will show you how to draw a deer from a triangle. First you draw an inverted triangle which will make up the face of the deer. Then you draw two small curves starting at the two top corners of the triangle to make the horns of the deer. You can also draw more short curves or straight lines starting from these curves to make up the complete horns. Then you draw the ears starting just below the horns. Draw the eyes and color in the ears and ...

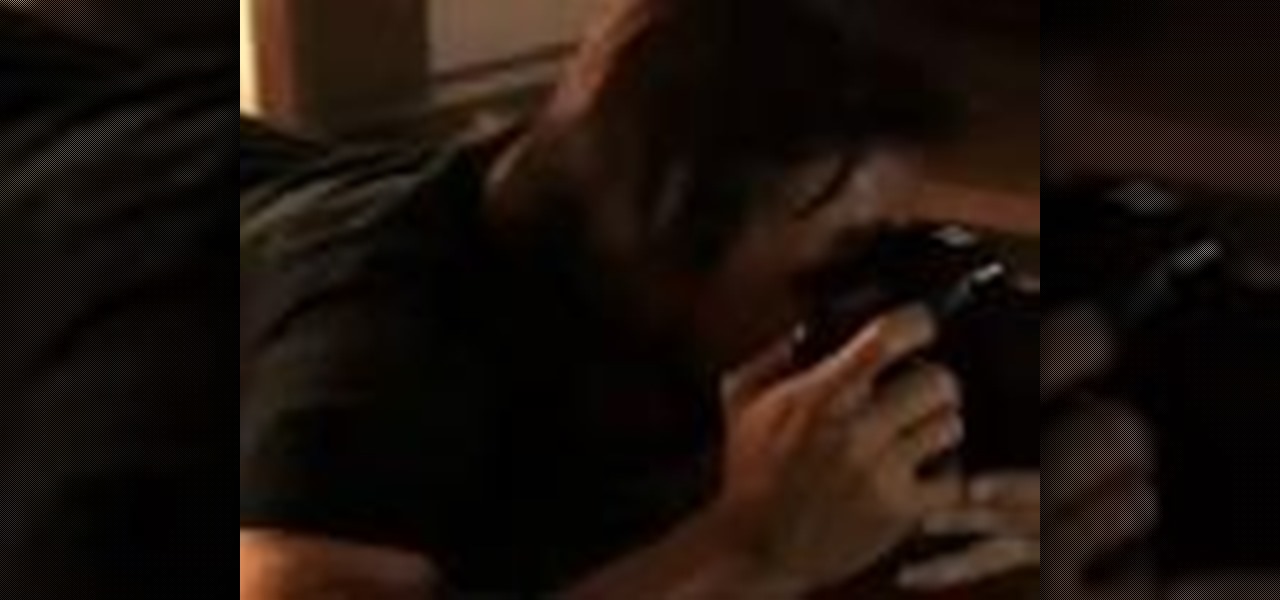
How To: Photograph with a point & shoot camera
In this tutorial, we learn how to photograph with a point and shoot camera. If you have dark light on the face, make sure you turn flash on your light and make sure it turns on to even out the lighting that's on the face. One of the easiest ways to shoot outside without using flash is to put someone in the shade. If the light source is coming from straight ahead, you will have the best lighting available. This will isolate where your light is coming from, and will work out better if it's not ...
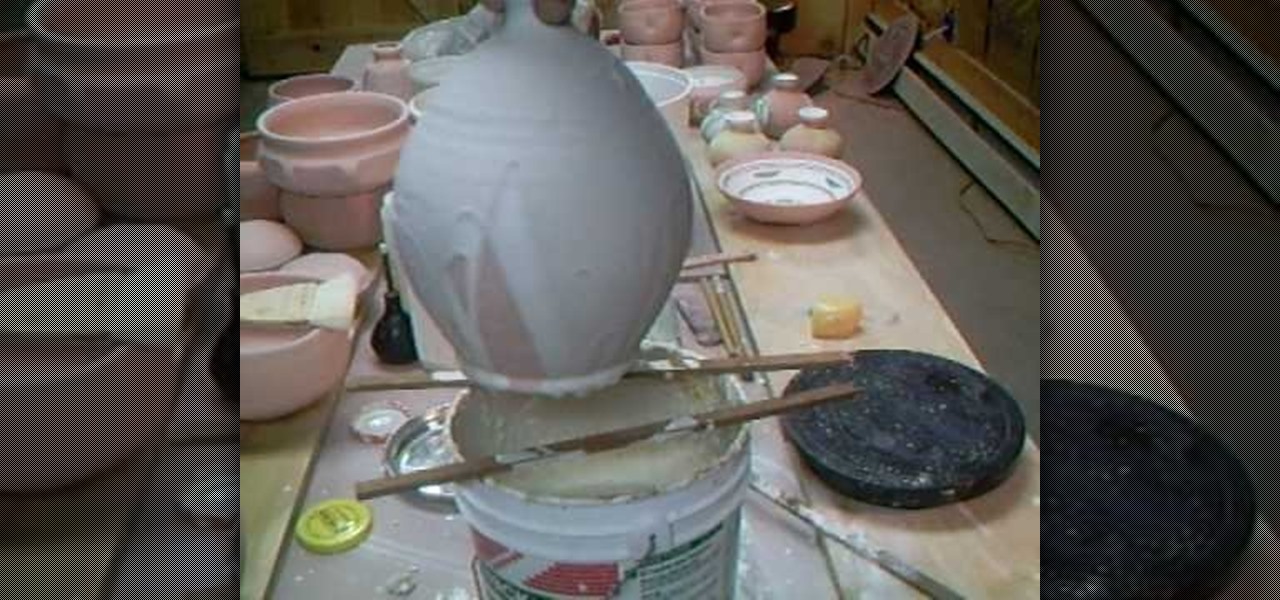
How To: Glaze a lamp base with Simon Leach
In order to glaze a lamp base, you will need the following: glaze, warm water, a sponge, copper carbonate, paintbrush, and sticks.

How To: Draw martial artist Bruce Lee (face, body and shading)
When you think of martial arts, only one name comes to mind, and no… we're not talking about Steven Seagal or Chuck Norris. We're talking about Bruce Lee, the epitome of martial arts. Not only was he the best martial artist known to man, he was also an accomplished actor, instructor, director, producer, screenwriter, and philosopher. But there was one thing he wasn't. An artist. Okay, he was a "martial artist", but he wasn't a visual artist, master of the pencil, kind of the drawing world… bu...

How To: Graffiti the word "Mex" with Wizard
Share your Mexican pride or simply make a cool graffiti tag of your friend Mex by watching this graffiti tutorial by Wizard. Wizard shows you how to do a basic graffiti version of the word "Mex."

How To: Graffiti the name "Ster" with Wizard
Have you ever wanted to graffiti your name? We definitely have (maybe something to do with the street cred?). Either way, learning how to do graffiti is a fun way to get into drawing and urban art styles.
How To: Draw an animated Pilot marker with Wizard
Thanks to advances in CGI, lots of ordinarily silent or non-alive things have been animated (or anthropomorphized for all you English majors out there). Dogs, cats, squirrels, and thanks to the "Toy Story" series, Barbie and Ken, too.

How To: Use a wide or telephoto lens for portrait photography
Mark Wallace shows us how to use a wide lens for portrait photography. A longer lens minimizes distortion in your picture and it maximizes what type of view you can see, so you can see more of the thing you are taking a picture of and less of the background. These lenses help keep the picture clean and uncluttered. You can see the difference between a wide and short angle lens by taking pictures with them and looking at the differences between them. There is also a zoom available, which makes...

How To: Create a tessellation
In this video tutorial, viewers learn how to create a tessellation. The materials required for this project are: index cards, scissors, pencil, large paper and coloring utensils. Begin by preparing a shape. Cut the index paper to a desired shape. Then place it on the right side of the large paper and tape it. Now trace the shape onto the large paper and continue transferring the shape until the page is filled. The shapes should fit together like a jigsaw puzzle. This video will benefit those ...

News: Pencil + Camera Mashup
Drawing is a popular here at Wonderhowto, as is photography. Put the two together and...voila, enter Ben Heine.
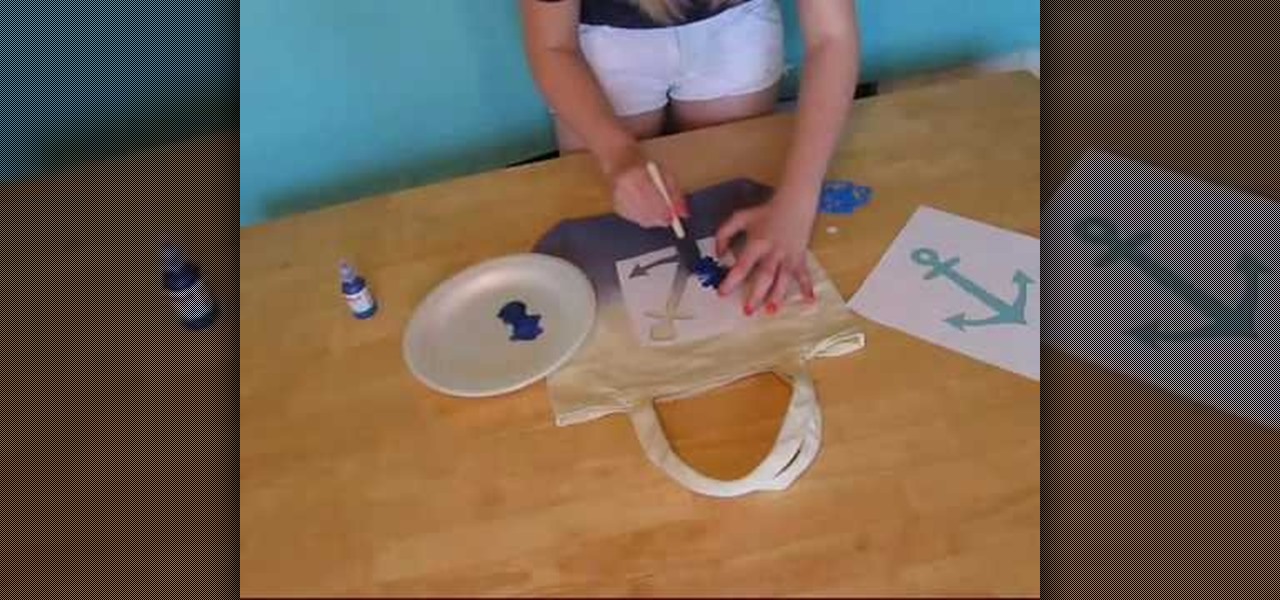
How To: Make an ombre style custom beach bag
In order to make an ombre style custom beach bag, you will need the following: a canvas tote bag, dye, gloves, a paper place, sponge brush, stencils, fabric paint, containers, white vinegar, and water.

How To: Fix up old shoes
Those helpful thread heads show us how to turn our old chucks into dope new stuff. There are tons of ideas here. Some of them are awesome. The others are more awesome.

How To: Make a Buster Keaton style hat
In order to make a Pork Pie/Buster Keaton Hat, you will need the following: a felt hat, water, scissors, and a ribbon.
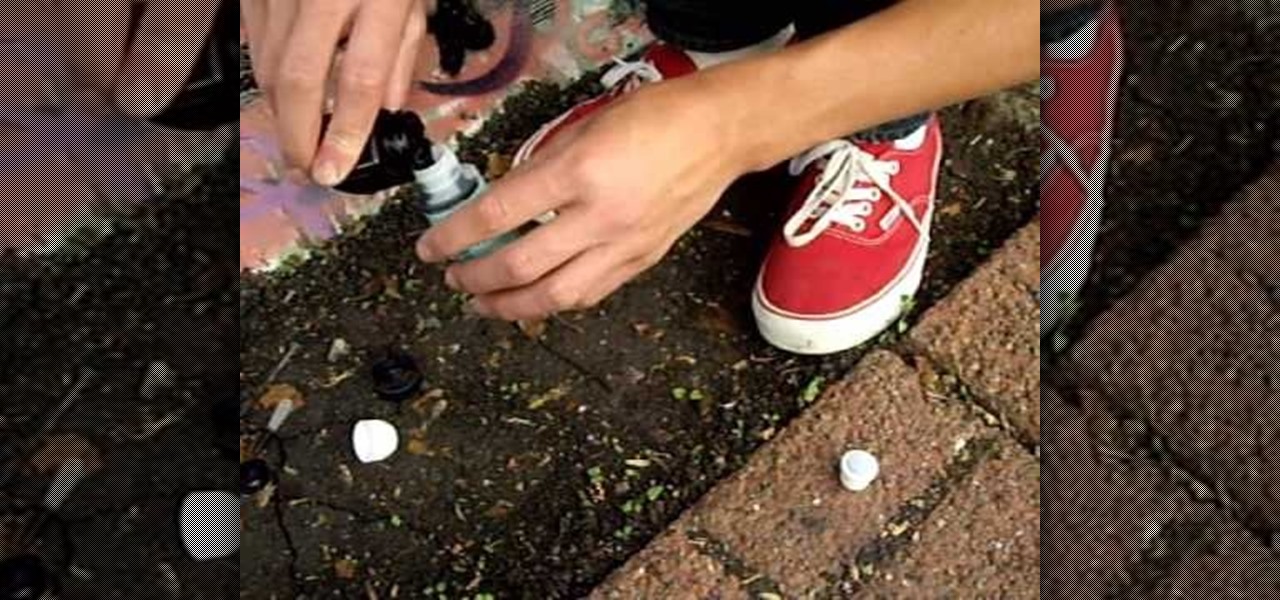
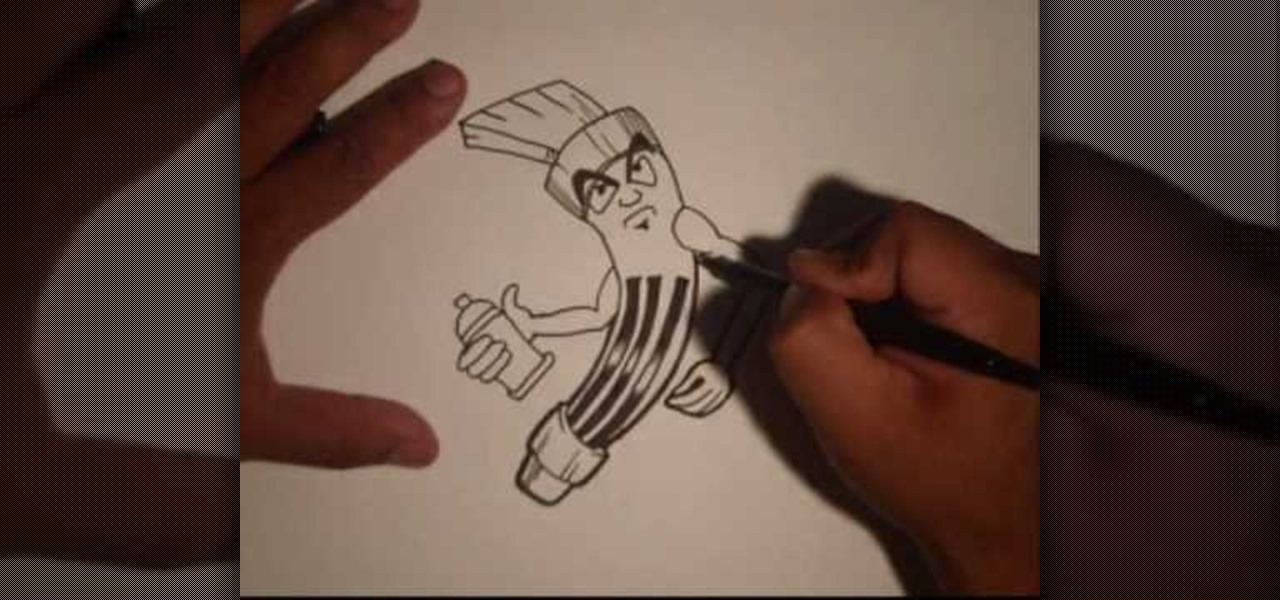
How To: Make a graffiti mop from a repurposed cleaner bottle
In this tutorial, we learn how to make a graffiti mop from a repurposed cleaner bottle. First, you will take stamp cleaner in a small bottle that you can pick up from any craft store and a bottle of Pilot ink (1 oz). Next, empty the stamp cleaner from the bottle and then pour the ink into that bottle using a dropper. After this, place the top back onto the bottle and shake it for several seconds. When done, take the cap off and you will be able to write on a wall now using this bottle's soft ...

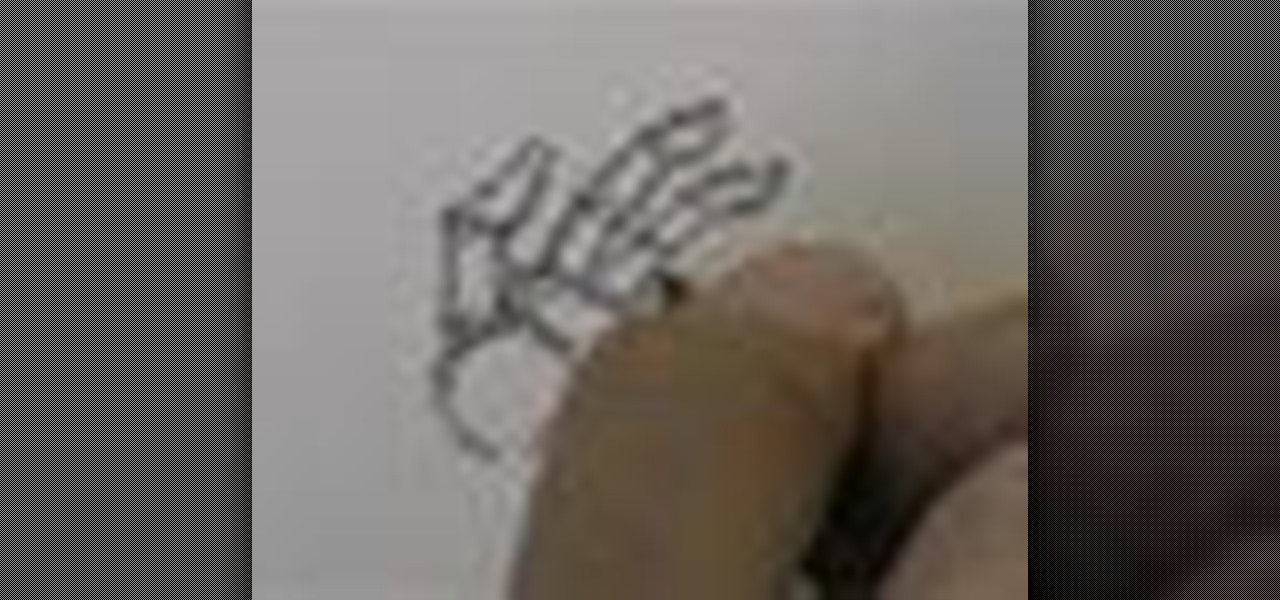
How To: Sketch a human skull
In this video tutorial, viewers learn how to draw a human skull. Begin by drawing a circle shape and draw a center line to mark the symmetry. About half way through the circle, create an indent for the temple and arch out for the cheekbones. Now connect the bottom of the cheekbones to form the front teeth. Then draw a spear head shape at about 1/3 of the head for the nostrils. Now draw the eye cavities from the center mark of the circle. This video will benefit those viewers who are intereste...
How To: Shoot an engagement photo
In this video tutorial, viewers learn how to shoot an engagement photo. An engagement shoot should be a lot more special and personal. To do that, you need to find meaning to the photo. Finding a scene with a deep meaning will help make the photo much more special. A challenge when shooting an engagement photo is to get the couple to be comfortable and relaxed in front of the camera. Try to get the couple to interact with one another to make the photo look honest and real. This video will ben...
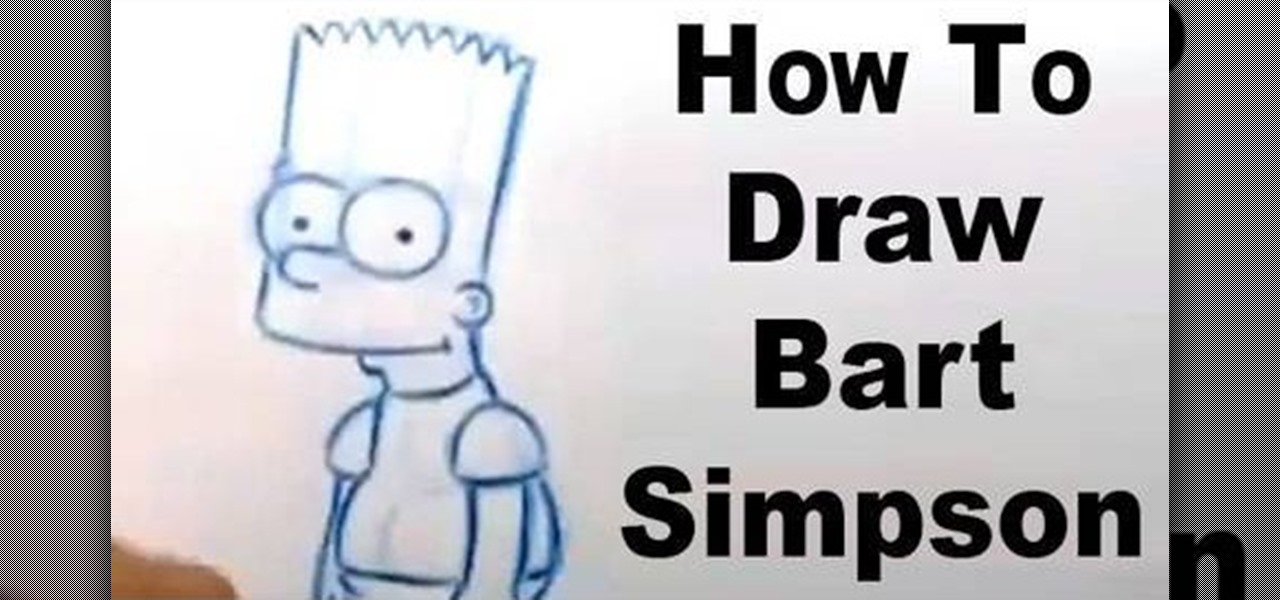
How To: Draw Bart Simpson
Chance Raspberry shows us how to draw Bart Simpson in this video. First, start by drawing his head, which is in the shape of a soda can. Next, draw his neck which is the shape of a can of tuna. After this, draw a center line on his head, then another line on the side of the head where his eyes will go. Then, cut the head in half so you know where the top and bottom of the eyes go. Draw his eyes in, then draw on his nose and ears. To draw the hair, draw nine spikes on the top of his head drawi...
How To: Safely pack your photo equipment for travel
Yanik Chauvin teaches us how to safely pack photo equipment for travel in this tutorial. First, remember to have good insurance on all your equipment, just in case something does break. To pack your things, use a backpack that is specifically made for cameras. Also, arrange for the lens not to be attached to the body of the camera while traveling. If you have to have it attached, make sure there is something under your lens to protect it from any additional shock. If you don't have a backpack...
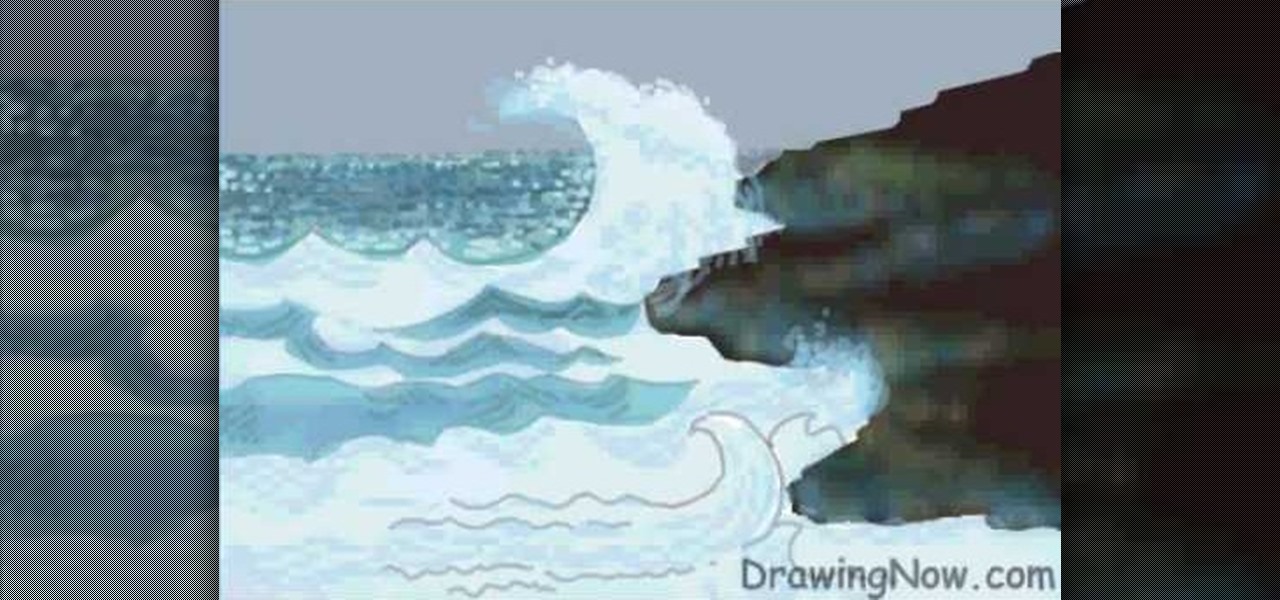
How To: Draw ocean waves
In this video tutorial, viewers learn how to draw ocean waves. The image drawn in this video has water waves clashing into some rocks on shore. Begin by drawing the outline of the rocks on the right side. The horizon line of the image is about 3/4 above the rocks. Then draw a large wave that passes the horizon line. Now paint the sky in gray and paint the rock in shades of black and gray. Paint the waves and slowly build the colors. Use the pencil tool with transparent color to fill in the wa...
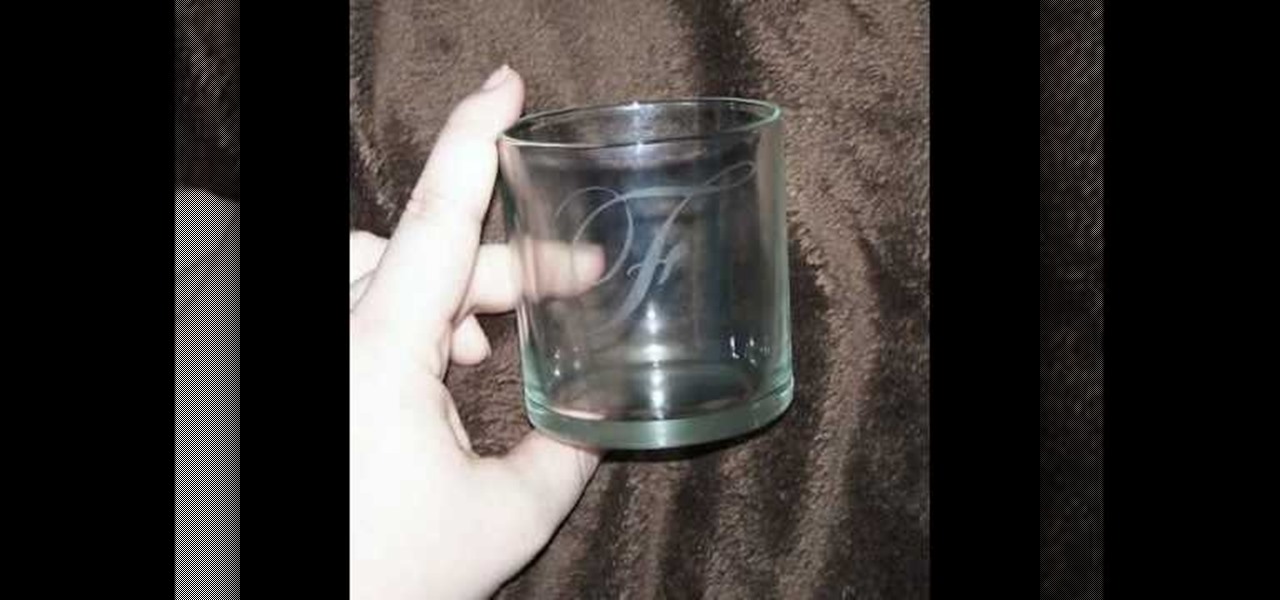
How To: Etch glass in 5 minutes
In this video tutorial, viewers learn how to etch glass in 5 minutes. The materials needed for his procedure are: contact paper, Armour Etch and a paintbrush, glass and a sink. Begin by cutting the contact paper face up on a circuit mat. Cut it on medium speed and pressure. Then put the contact paper on glass. Work carefully to prevent any wrinkles and bubbles in the design. Now put the etching cream on in a dabbing motion. The etching cream will not run into areas that are not stuck down. Fi...

News: Olafur in the Sky with Diamonds
Icelandic artist Olafur Eliasson totally inspires us here at Wonderhowto. His waterfall installations on the Hudson River. His incredible sun exhibit at the Tate in London. His concepts and execution are dazzling. Plus he has Taschen book that weighs a frickin ton. (Yes. The tonnage does translate to respect.)
How To: Write the letter Q in calligraphy copperplate
In this Fine Art video tutorial you will learn how to write the letter Q in calligraphy copperplate. Hamid Reza Ebrahimi shows you how to this using a Brause & Co No 86 nib, Persian traditional black calligraphy ink, Brause marbled penholder and Persian leather pasteboard and Steinbach pasteboard. To write the capital "Q", dip the nib in to the ink, then starting at the 2nd horizontal line, write upwards touching the top line. Then continue writing downwards till you touch the 4th line and no...

How To: Take professional-quality photos using natural light
Interested in taking professional-caliber portraits but haven't time (or money) for a bulky light rig? Great results can be had by taking advantage of the available light from windows. This photographer's guide offers a number of pointers for you shooters out there. For more information, and to get started taking your own beautifully lit photos, take a look.
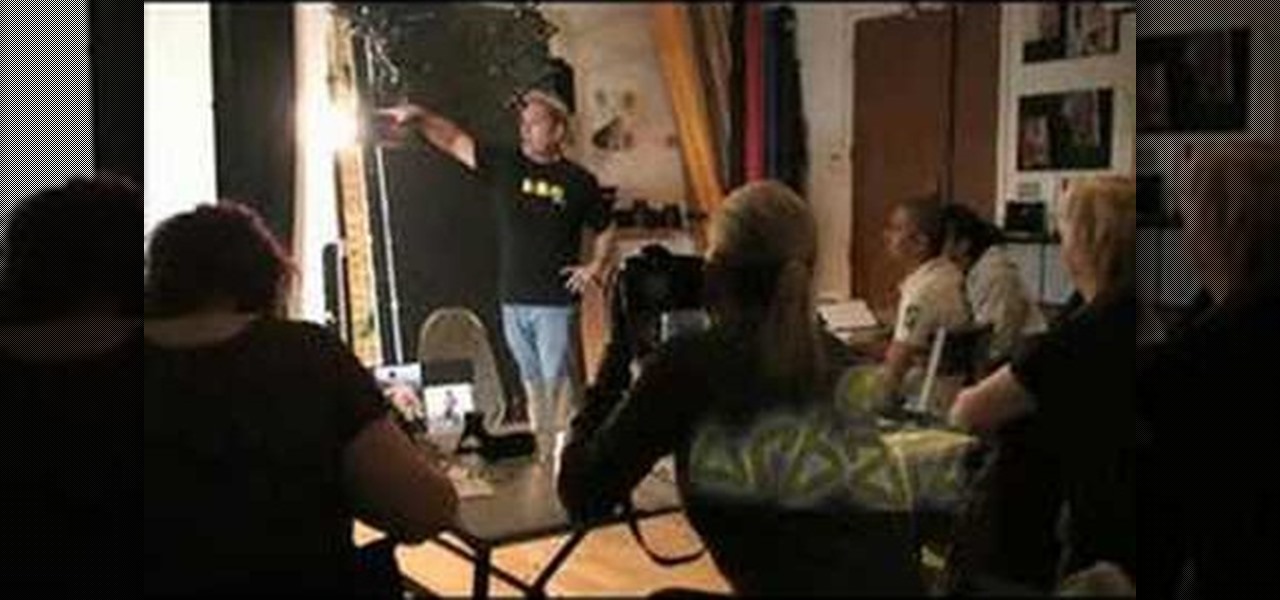
How To: Use & understand studio flash
This video tutorial is in the Fine Art category which will show you how to use & understand studio flash. Right in front is the flash ring. It controls the direction of the flash. The most important buttons are the up and down button that controls the power of the flash. Five is the lowest power and it goes up to ten. Starting with five it goes up by one stop increment. You don't need to use any of the other buttons. All you need to do is to turn on the flash with the ON / OFF button, point i...
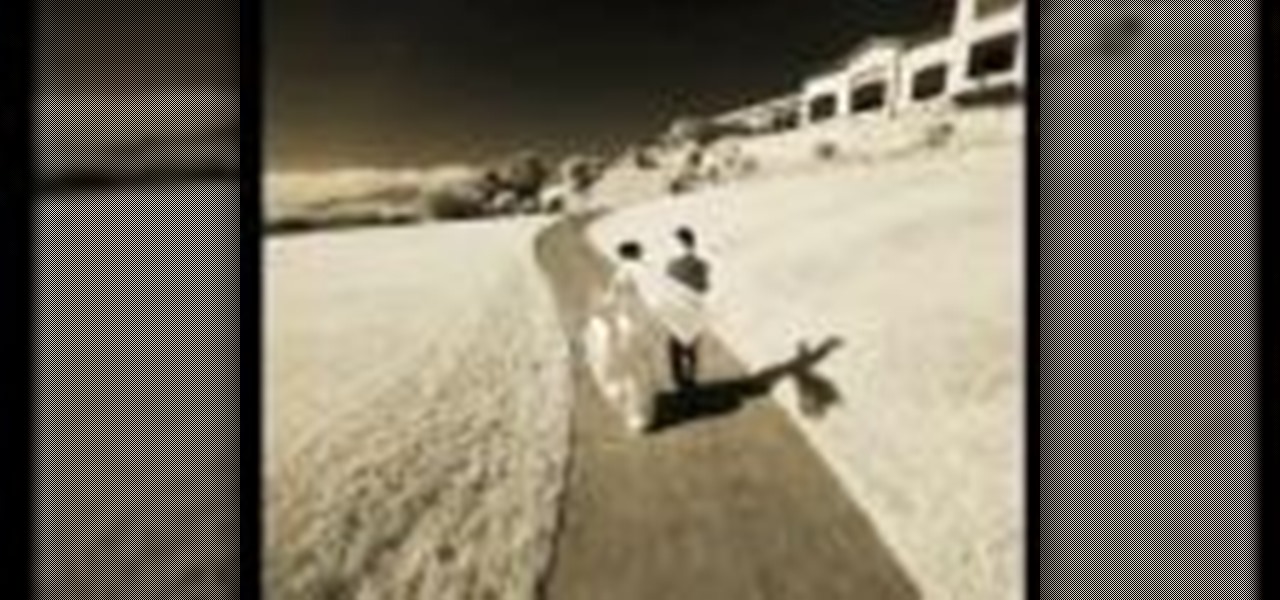
How To: Photograph with infrared
In this video tutorial, viewers learn how to photograph with infrared. Infrared photography is photography the infrared spectrum of light, rather the visible spectrum of light. The main effect are to turn the sky darker, smooth out skin and turn foliage white. Users will need a camera that is converted into infrared. Then simply take a picture with the infrared camera and all the photos that are created by the camera will be in infrared. This video will benefit those viewers who are intereste...
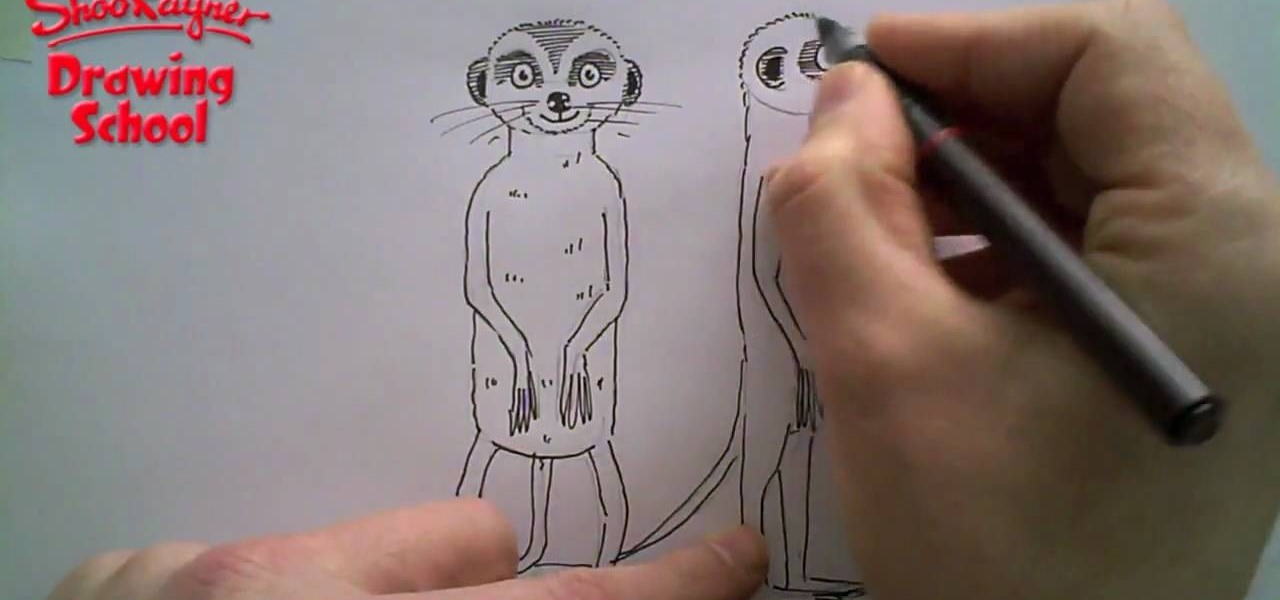
How To: Draw a meerkat
In order to draw a meerkat, you will need the following: a pen, an eraser, and a pencil.
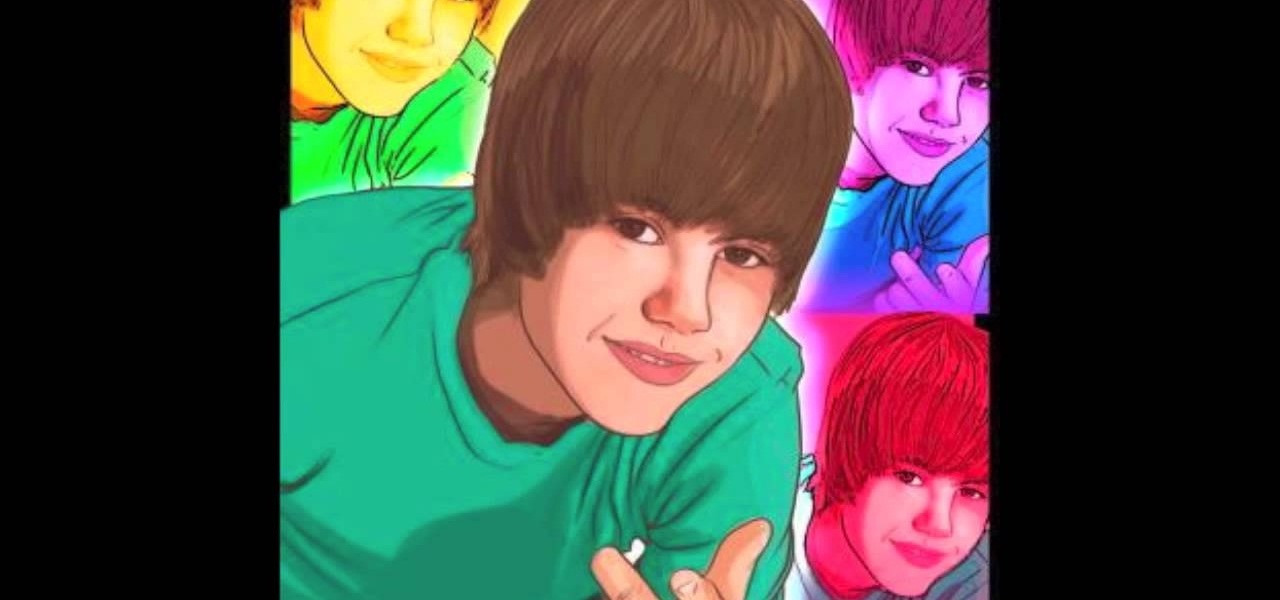
How To: Draw Justin Bieber step by step using basic shapes
Do you swoon over Justin Bieber and wish you could have him all to yourself? Though he's probably not going to pay a personal house call to you anytime soon, you can draw yourself a very lifelike picture of him!
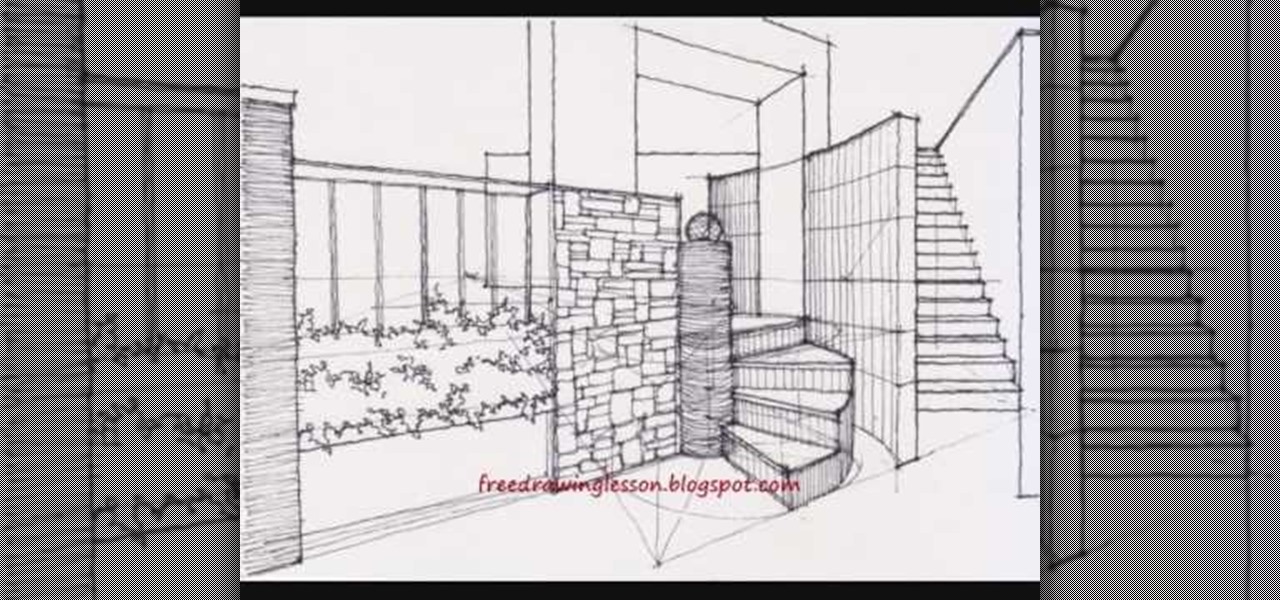
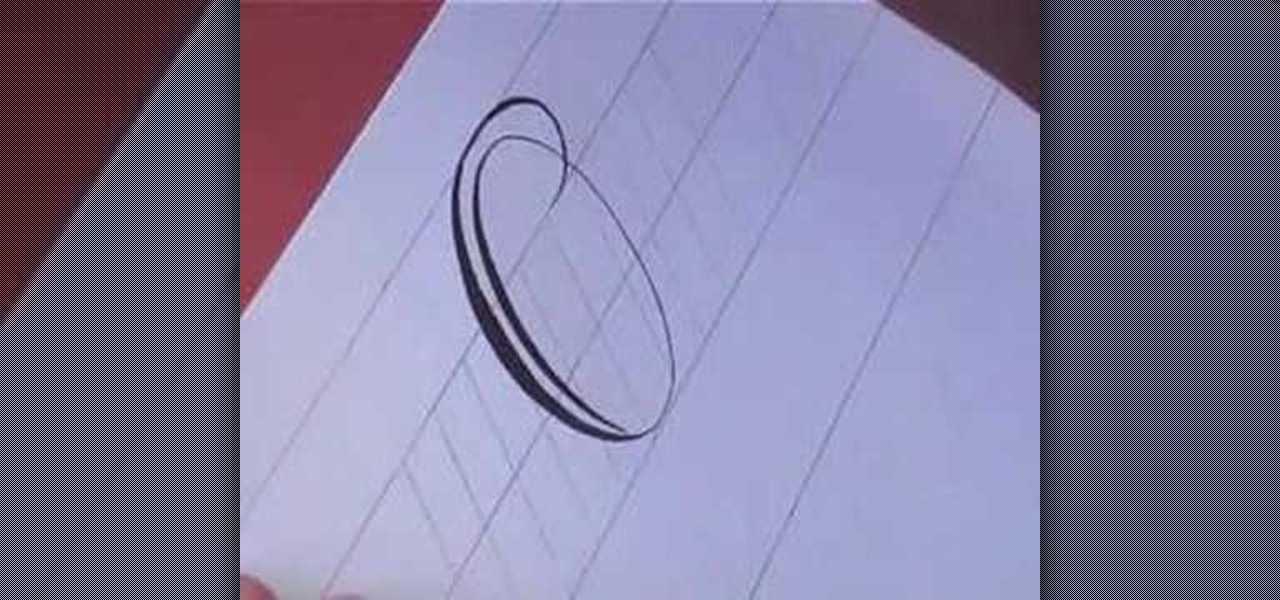
How To: Draw a spiral staircase with complex levels
Are you a fantastically talented artist who's tired of scribbling the same circles and squares over and over again? Sprinkle some hot sauce into your drawing affairs by combining the two. Watch this tutorial to learn how to draw spiral staircases, which are much harder than normal linear staircases to complete but also much more fascinating aesthetically.

How To: Use daylight lamps and do polymer clay silkscreening
Ray Charles created music in the dark (literally), but somehow we doubt you'd be able to create the same magic while attempting to mold polymer clay in the dark.