

Active Fine Art Posts


How To: Excel in landscape and wildlife photography with professional equipment
It doesn't matter how great a photographer if you don't have the right tools. Even Annie Liebvitz would get only average shots with a lower grade digital camera because it's very limited in terms of settings that you can control.

News: World's Largest Artwork Stretches 9 Square Miles in the Heart of Icy Siberia
Artist Jim Denevan works on a massive scale. He's "painted" the northern beaches of California, and etched away at the Nevada desert.

How To: Lampwork glass tiger stripe beads
We will show you how to make tiger stripe beads in this lampworking video.

How To: Apply special iron-on vinyl stickers onto tee shirts and other cotton fabric
If you're stumped about ironing on those iron-on vinyl stickers, this video should clear a few things up. It specifically covers Kitcsh-Nitsch IronOn vinyl stickers, but the principles are the same for all vinyl iron-on stickers. Make sure you don't use your padded ironing board when doing this! All you'll need is your iron and some scissors, and of course, your vinyl stickers!
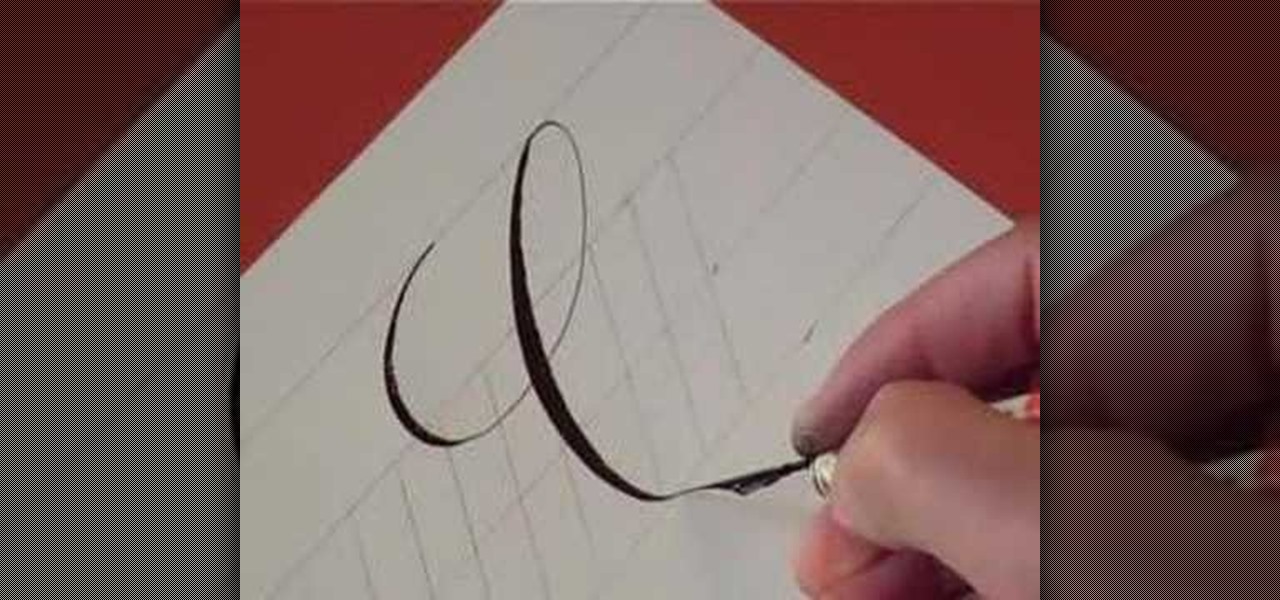
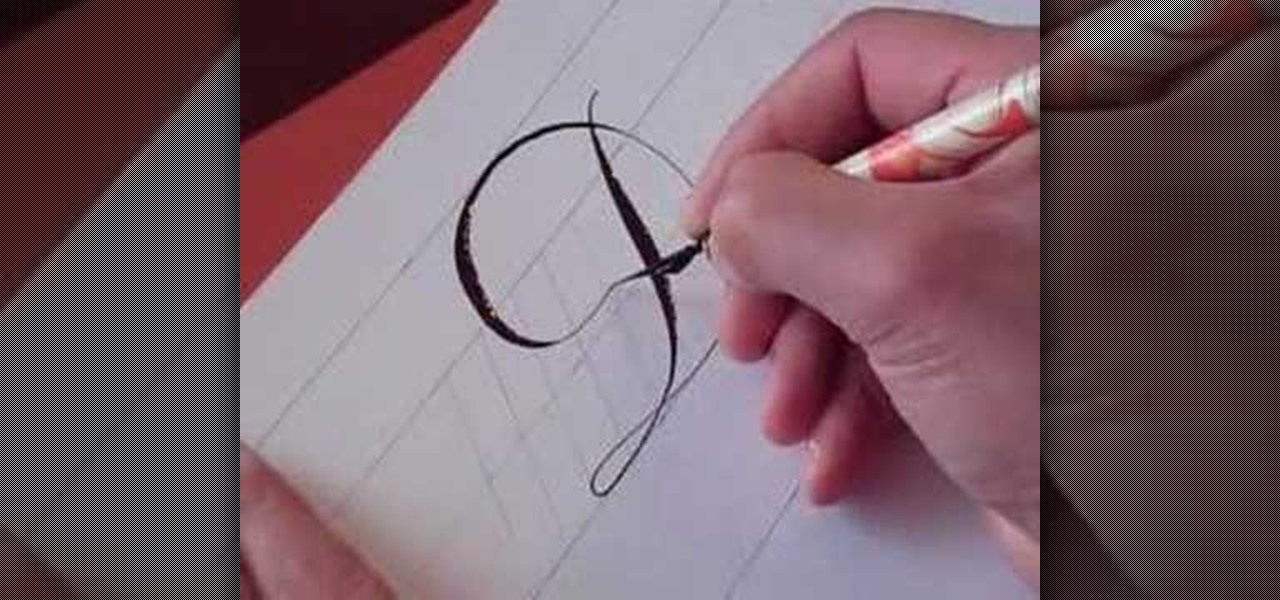
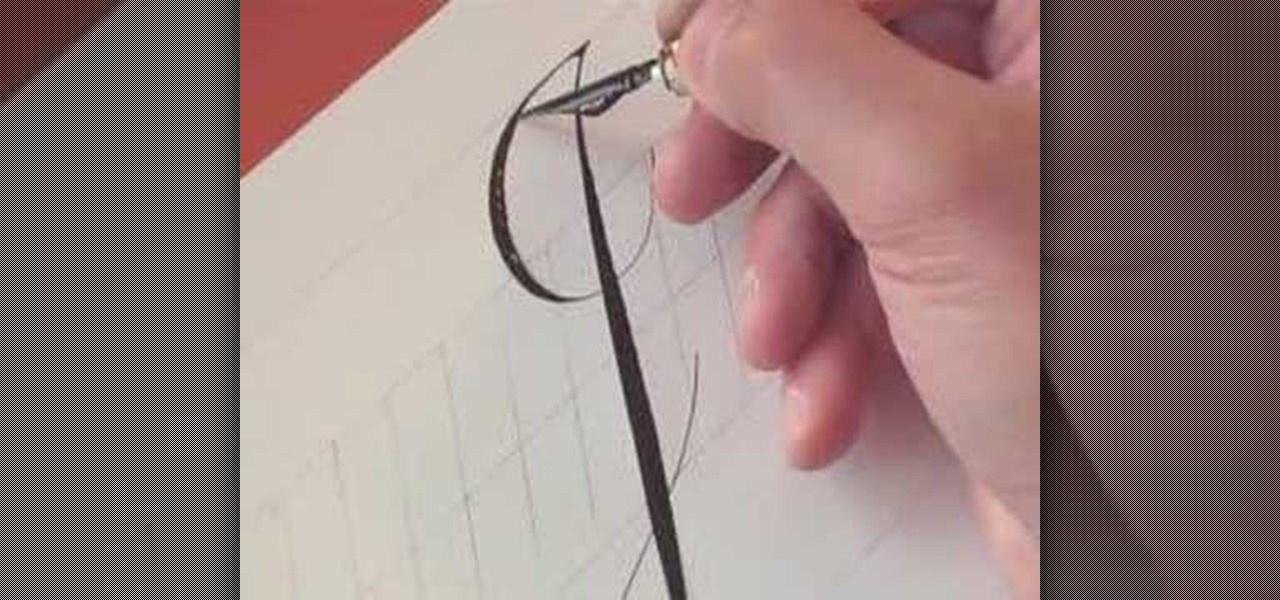
How To: Write the letter C in calligraphy copperplate
In this video, we learn how to write the letter "c" in calligraphy copperplate. First, dip your calligraphy pen into ink and start out making a large half circle on the paper. Dip the pen into ink again and make a loop with the top of the letter, then drag the pen down, making the "c" shape. End the letter with a loop on the bottom that isn't touching the inside of the letter. Make the lower case "c" by drawing the basic shape of the letter and adding a ball filled in with ink to the top of t...
How To: Write the letter D in calligraphy copperplate
In this video, we learn how to write the letter D in calligraphy copperplate. Start off by drawing a thin line down the paper, pressing on the pen harder to make a thicker line in the middle, then thinning out at the end. Drag the line to the left making a thin line, then loop it around to the front of the line and make the D shape. After you make the shape, bring the line to the back of the original line and loop it. Do make a lower case letter, make an oval shape with a thick line on the le...

News: Dead Flylashes
Would you glue fly legs to your eyelids? More or less stomach churning than gluing your eyelids to your...eyelids? (Shudder.)
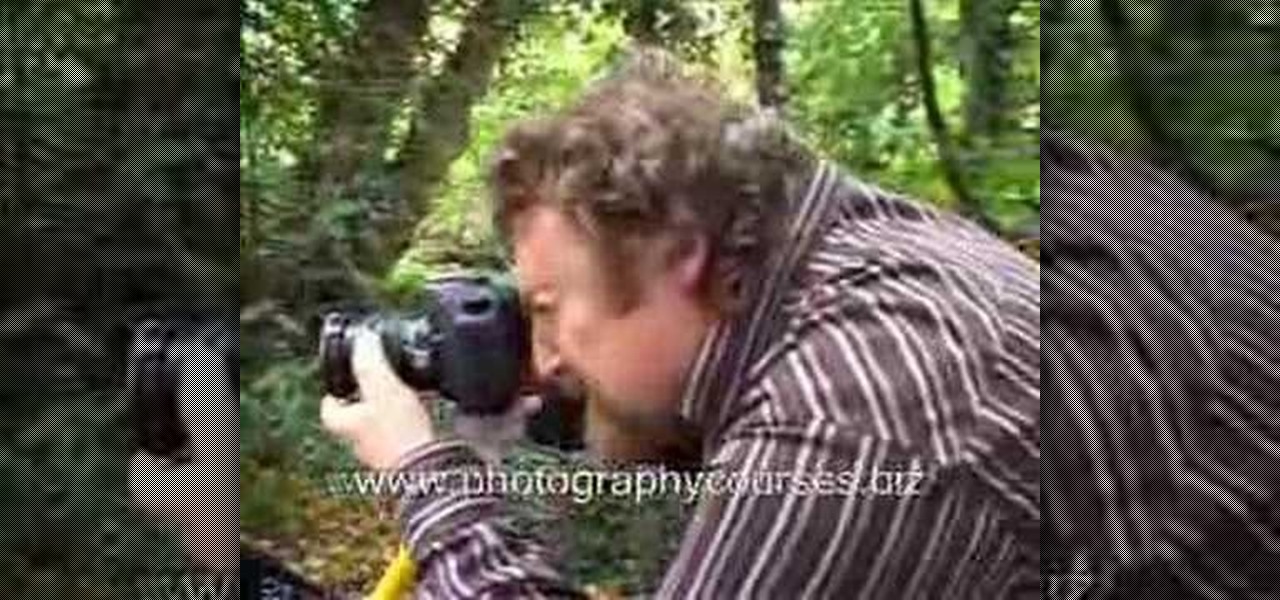
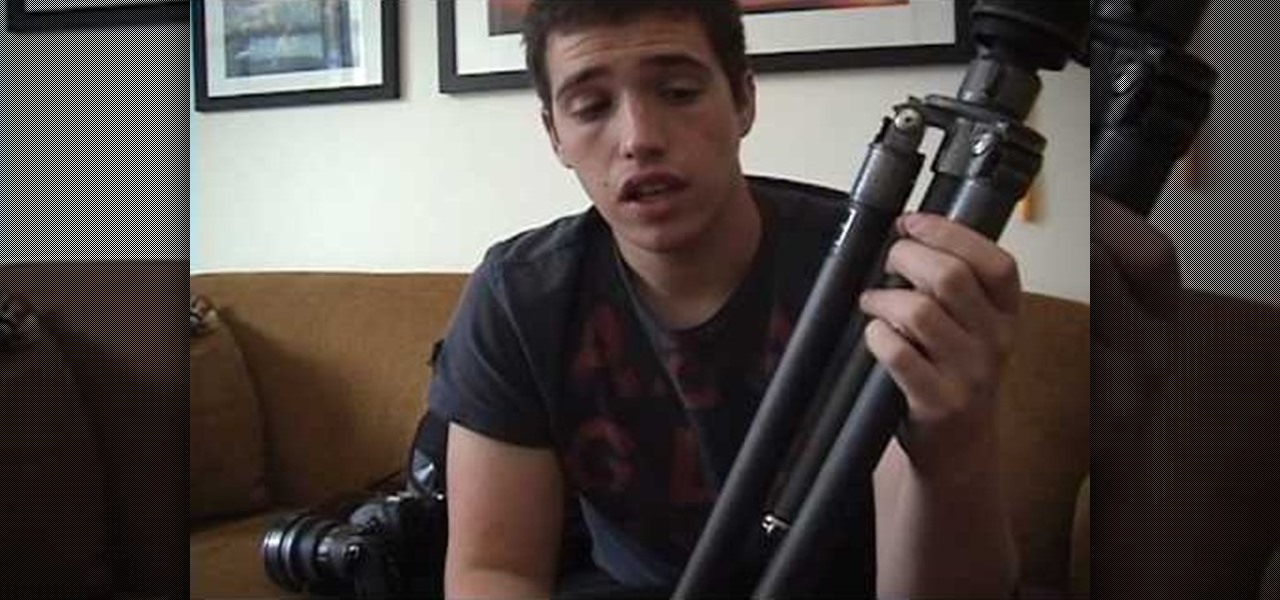
How To: Photograph a fast car in motion
In this video, we learn how to photograph a fast car in motion. First, place a tripod on the camera and place the camera on top of the tripod. Take some still shots on the hood of the camera and have someone inside of the car. Now, start taking pictures and have the person take their foot off the brakes. Push the car and continue taking pictures on the hook while the car is rolling. When you have enough shots, have the person put their foot back on the brake, then you will be able to view you...
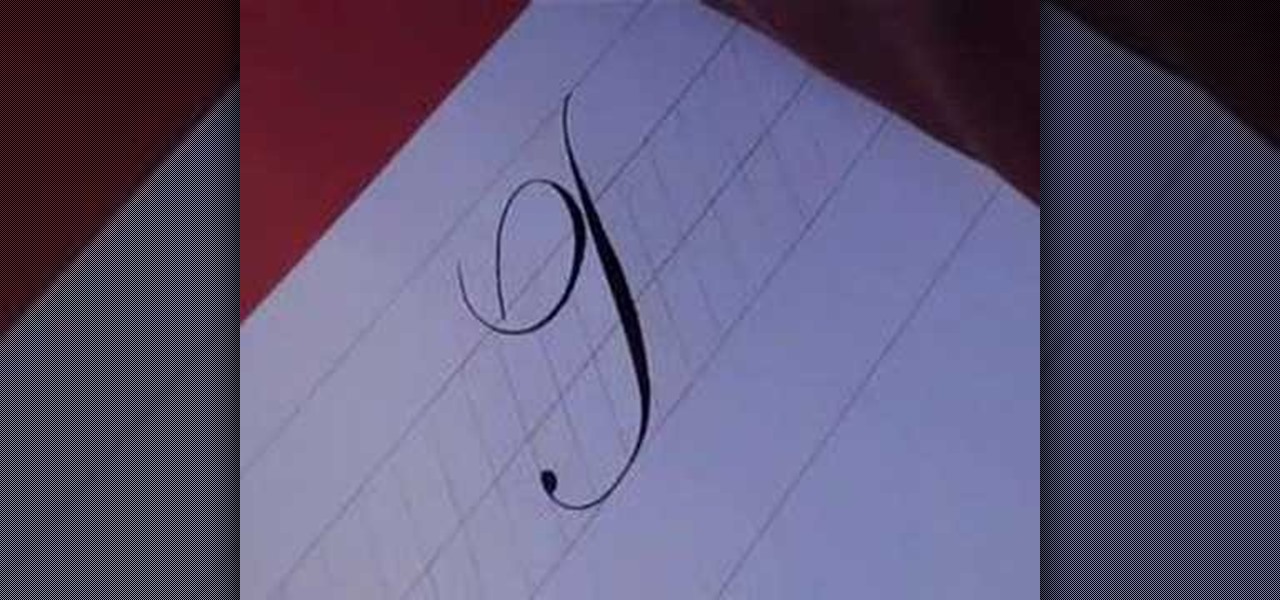
How To: Write the letter J in calligraphy copperplate
In this video, we learn how to write the letter J in calligraphy copperplate. For the uppercase letter, start by grabbing your calligraphy pen and drag it down so you have a thick black line with a thin line at the top. End the letter with a loop around it, then bring the top line to the left and loop it around, making a semi-thick line with it. To make the lower case letter, make a thin line going diagonally to the right, then dip the pen in ink and bring the pen down in a thick line down. C...
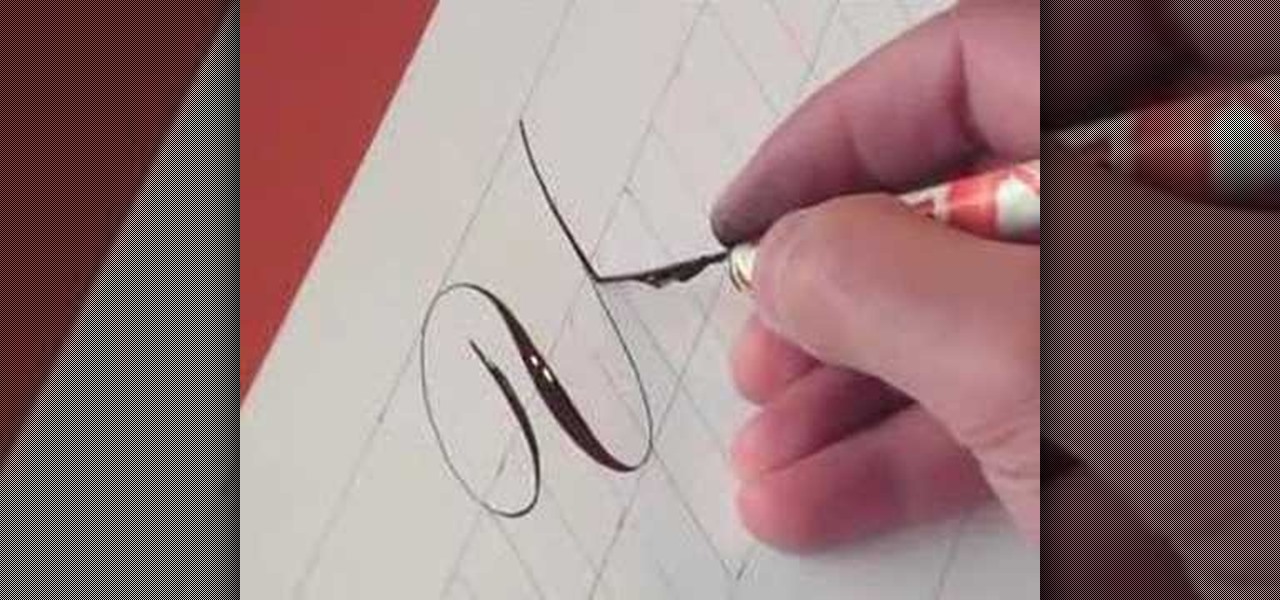
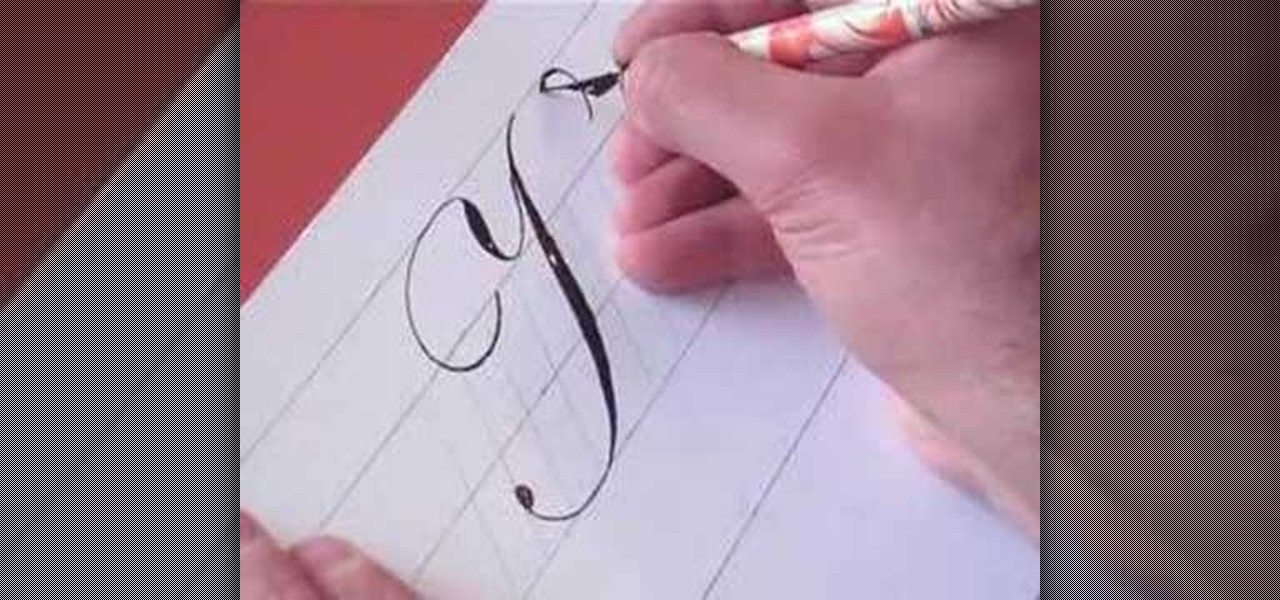
How To: Write the letter Y in calligraphy copperplate
In this tutorial, we learn how to write the letter Y in calligraphy copperplate. First, make a thin line with the pen, going thicker as you go down, make a loop and then come back down. Make a "u" shape, then connect a curved line to the other side finished with a dot on the bottom to complete the letter. To make the lower case letter, make a small thin hump, then drag the pen down to a thicker line. Make a new line on the other side, making a thicker line and connect it with the other shape ...
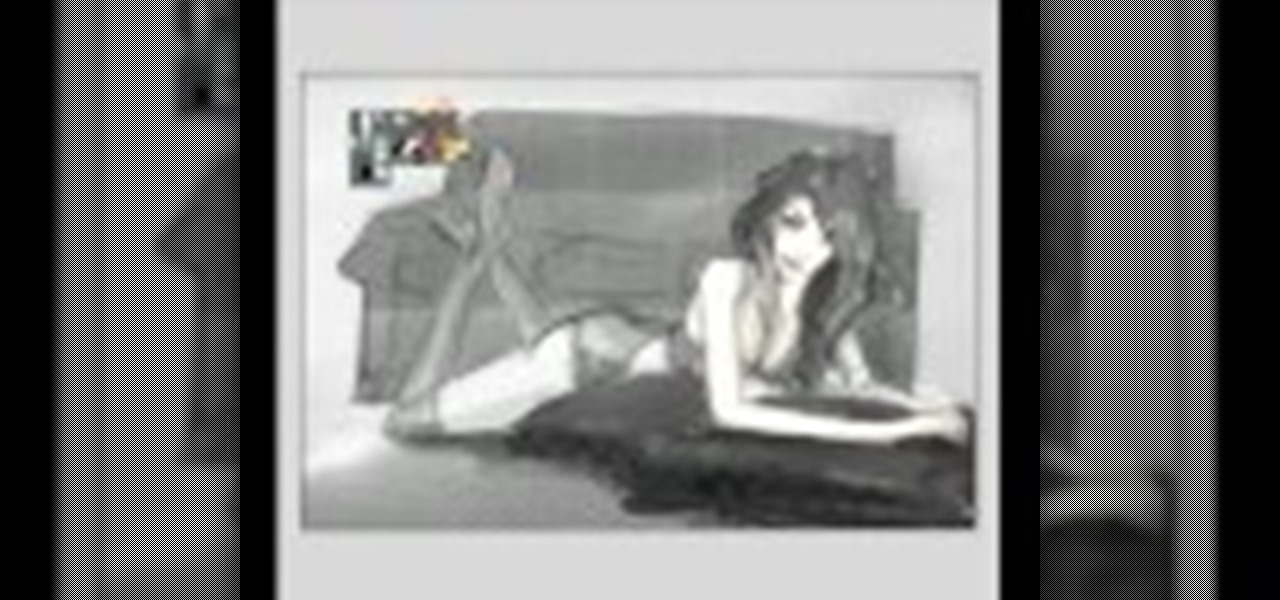
How To: Draw a manga or anime girl
In this video, we learn how to draw a manga or anime girl on the computer. Start off by drawing the torso, with the arm coming out. Have her leaning on the pillow on an incline, then draw her legs. Continue to draw up the body, making the head and hair, then the other arm. Draw in the details on the body and the face, then start to fill in with a bold tool to bring out all the features. Go over all your construction lines, then erase whatever is in the background that you don't need as a guid...

How To: Spray paint graffiti
To spray paint graffiti, you will need the following: 2 cans of spray paint and a mask. You will need to have an idea of the design you want to paint, before you begin this project, because you will need to work quickly. Put on your safety/protective gear. Paint an outline of your design, first, with one can of spray paint. Then, you will want to strategically fill in the design. One can is primarily for filling it in and achieving light and shadow. Therefore, you will need a dark shade and a...

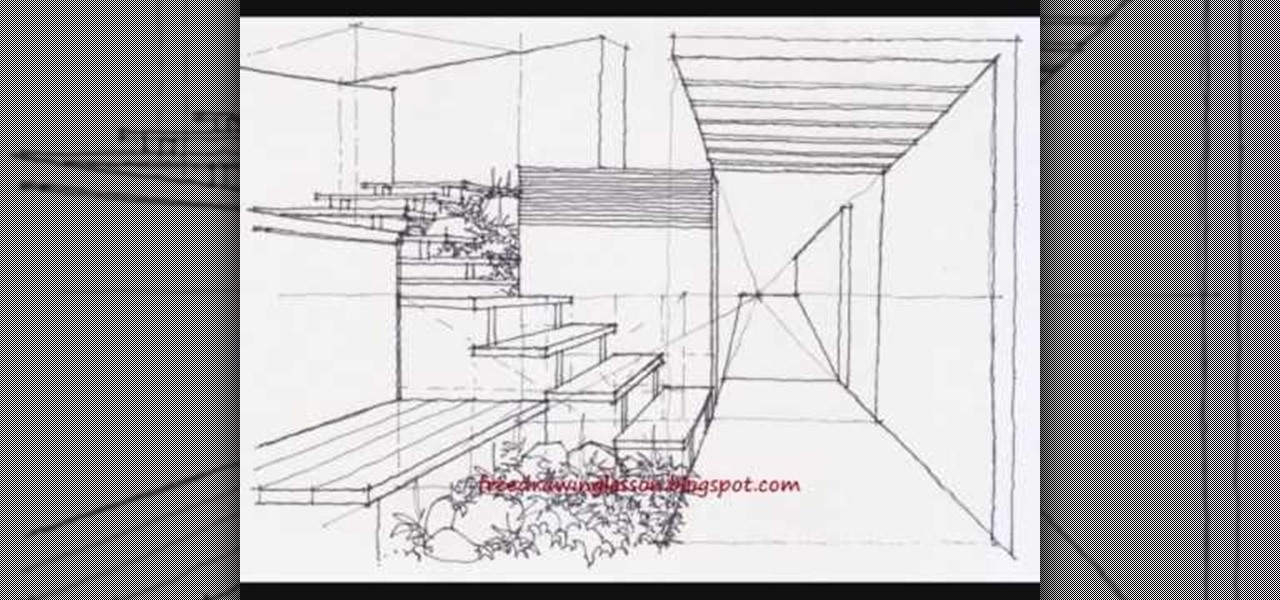
How To: Draw steps in perspective
In this tutorial, we learn how to draw steps in perspective. Start off by drawing a dot in the middle of the paper. From here, draw lines using a ruler coming from the middle diagonally on the top middle and sides. Now, you will be able to draw your pictures using these as a reference point. The lines at the top will show the steps that are at the top and farthest away the closer they get to the dot in the middle. After this, fill in the details of the picture making different items around th...
How To: Etch a drinking glass
In order to etch a drinking glass, you will need the following: a dremel or a glass engraver, a glass, and a template.
How To: Write the letter T in calligraphy copperplate
In this video, we learn how to write the letter T in calligraphy copperplate. Start by drawing a thick line that follows out a loop that curves to the left hand side. After this, create a loop at the top of the line, on the left hand side. Draw this out and cross the line over the top to make the T shape, ending with a slight curve at the end. To make the lower cased letter, draw a thin line, then draw a thick line over it, then cross a thin line across the top middle of the letter. Now you w...
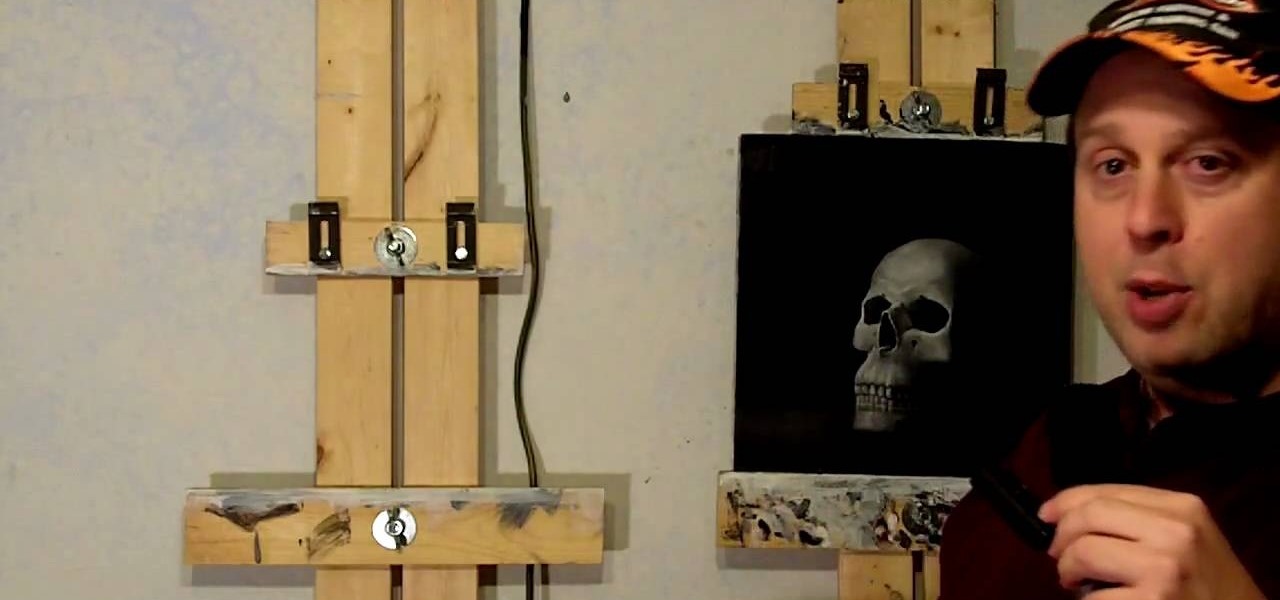
How To: Make an easy $20 DIY art easel
In this video, we learn how to make an easy $20 DIY art easel with Patrick Lawrence. Each side should be about 6' tall, and make sure you screw it into the wall when you are finished. First, you will hold these together with a carriage bolt that slides up and down the two pieces of wood. At the top, screw the screws into the wall and at the bottom, bolt it up the same way as in the middle using a wing nut and a big washer. That's all there is to making an easel yourself, saving you tons of mo...

How To: Draw a cartoon dragon with a big head
In this video, we learn how to draw a cartoon dragon with a big head. First, draw the outline of the dragon, making the head much larger than the body. After this, add in small details to the dragon using the light pencil mark. Next, take a bold marker and trace over the pencil lines that you made, filling in the eyes, nose, teeth, wings, tail, ears, etc. After you do this, color the dragon completely green. Then, take a darker green color and apply it to the edges and where you want shadowin...
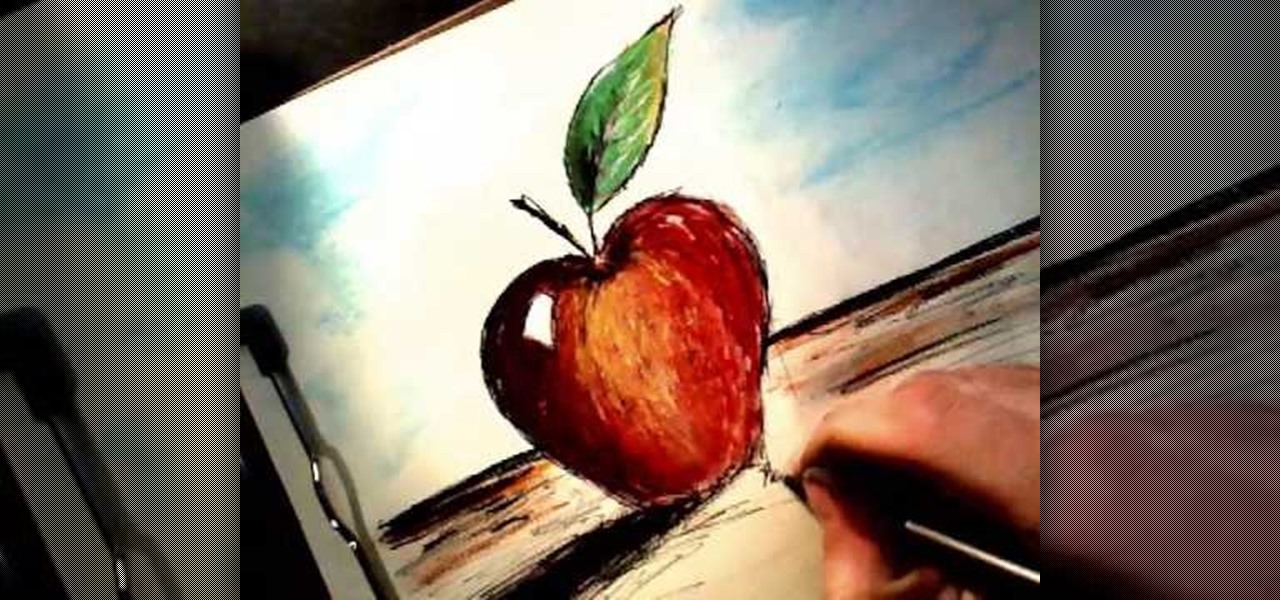
How To: Draw an apple
In this tutorial, we learn how to draw an apple. Start by drawing the outline shape of the apple. It looks like a slight heart shape in the middle of the apple where the stem is. After this, start to fill in the apple with lines to make it look more realistic, then draw the stem and a leaf coming out of the top middle of it. Color in the leaf with browns, blacks, and green. Then, draw lines on the bottom of the paper to make it look like the surface. Finish by coloring the apple red, making d...
How To: Write the letter K in calligraphy copperplate
In this video, we learn how to write the letter K in calligraphy copperplate. Start by running your calligraphy pen on the paper going from a thin line to a thick, making a line curved to the left ending with a dot at the end of a small loop. Next, make a loop to drag out across the top on the right hand side and curve it down to make the K letter. Do the same to make the lower case letter, except making a loop for the top of the letter instead. When finished, let the ink dry and you've got y...
How To: Use & understand depth of field in photography
In this video, we learn how to use and understand depth of field in photography. If you look at a photo, the depth is how deep the picture looks. You can change the depth by changing the aperture to make the depth of field look shorter or longer. The lighting can also change the depth of field and what you can see in the background. A big aperture will give you a large depth of field, with a small amount of light. If you want a big depth of field in a landscape, then you will use a maximum ap...

How To: Write the letter O in calligraphy copperplate
In this video, we learn how to write the letter O in calligraphy copperplate. Take your calligraphy pen and make a medium thick half loop at the top, dragging it down into a thicker line on the left side of the word. Then, continue onto the other side of the O with a lighter touch of the pen making a very thin line, finishing with a loop in the middle. Make the smaller O just like normal, making the thick line on the side and finishing with a small loop bending out to the right at the end. Wh...
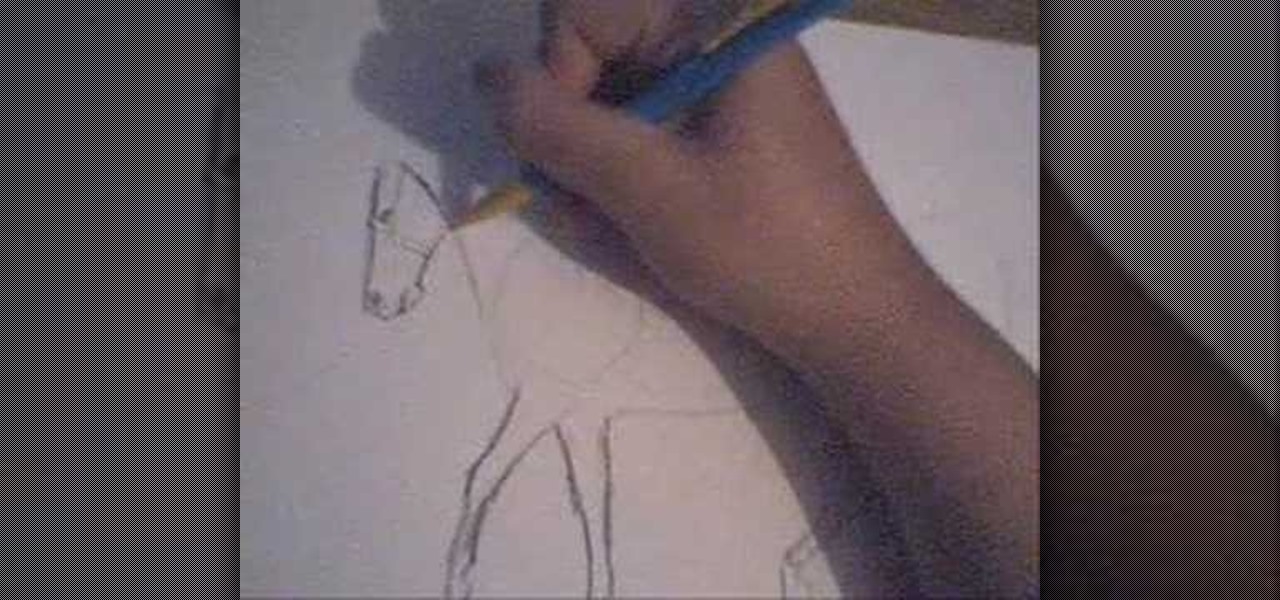
How To: Draw a horse
In this video, we learn how to draw a horse. First, draw the outline of the horse's body. Start with a circle for the head and wispy lines for the rest of the body. Make large shapes that connect to see where the mass of the body will be. Next, draw in the head, tail, back, and legs of the horse. After you have the outline finished, erased the lines inside of the picture. Now, draw in details on the horse. Add in lines to show where the hair is, then draw in the nose and eyes to the face. Als...

How To: Use off camera wireless flash
Chris Rutter teaches us how to use off camera wireless flash in this tutorial. First, attach the flash to the camera and aim it towards your subject. For a more flattering result, place the flash gun on a tripod that is placed on the right hand side of the subject. Now, go to your camera and set the control so that the flash with go at the same time you take the picture. Now, turn the camera on and take a picture of your subject again. Your flash should go off at the other location, and your ...
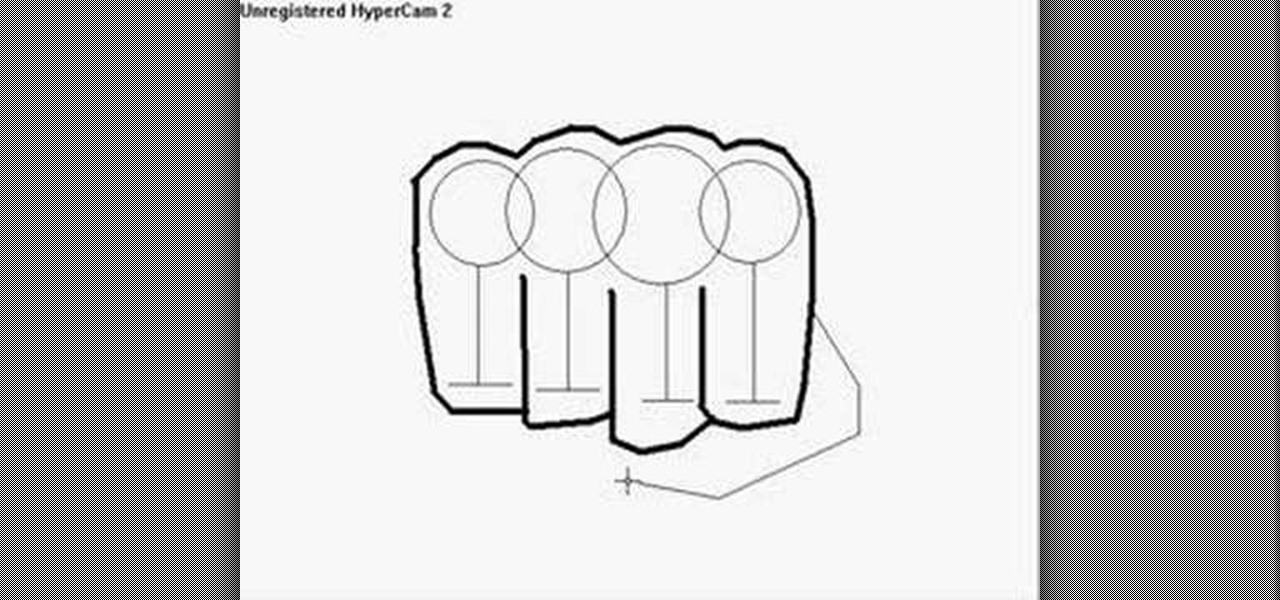
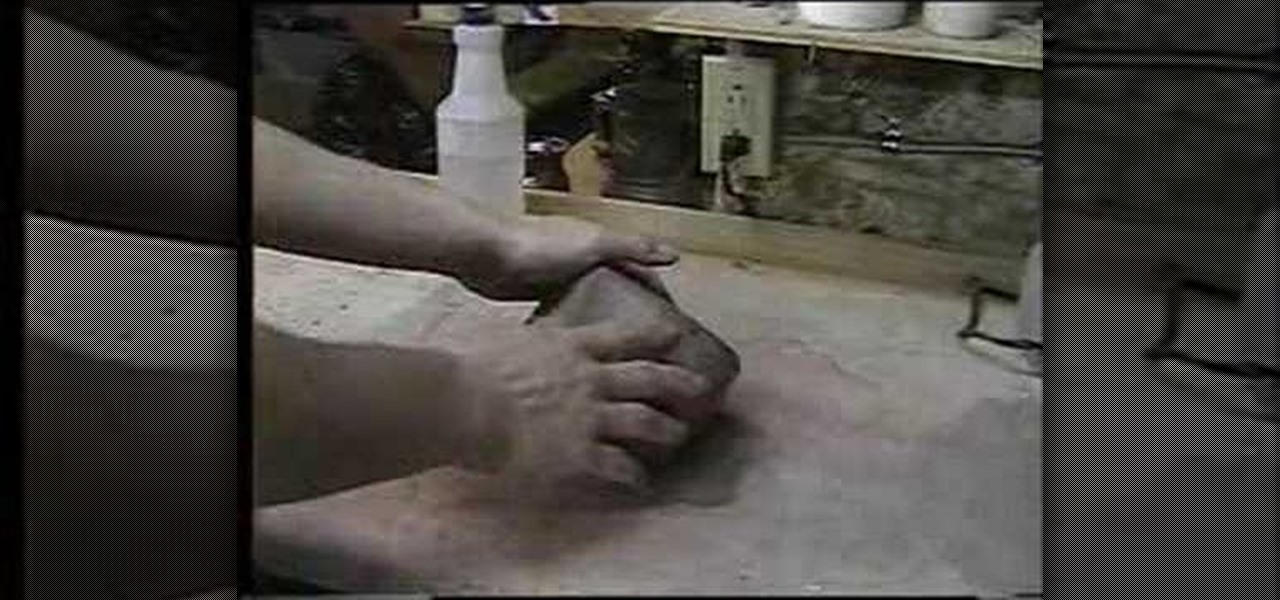
How To: Draw a fist
In this tutorial, we learn how to draw a fist. Start off by drawing for circles linked to each other, then draw lines coming down from the middle of each circle. Then, draw a line across the bottom of each vertical line, going horizontally. After this, use a dark line to outline around the circles and the bottom of the lines. Make sure to draw a line in between each of the individual lines. Next, add a couple of curved lines to make a thumb appear on the side. To finish, erase the original ci...
How To: Draw an urban garden using complex levels
Too often in the hustle and bustle of life we forget to take a deep breath, calm down, and embrace the quiet. Many of us are so wired to the point that the quiet scares us, leading to a state of constant overstimulation in which we develop stress, hypertension, and cardiovascular problems. Doesn't sound so fun, does it?
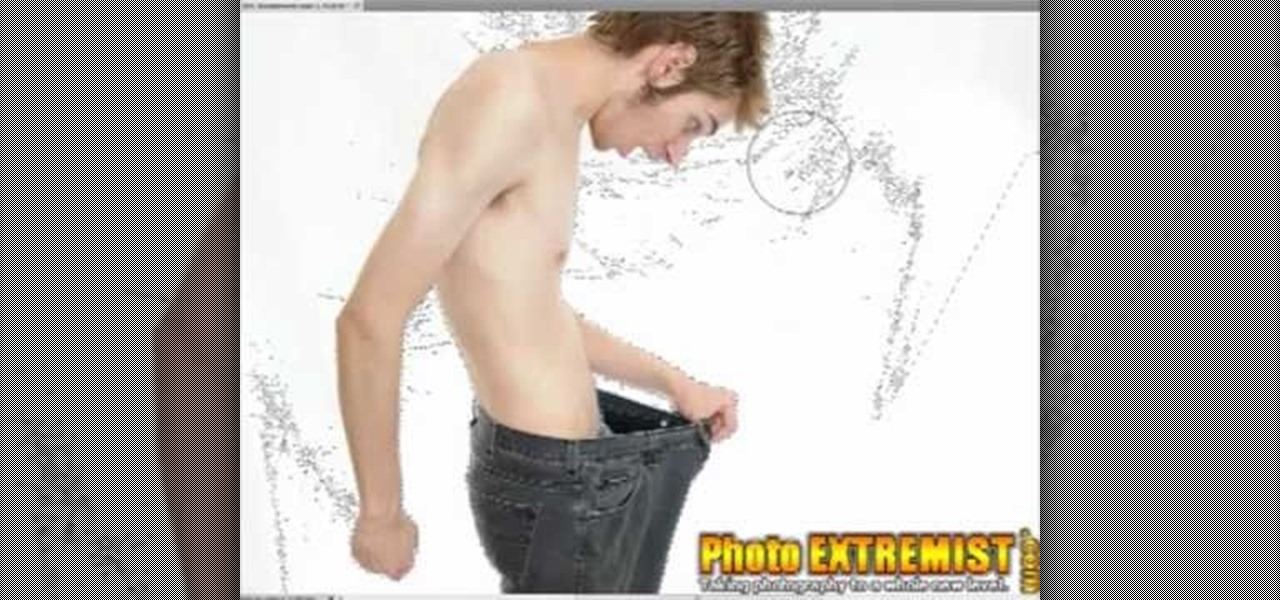
How To: Photograph well-lit isolated objects on a white background
Not all of us have an entire photo studio in our houses. In fact, unless you're a professional photographer, you probably don't have much space at all in which to create solid looking shots.
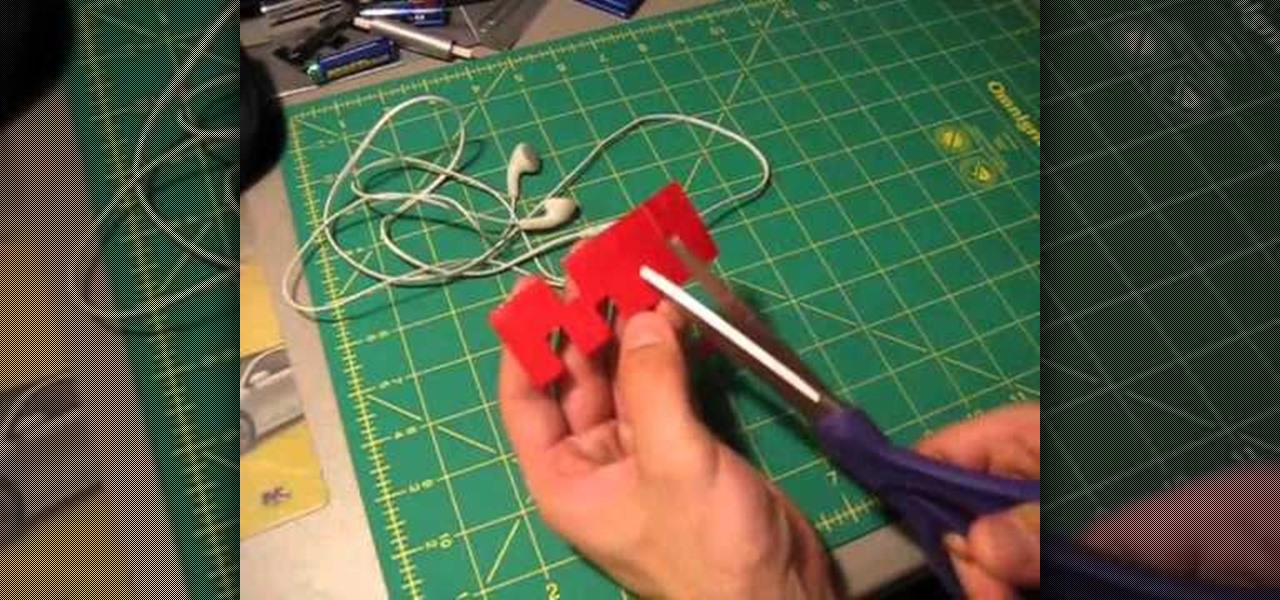
How To: Make a headphone holder out of duct tape
Duct tape can be used for just a lot more than taping your eBay packages shut. In fact, duct tape has a whole lotta urban crafting potential. Don't believe us? Just check out this duct tape tutorial.
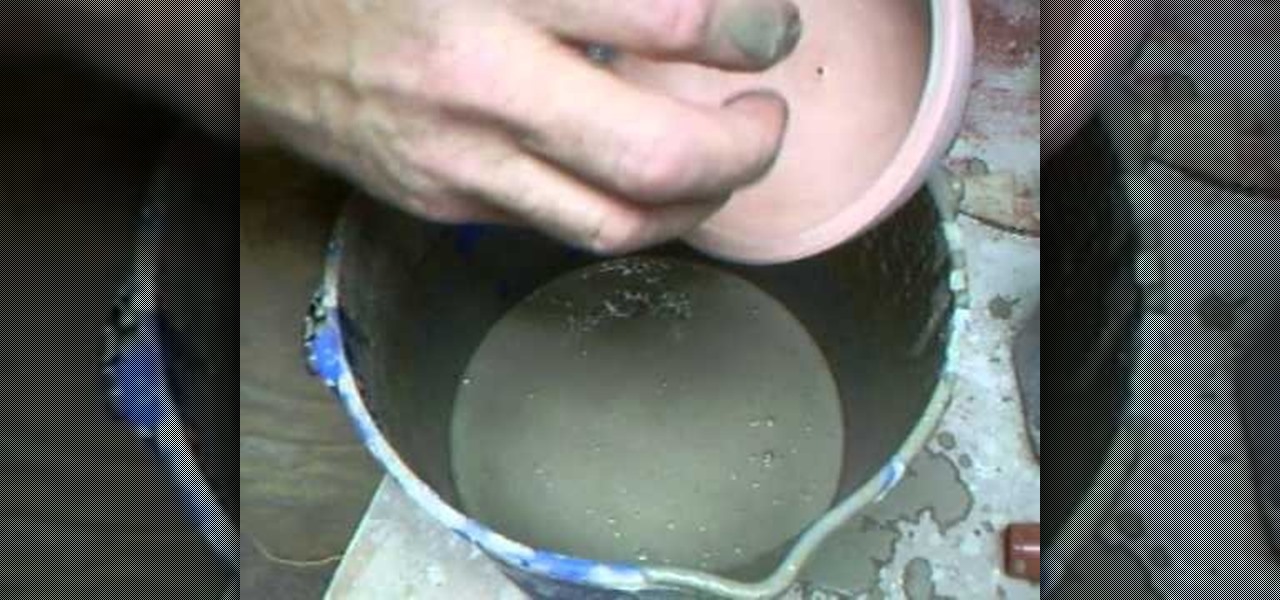
How To: Glaze assorted pottery forms with Shino glaze with Simon Leach
We're not going to lie to you: Creating pottery is a long, arduous, and intense process. But After you throw your charger, come back to reshape offset parts, fire the charger, and then glaze it, you have yourself a homemade work of art you will treasure for a lifetime. In other words, all the hard work you put into pottery is worth it!
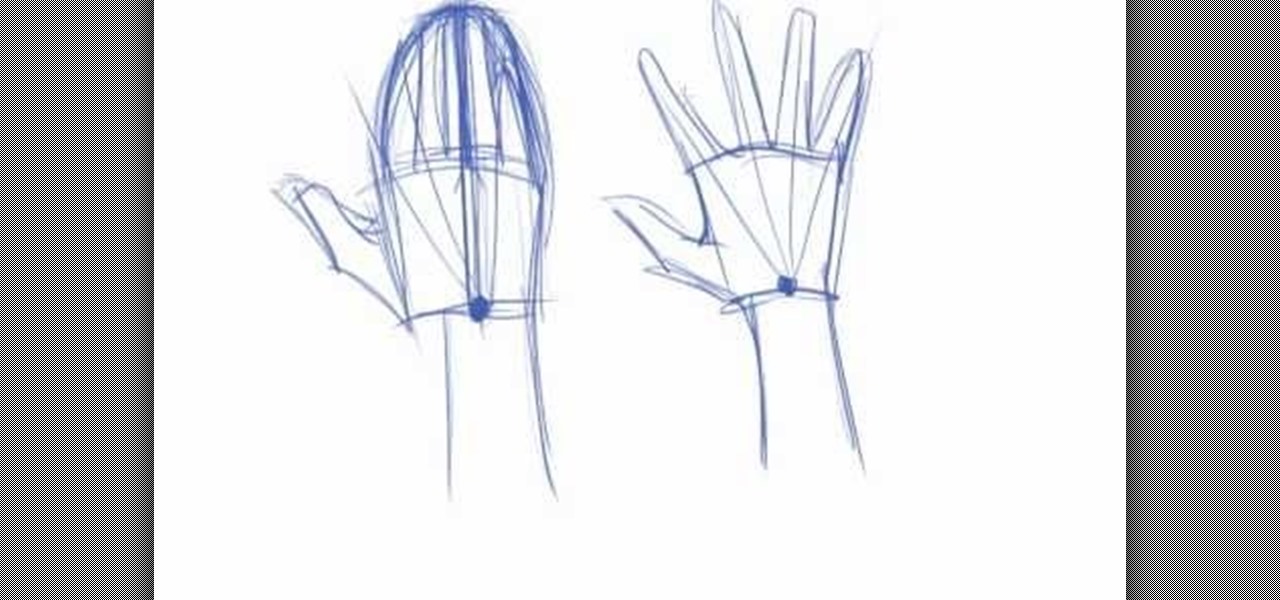
How To: Draw realistic hands in resting and action poses
We know of several artist friends who are practically reborn Monets with their pencils and brushes and can sketch out anything they imagine, except for hands. Not that they can't draw hands, but it seems that hands are the Achille's heel for many art students.

How To: Draw Gizmo from the "Gremlins" with Wizard
We don't remember much about the 1984 movie "Gremlins," but we do remember the adorable protagonist/lead Gremlin Gizmo! Who can forget his big, pleading eyes, doll-like stature and chubby tummy? Our four-year-old selves swooned over the fantasy that we could own our very own Gizmo as a pet. Unfortunately for us, our pipe dreams went bust when we discovered that Gizmo shockingly wasn't real, but at least we can still recall the tender days of yore by drawing this Gizmo character.
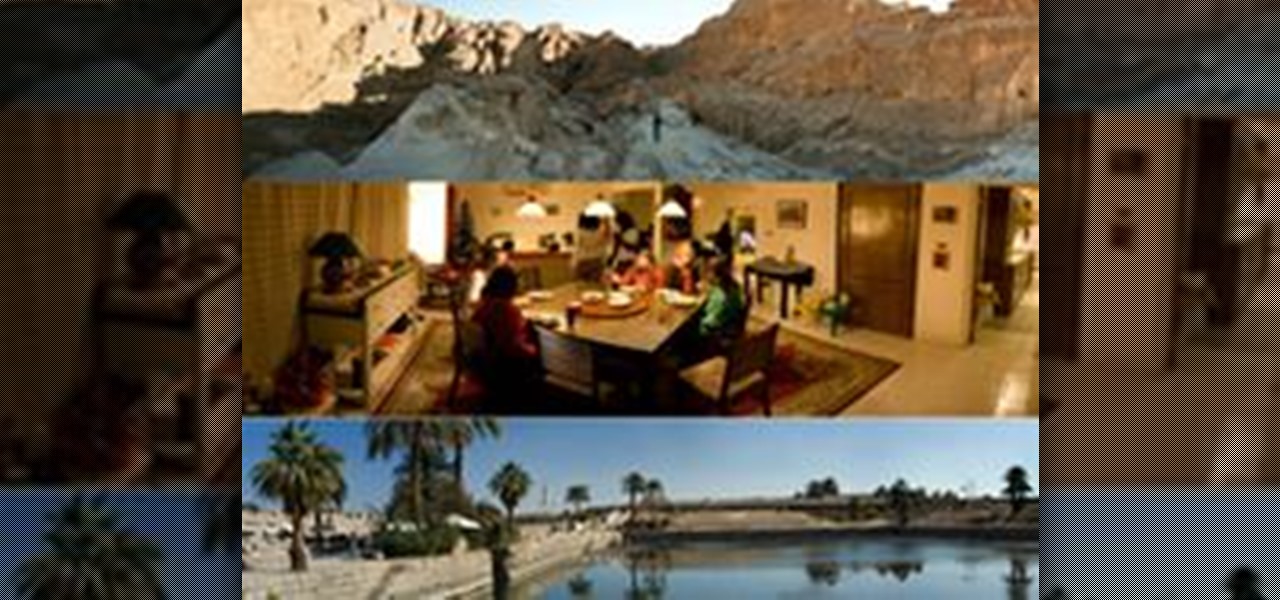
How To: Successfully Create A Panorama With Your Camera
Have you ever wondered how to successfully create a panorama with your camera? What is a Panorama?
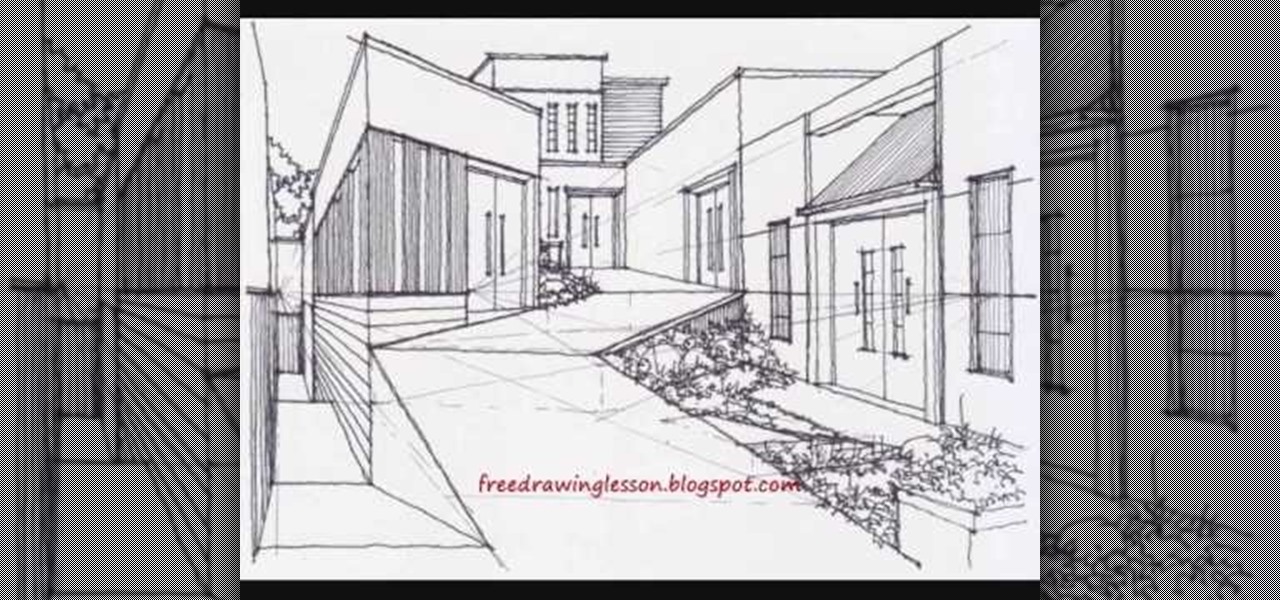
How To: Draw an elevated urban street with complex levels
Have you always secretly harbored a love for urban design or architecture but your parents made it clear to you that they would only financially support you through school if you studied pharmacy? We know your situation sucks, but just because you can't get a degree in urban planning doesn't mean you can't sketch out designs of beautiful cities.

How To: Craft an urban chic tote from waste fabric scraps
Chances are you have a pile of old, unused clothing lying somewhere in your house. You're sure as hell never going to wear any of it, but you also don't want to throw anything away just yet. So how do you eliminate the unsightly pile without completely tossing it into a trash can?
How To: Robin Rhode Knows How To Play With Himself
South African born artist Robin Rhode combines street art with optical trickery, resulting in a cumulation of performance, graffiti, drawing, film and photography.
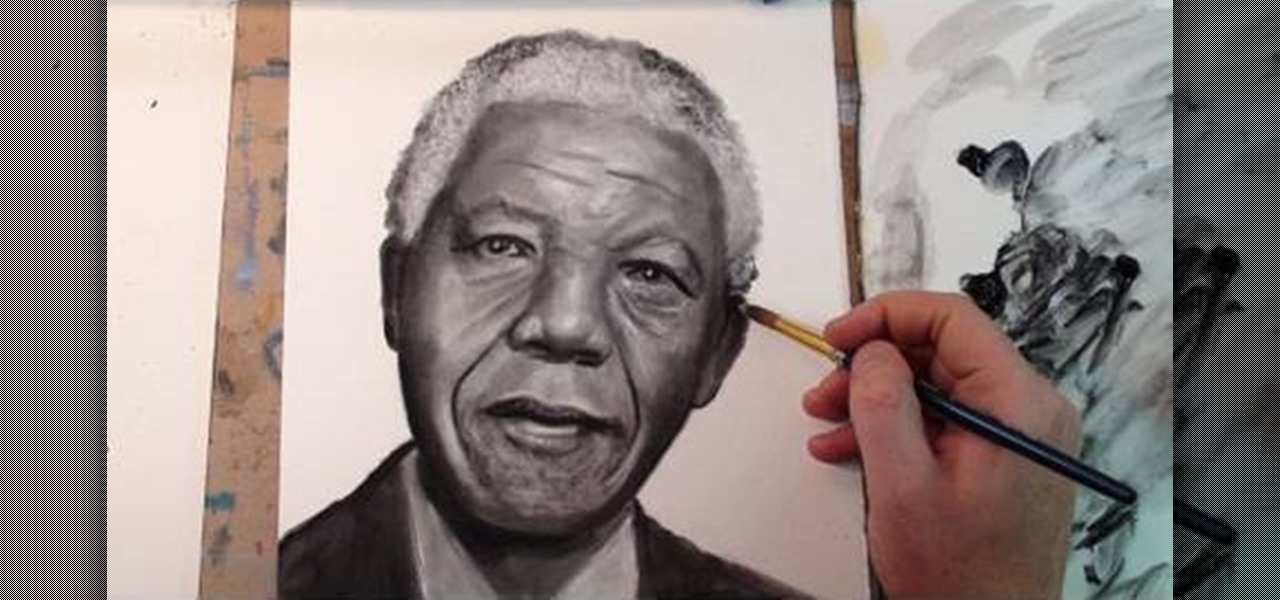
How To: Create a portrait of Nelson Mandela with a dry brush oil paint technique
Merrill is quite the artist, but he, like everyone else, must "draw" from inspiration. And he has discovered a new technique from Igor Kazarin's YouTube channel Portrait Drawing.
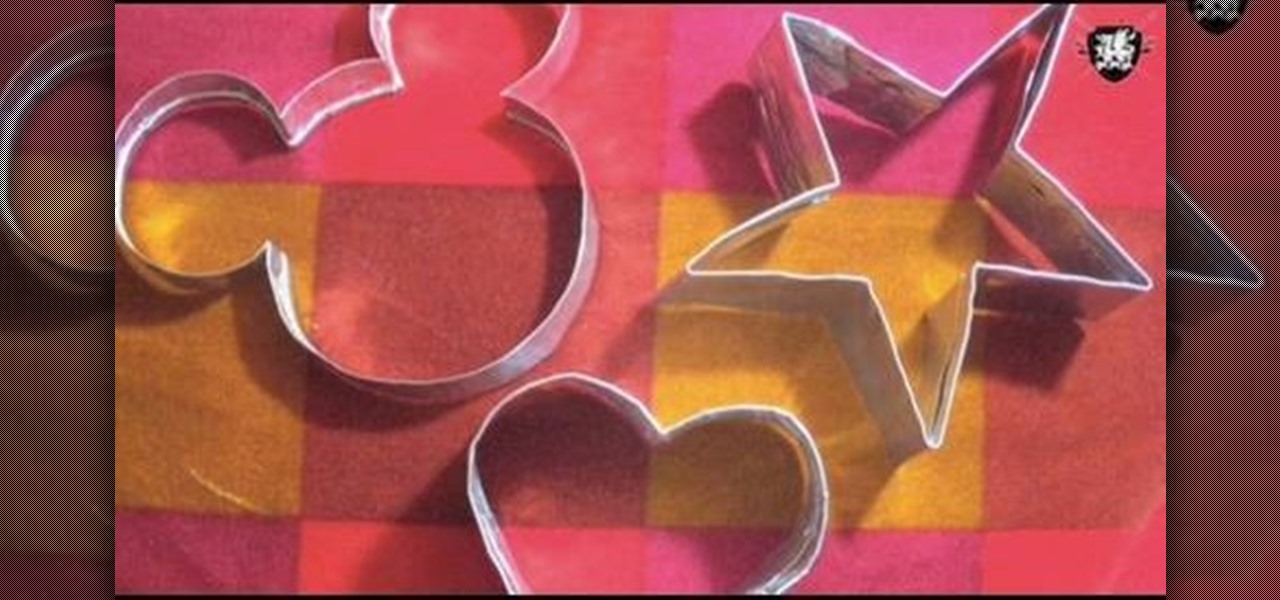
How To: Make your own cookie cutters with Threadbanger
Had enough of cookie-cutter cookie cutters? Make your own! It's easier than you'd think. So easy, in fact, that this DIY guide from Threadbanger can present a complete overview of the process in about three minutes' time. For complete instructions, and to get started a-makin' your own cookie cutters, watch this video guide.
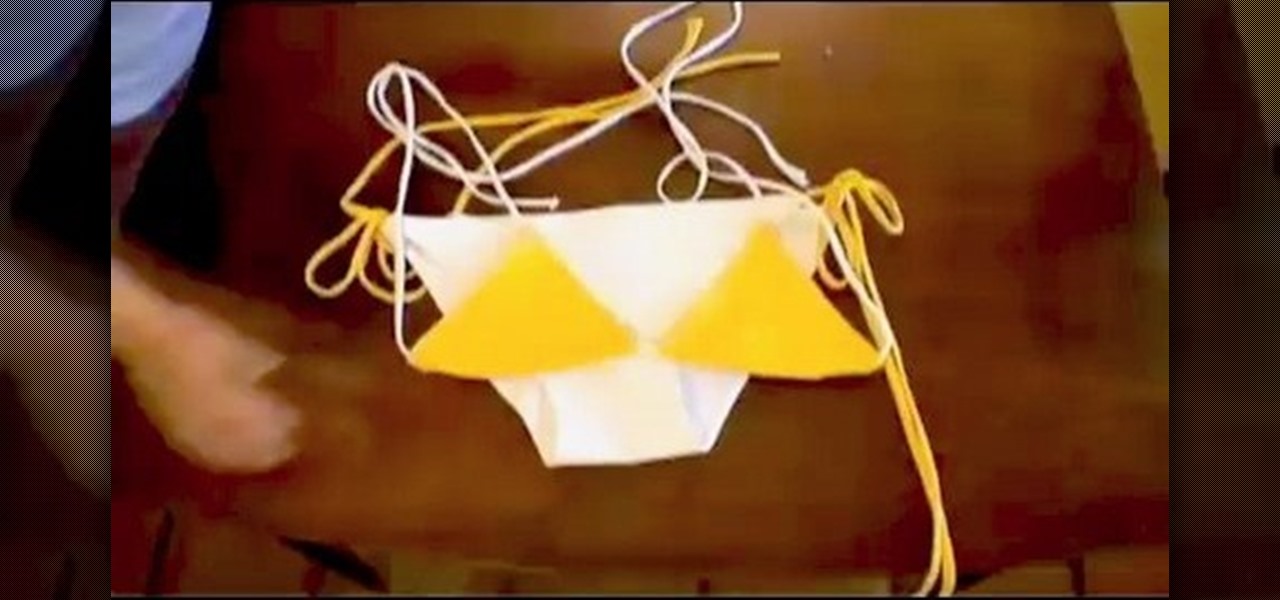
How To: Make a bikini from old t-shirts - hip chic
The Thread Heads hang out at the Renegade Craft Fair in New York. Then they teach us how to make a bikini from an old tee! It's a ways into the video, so jump ahead if you just want the how to. Hot!

HowTo: Make the Laziest Dress Ever
There are lots of simple "hack-like" fashion projects on the web, but kudos to the Glamourai for bringing Style into the equation. Her "Scarf-tan-ette" is surprisingly chic considering it's simplicity. Relatively uncomplicated to make, all you need is a couple vintage scarves, some chain, pins and a sewing machine. (The YSL sunglasses help the look as well.)
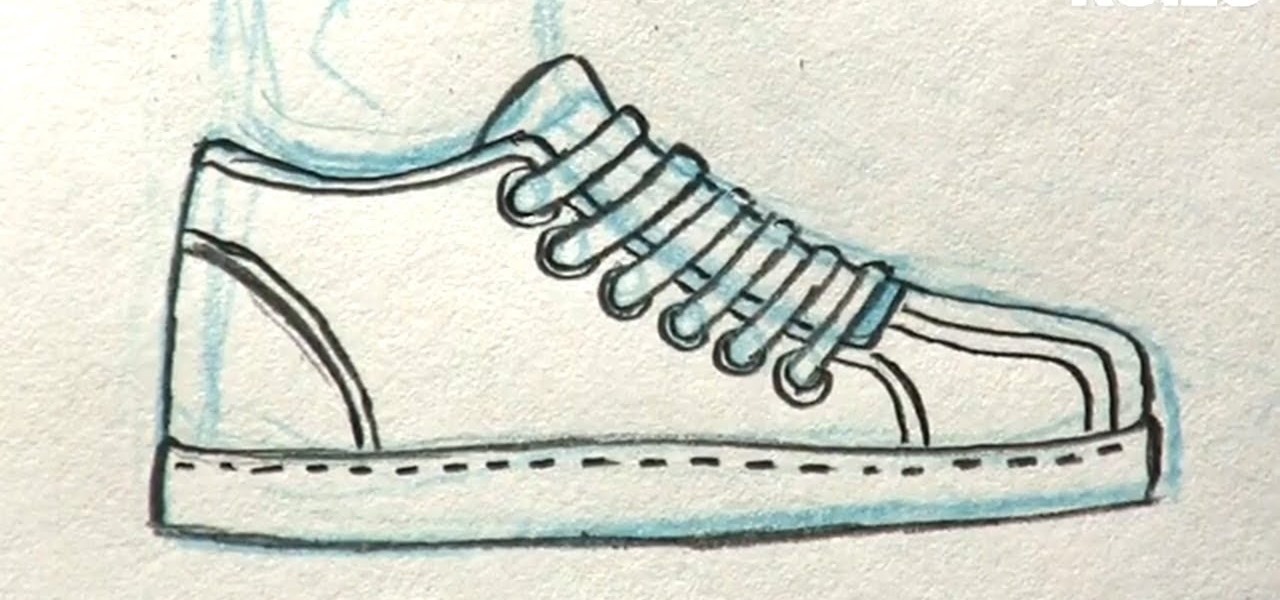
How To: Draw manga shoes
In this tutorial, we learn how to draw manga shoes. First, you want to sketch the basic shape of the foot. On top of this, you will draw a rough shoe shape with a different colored pencil. Next, draw in the details of where the laces are going to go, and where the lip of the shoe will be. Also draw in the soles and any other details you feel you need. Switch over to a black pencil to draw in darker details and add in shading throughout the drawing. When you are done, sign your name by your dr...

How To: Take better indoor portraits
James Barry teaches us how to take better indoor portraits. When you are taking these, you want to make sure you have the lighting that is directly onto the subject and the subject's face can be seen. You will have to work with the light and often you will have to add in several lights to get the facial features to all show. Work with your camera to see what it sees and how the light looks through the camera. It will take several minutes to get the portrait to come out correctly. Place the li...