

Active Fine Art Posts


How To: Draw a simple and colorful clownfish (pez payaso)
Capture the charisma of the clown and the charm of a marine fish into a masterpiece called the clownfish! Actually, the clownfish is as real as they come, with bold vertical stripes and bright coloration, and are sometimes referred to as anemone fish, because they live in close proximity to anemones. This video illustrates the step-by-step details to drawing a clownfish. "Pez payaso" is the Spanish translation of clownfish.

How To: Draw a simple dolphin (delfín)
Watch this video guide that shows you the steps to drawing your very own Flipper-like friend— the dolphin. It's a very easy drawing to accomplish, and the video illustrates, step-by-step, the process of creating a dolphin portrait. It's a simple one, so grab you cocktail napkin and pencil. "Delfín" is the Spanish translation of dolphin.
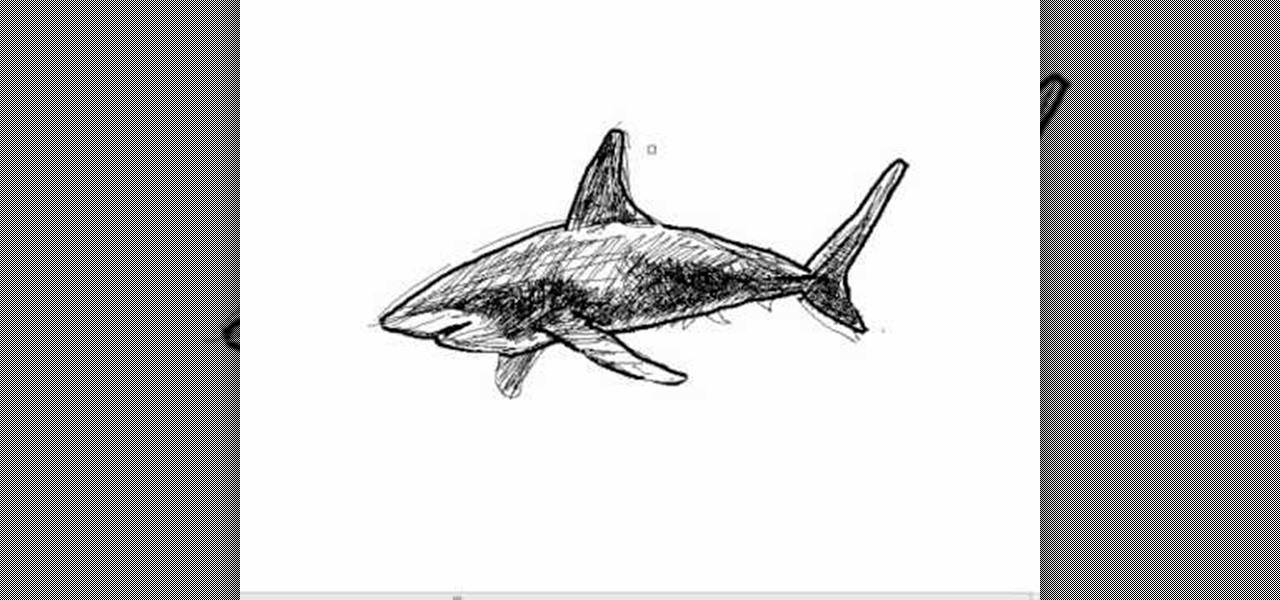
How To: Draw a simple shark (tiburón)
Master the skill of marine fish by learning how to draw a shark. This is a very easy drawing that anybody can do, in which you'll see how to draw the shark's body, dorsal fin, tail and pectoral fins. This is a very easy, step-by-step illustration of the aquatic beast that terrorizes the waters. "Tiburón" is the Spanish translation of shark.
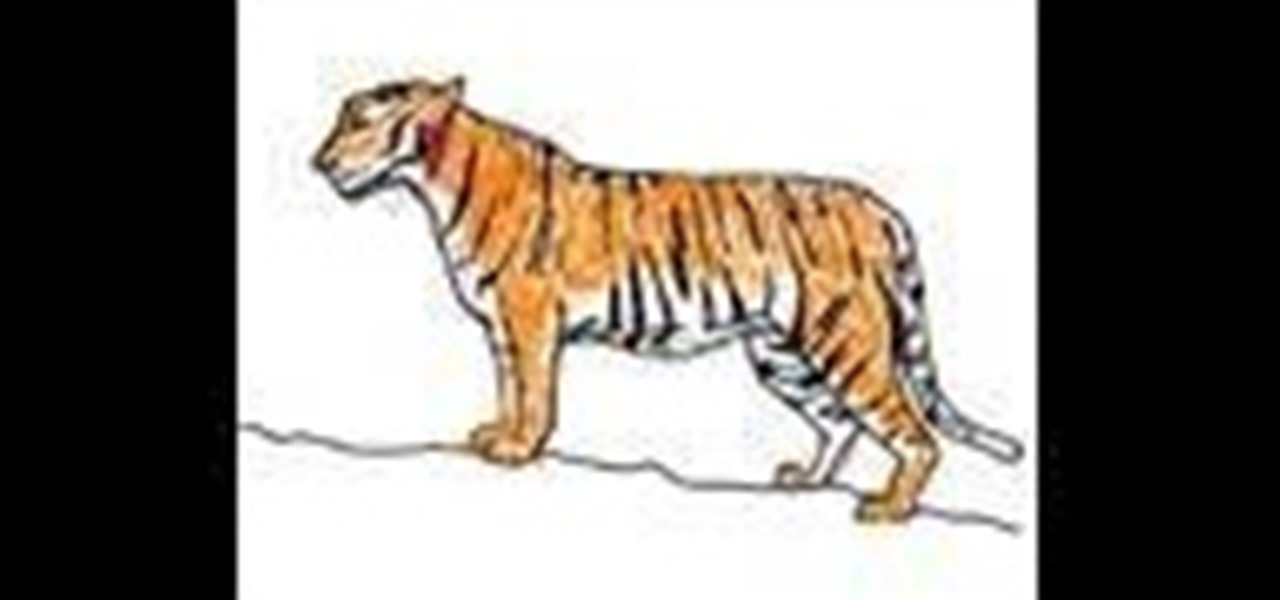
How To: Draw and color a simple tiger (tigre)
Try your hands at drawing this ferocious cat— the tiger. If you haven't any artistic skills, you can still draw this simple tiger. This video illustrates the step-by-step details to drawing and coloring a Panthera tigris. "Tigre" is the Spanish translation of tiger.

How To: Draw a simple rose (rosa) flower
Forget buying your sweetheart a rose, show her that you really care by spending some time drawing a simple, yet elegant rose yourself. Nothing says "I love you" more than a handmade gift, and this rose drawing is perfect if you're not much of an artist. It's really easy to sketch out. "Rosa" is the Spanish translation of rose.

How To: Draw a simple horse (caballo)
Capture the striking beauty of the horse in a simple artistic drawing. This video guide illustrates the step-by-step details to drawing a horse, so if you've never been able to before, this is where you should start. It's really simple. Add a horn on top and you've got yourself a unicorn! "Caballo" is the Spanish translation of horse.

How To: Draw a simple frog (rana)
Just because a frog is small, doesn't mean it's easy to draw, unless you follow along to this video guide, which illustrates the step-by-step details to drawing a simple frog. Complete this frog drawing in not time! "Rana" is the Spanish translation of frog.

How To: Draw a simple tusked elephant (elefante)
This video will show you the step-by-step details to drawing an elephant with tusks. It's a really simple drawing, one easy to follow along to. Elephants are powerful creatures, so capture their strength in your own elephant drawing. "Elefante" is the Spanish translation of elephant.
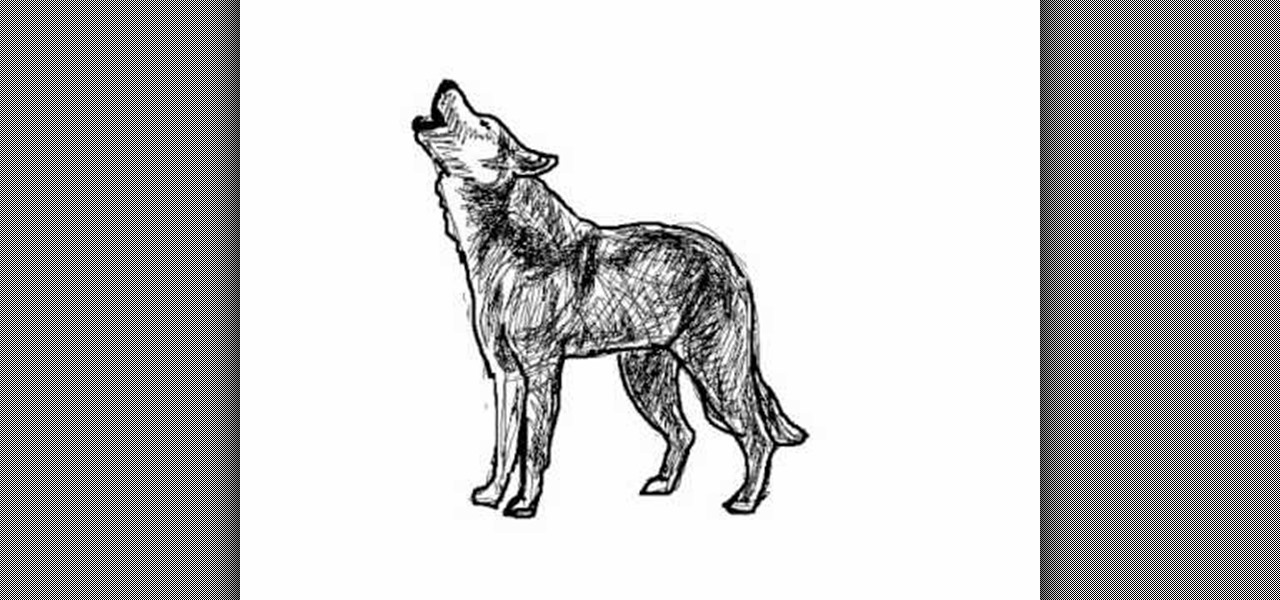
How To: Draw a wolf (lobo) howling at the moon
Wolves are amazing creatures, especially when they're howling at the moon. Capture this powerful and elegant prowess of the wolf in a drawing. You can learn the step-by-step details to drawing a wolf howling into the moonlight in this drawing guide. "Lobo" is the Spanish translation of wolf.

News: Once Again, China Operates as if It's Another Planet
I thought American bicycle couriers were tough. Until I saw these poor Chinese workers carrying literally truckloads of cargo on the back of their bikes. Photographs of Shanghai bicycle carriers by Alain Delorme:

How To: Melt a vinyl record in the oven and shape it into a plastic bowl
Spice up your next party with some unique party dishes, and we're not talking about food here, we're talking about the actual dishes, specifically bowls. But not just any bowls, vinyl bowls, made from authentic vinyl records. The steps are simple: melt the vinyl record in the oven, then take it out and mold it (safely) into a plastic bowl. Change the shape up each time!

News: Long-Exposure Photographs of Old-School Video Games
When a person sits motionless for hours on end in front of a television screen, it's sloth; when a camera does the same, it's art! Case in point, these beautiful long-exposure photographs of old Atari games by Rosemarie Fiore:

How To: Turn a tank top or tee into a better fitting, cute, unique shirt
Your tanks and your tees aren't fitting just right, don't throw them away or toss them in a storage box just yet. Grab some scissors and cut that sucker up, then mold it in a better fitting, unique and cute shirt. The easiest part is simply slicing up the back up the shirt, but then comes the strings. Watch and see for yourself. This is a great way to transform a normal T-shirt or tank top into something more creative.

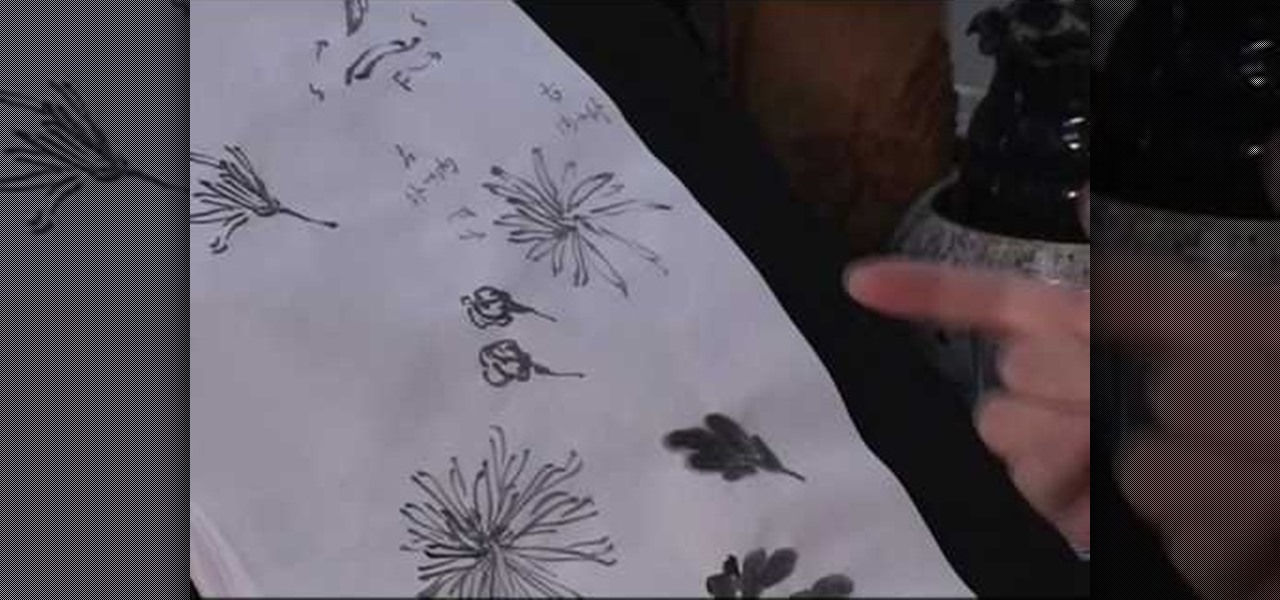
How To: Pick the right brushes for fabric painting
Fabric painting is a fun hobby, but like most styles of painting there are a dizzying array of tools available to choose from. This video will teach you about different kinds of fabric paint brushes and how to choose the right one for your project.
How To: Make a cap style hat out of duct tape, cardboard, and newspaper
Cool hats are one of the most effective ways of drawing attention to oneself, and this one is sure to do that. Plus, you make it yourself, which makes it even cooler. This video will show you how to make a cool cap out of duct tape, cardboard, and newspaper.
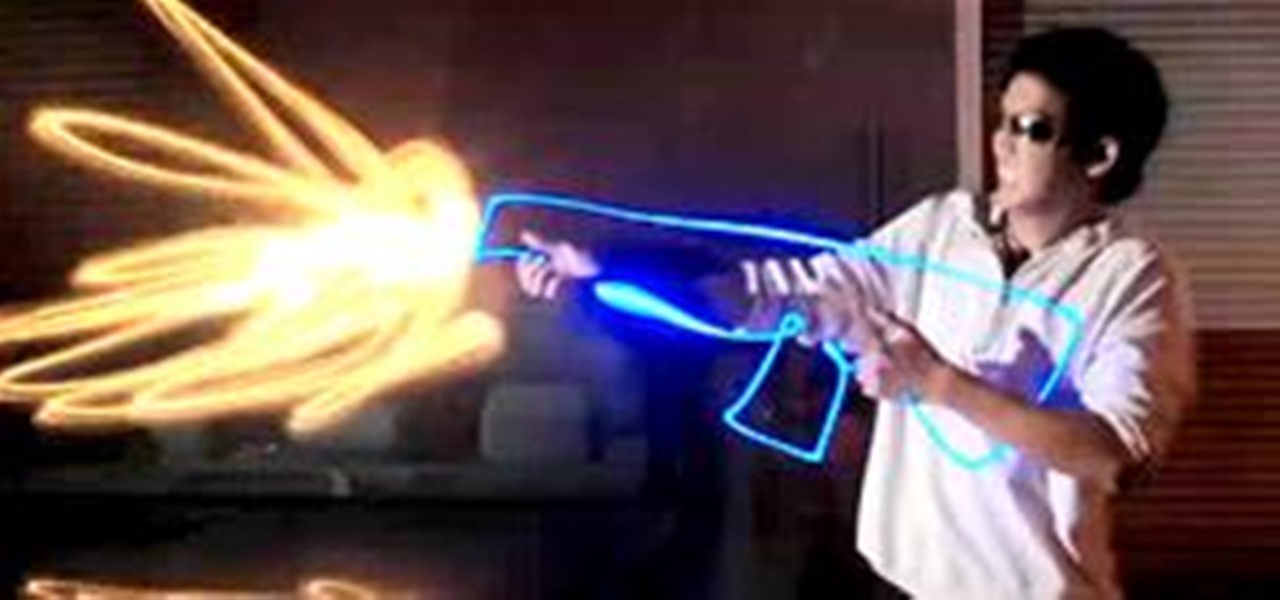
HowTo: Annihilate Your Enemies With Light Warfare
You may be familiar with the graffiti art practice of light painting, or light writing (1, 2, 3, 4). Essentially, it is a practice that employs the manipulation of light, photography and stop motion animation.

How To: Make a duct tape dress form
This how-to video covers the steps for making an exact double of your body out of duct tape to use as a dress form. Many commercial dress forms don't adjust to body types, and nothing will ever be as accurate as your own precise dimensions. All you need is duct tape, poly fill, and a friend with scissors to liberate you. Watch this video fashion design tutorial and learn how to build a cheap duct tape dress form.
How To: Paint a Chrysanthemum in traditional Chinese style
The chrysanthemum is a beautiful Chinese flower which often appears in artwork to represent autumn and the spirit of survival. Follow along with this this tutorial and learn how to add this seasonal subject matter to your next Chinese still life painting.
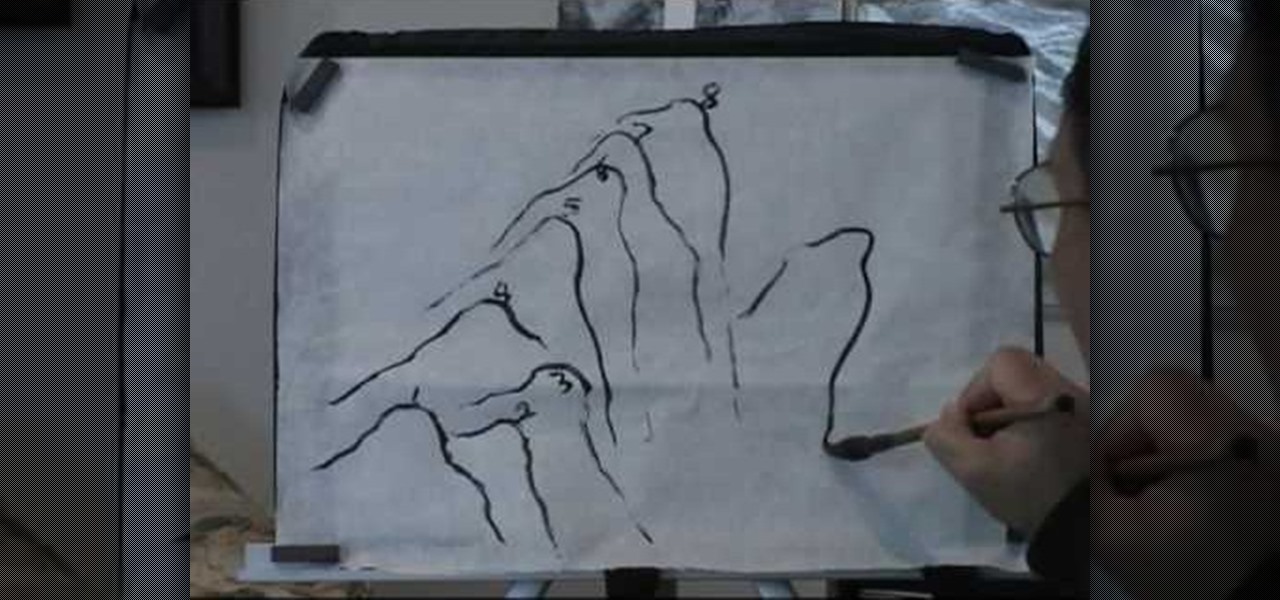
How To: Apply the concept of Dragon Vein when painting Chinese landscapes
The concept of the Dragon Vein - the ridge of a mountain range - is an important one for Chinese landscape painters. Using a brush made with chicken feathers, this tutorial shows you how to apply a dragon vein to your own landscape art.

How To: Draw a house like an architect's blueprint
Design your dream home! Starting from the basic idea of a house, this series of videos shows you how to draw the layout of a house as if you were an architect. Draw walls, windows, doors and large furniture to make sure you've gotten all your details correct.

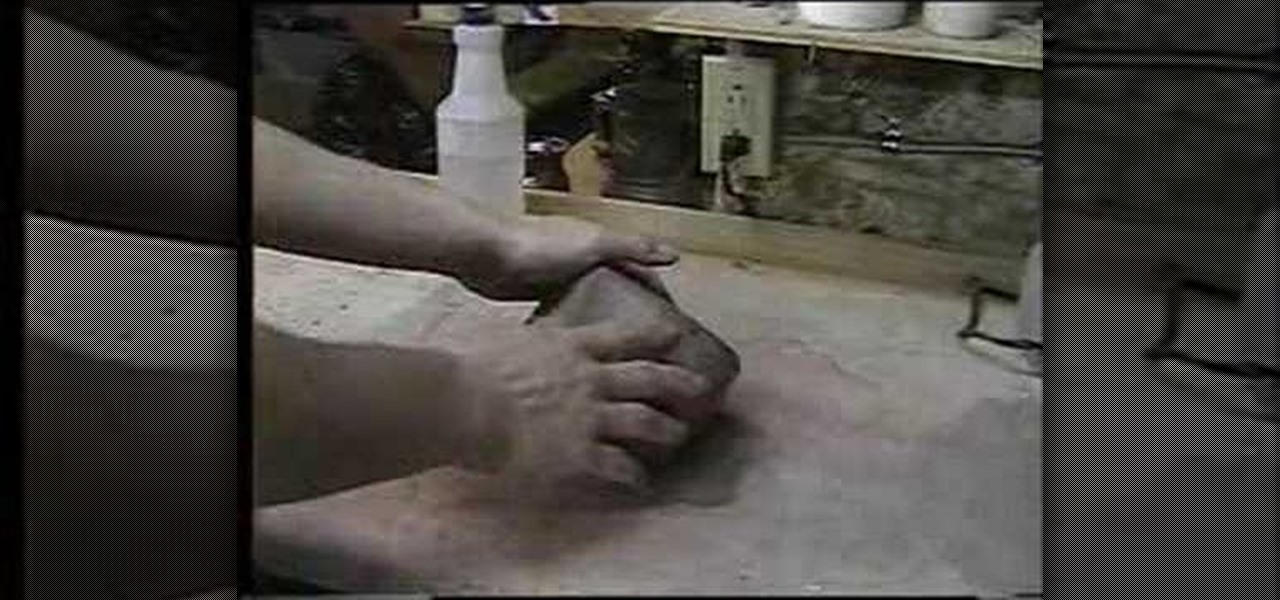
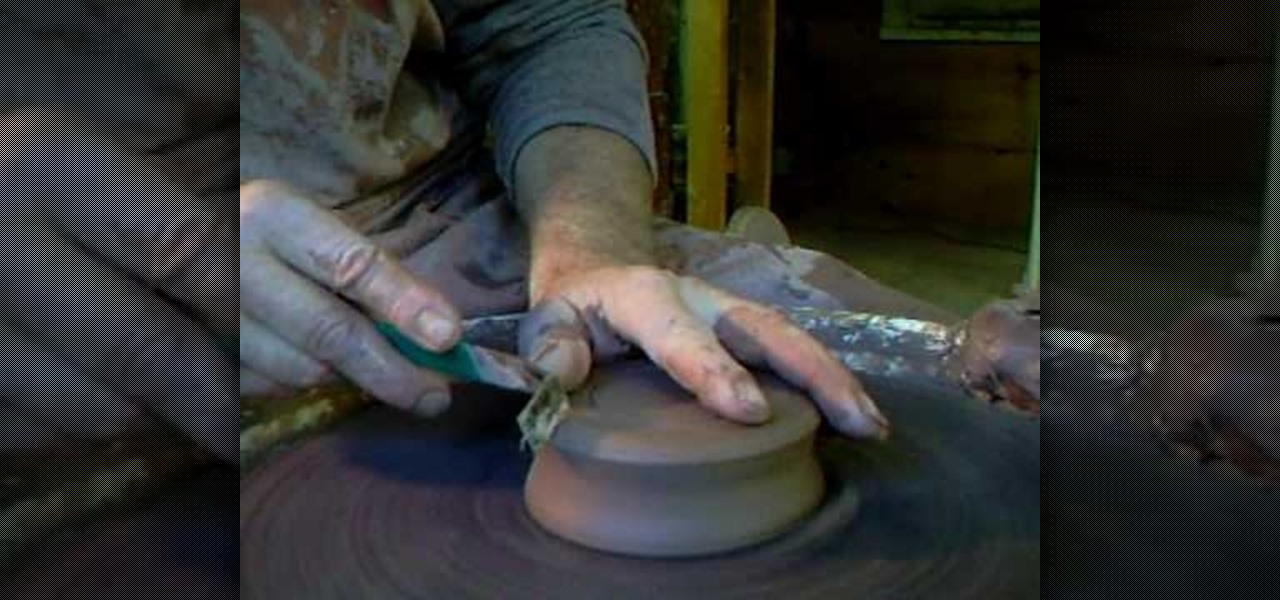
How To: Turn a lump of clay into a ceramic pot on a potter's wheel
Starting with just a lump of clay and some water on a potting wheel, you can end up with a lovely clay pot! This video shows you how to make a trivet, so you can safely rest hot dishes on your table or countertop.
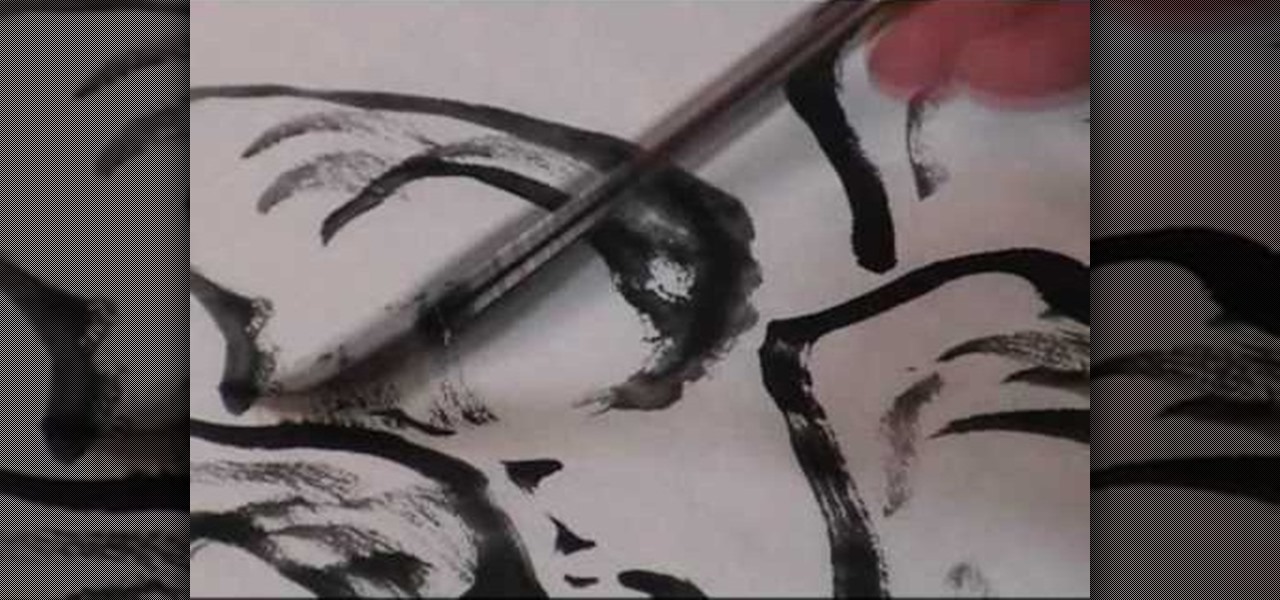
How To: Paint texture wrinkles on a Chinese landscape
Start with a fresh piece of rice drawing paper, and then follow the steps shown in the video to make your own brush drawing of a Chinese landscape. This tutorial focuses on adding texture wrinkles to the sides of rocks or cliff faces.
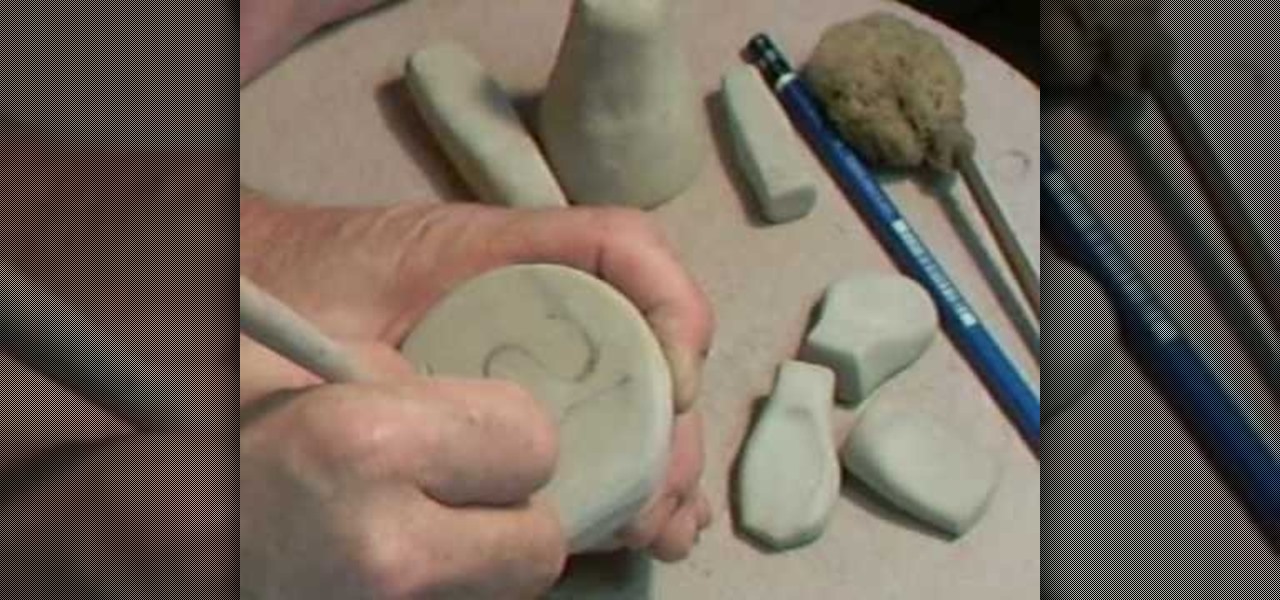
How To: Make a personal seal or signet out of smooth clay
Create your own personal seal from a piece of clay! This tutorial shows you the process, starting with a large piece of smooth clay, to cut your chosen sigil into the clay. Make sure you draw the sigil on in reverse. Now all you need is a letter and some sealing wax!
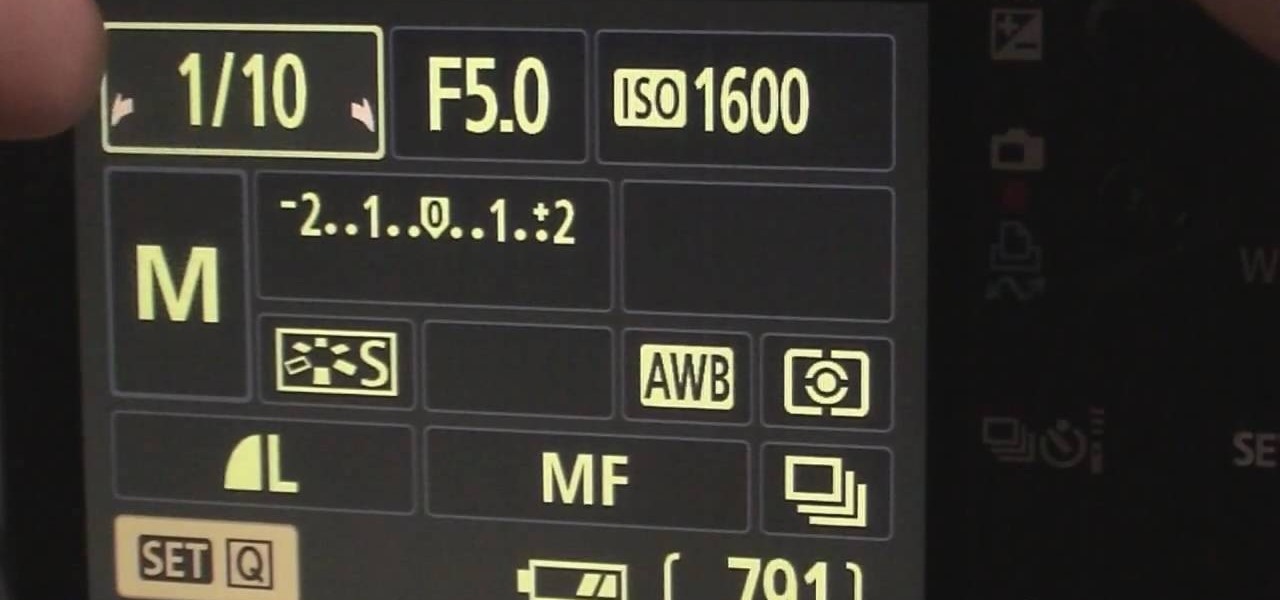
How To: Take photographs of fireworks with a DSLR camera in manual mode
If you want to take awesome photographs with your DSLR camera, all you really need is a tripod and a good location. This tutorial shows you how to adjust the manual settings on your camera to make them ideal for photographing your next fireworks show.

How To: Use light and shadow when trying to replicate a pencil drawing in Photoshop
Starting with a basic line drawing, this tutorial shows you how you make a project in Adobe Photoshop that looks like it was drawn with a pencil. Then the tutorial goes into how you can use a few techniques to play with the lighting in your figure for maximum effect.
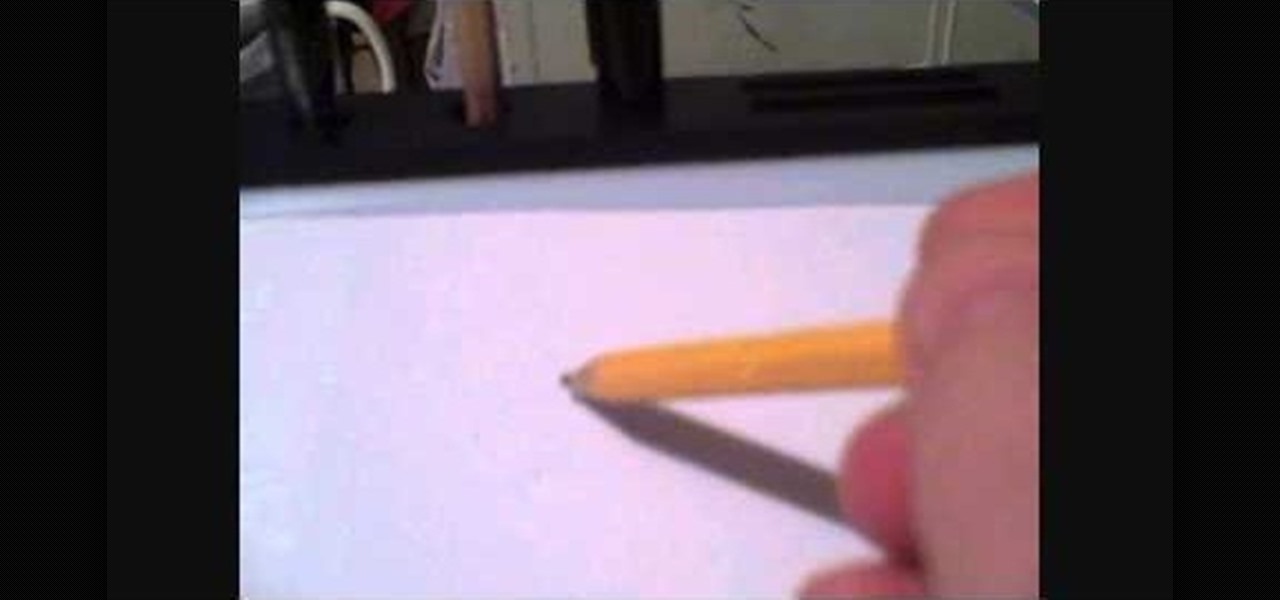
How To: Draw a simple pencil sketch of a knife
Drawing a pencil sketch of a knife or other bladed weapon is not incredibly difficult for the artist. Watch in this video as the artist draw a basic knife, and then demonstrate several variations, including a curved blade, you can use for your own artwork.
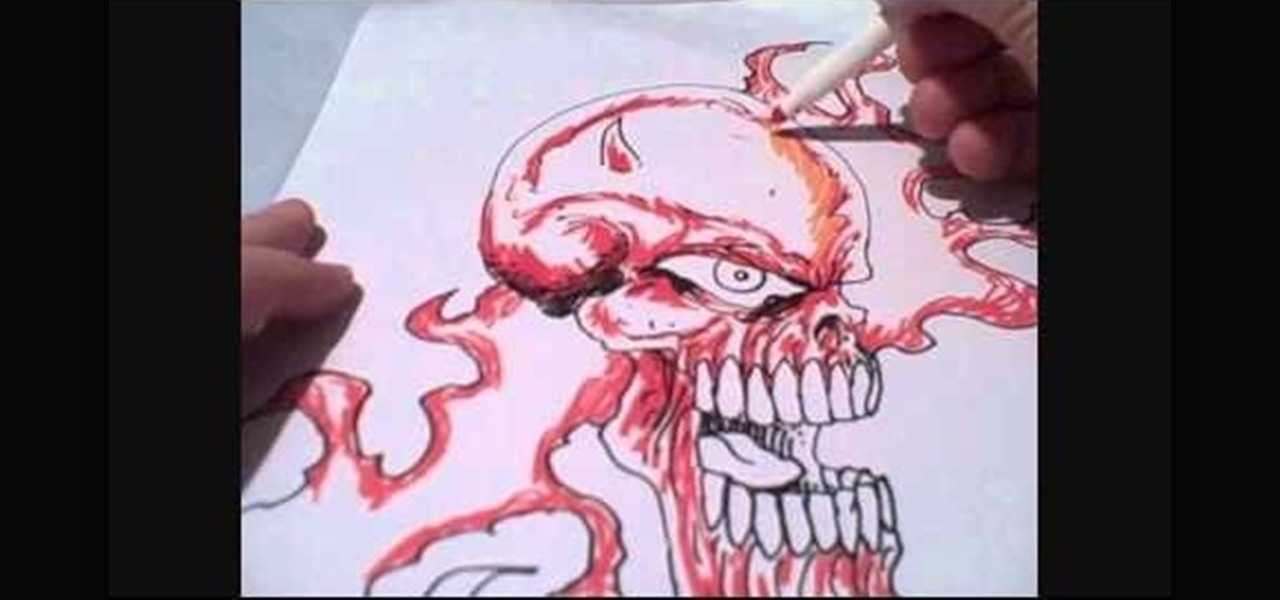
How To: Color a drawing using the washable Crayola Supertips markers
The Crayola washable supertip markers are an ideal tool for any artist, young or old, who wants to bring sharply defined, bright color to their drawings. This video demonstrates how to color simple line drawings using these basic markers.
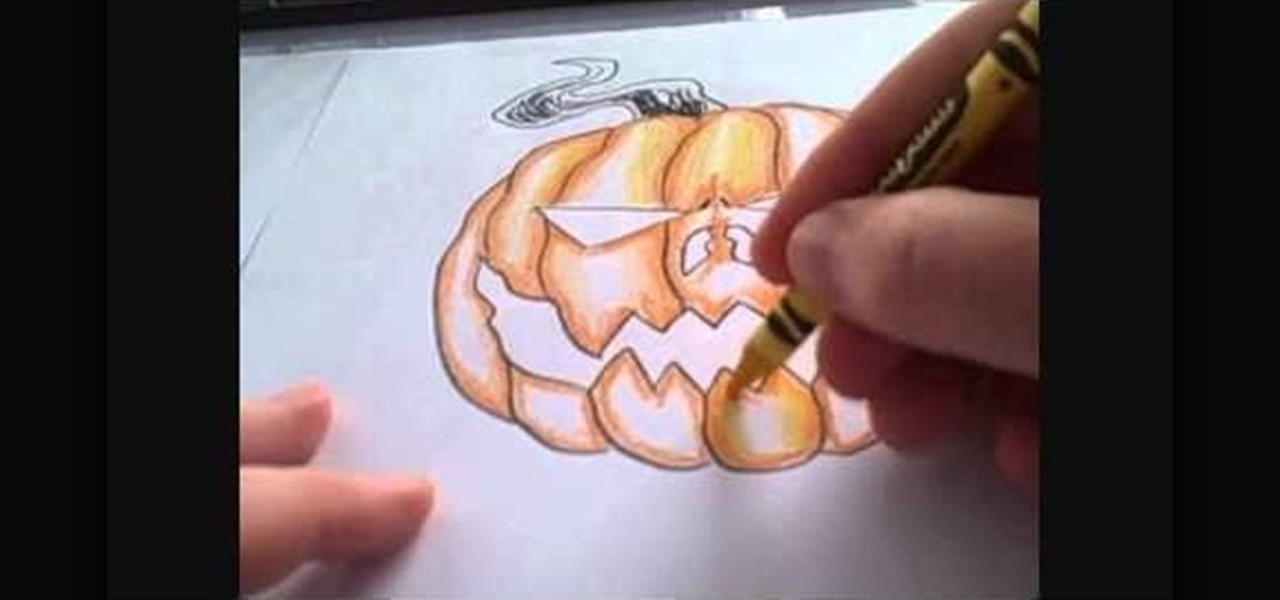
How To: Color a Halloween jack-o-lantern using Crayola crayons
Despite their reputation, Crayola crayons can still be a useful medium for an artist to use. They come in a wide variety of highly saturated colors, which makes them ideal for when you want brightly colored projects. This tutorial demonstrates how to use Crayola crayons to draw a Halloween jack o lantern.

How To: Get good results when figure drawing from a photograph using Photoshop
You can certainly use Photoshop to do do freehand figure drawing! This tutorial shows you how to make a drawing, starting with a sketch, from a photograph while using Adobe Photoshop. Then add in some coloring, shading and highlights, and then use color theory to bring out the most important lines.
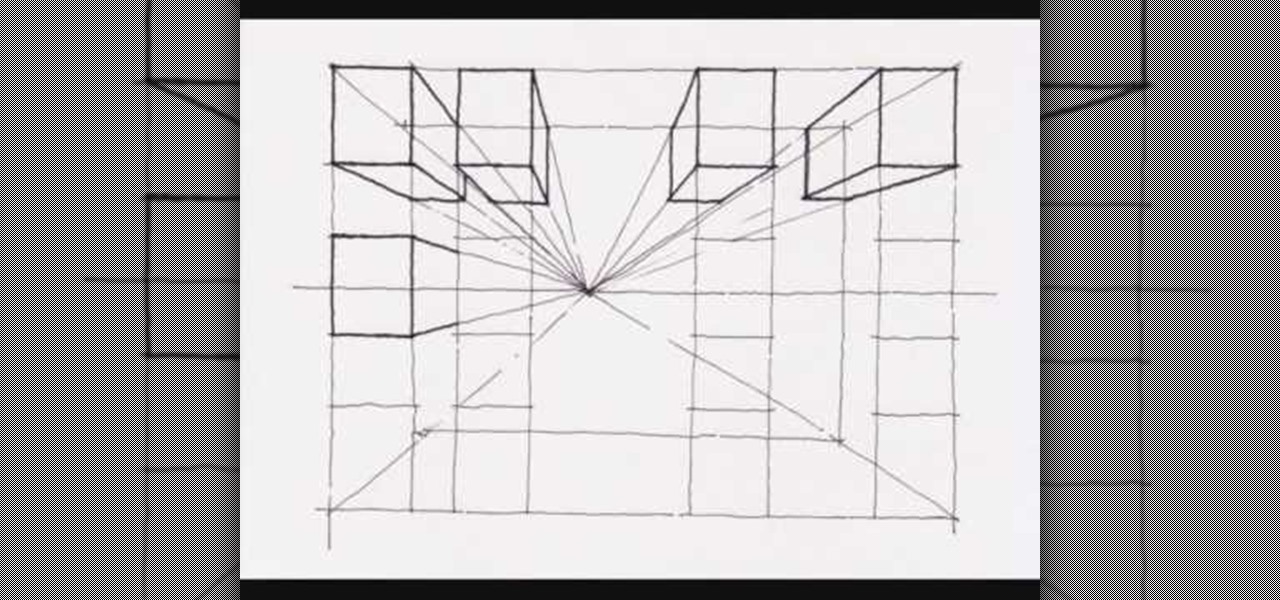
How To: Create a one point perspective drawing
This video demonstrates how to create a one point perspective drawing. You begin by making a horizon line across your paper and adding diagonal lines from the corners which will all converge at a single point along your horizon line. You can then create boxes by creating squares or rectangles around the lines extending from the central point. The outer edges of your rectangle can further be connected to your single point in order to create a 3-dimensional shape for the boxes and cubes which y...

How To: Decorate with duct tape Kanji characters
This video will show how to decorate duct tape creations with Japanese Kanji characters, which are Chinese-based characters. After creating your duct tape stencil which will serve as a backing, you should go online and find a Kanji character which you would like to copy, print it out on paper, and cut it out with scissors. Place the characters on your duct tape and trace around the character, making a stencil of the character you would like. Finally, you need an X-acto knife, which you will u...
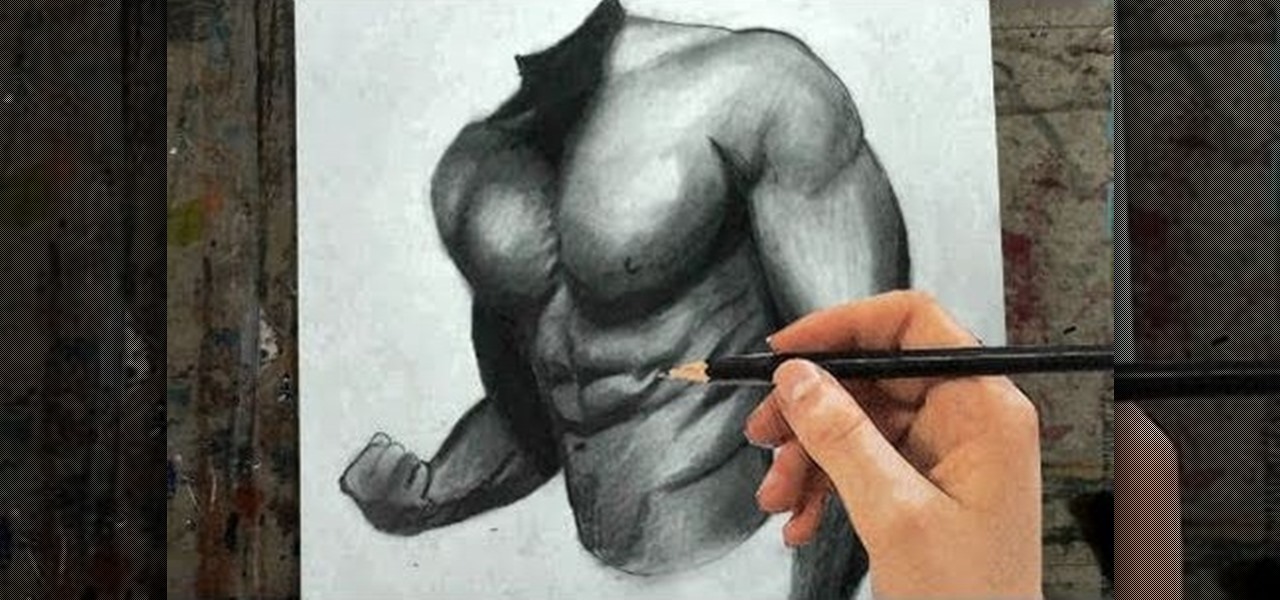
How To: Draw the male upper body (torso, chest and arms)
Drawing human subjects can be tough if you're not an experienced artist. getting every detail just right it quite a task, because of the intricateness of the human body. But Merrill is going to show you how it's done.

How To: Use R1C1 speedlight when shooting photos
In this tutorial, we learn how to use R1C1 speedlight when shooting photos. First you will want to place the attachment ring and adapter ring to the camera. After this, grab the remote flashes and the built-in flash panel. After you have installed all of these things on your camera, you will be ready to start taking pictures. Find the object you want to take pictures of, then start to use the wireless flash system to take quick picture that look great. As you click the remote, the flash will ...
How To: Make simple pot stands
In this tutorial, we learn how to make simple pot stands. Start with your clay on the table and use water and your hands to start to shape it. Press down on the ball until it forms into a low bowl shape. Then, start to add more clay and water to the sides of the pot so that it's thicker on the edges. After this, place the pot stand onto a ceramic drying area, then you will be able to glaze it and fire it. Clean off your spinning table after you are finished, then enjoy your pot and pot stand!
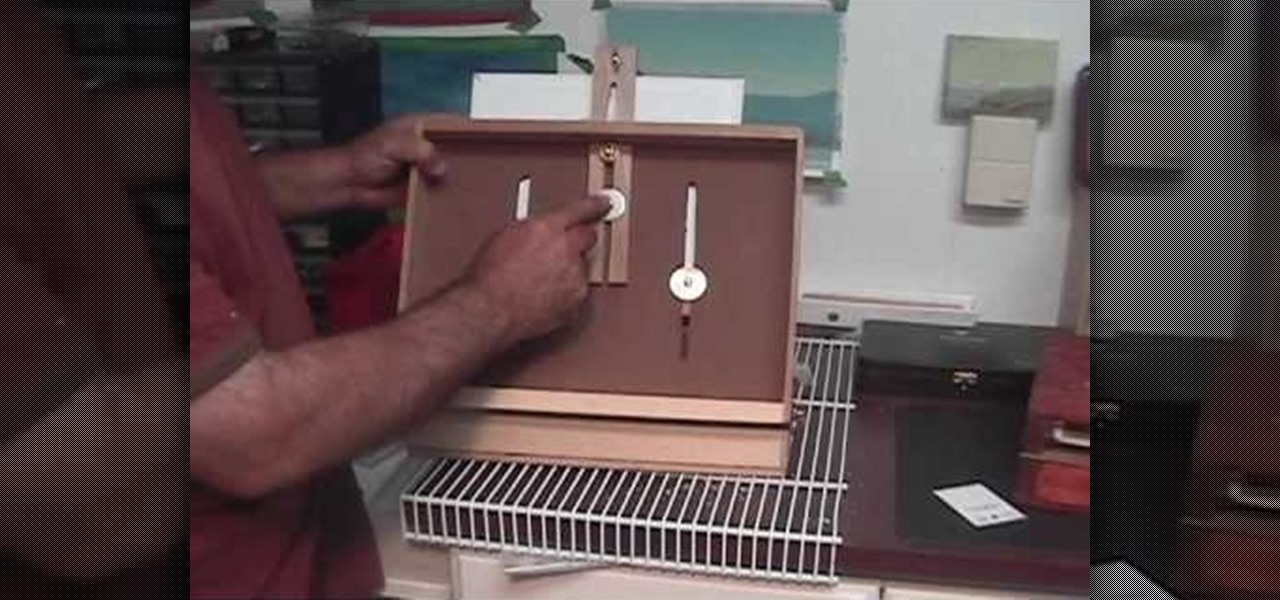
How To: Build a pochade box for outdoor painting
In this video, we learn how to build a pochade box for outdoor painting. This box will hold two wet panels in the back and help you hold other things you need to carry. You will need a medium sized box first, then you will need to cut the back and sides of the top to make slits where you can place in the panels. After this, you will create a barrier for the middle that has two slits in the bottom of it where you can slide it. On the bottom of the box you will have a hold where you can thread ...
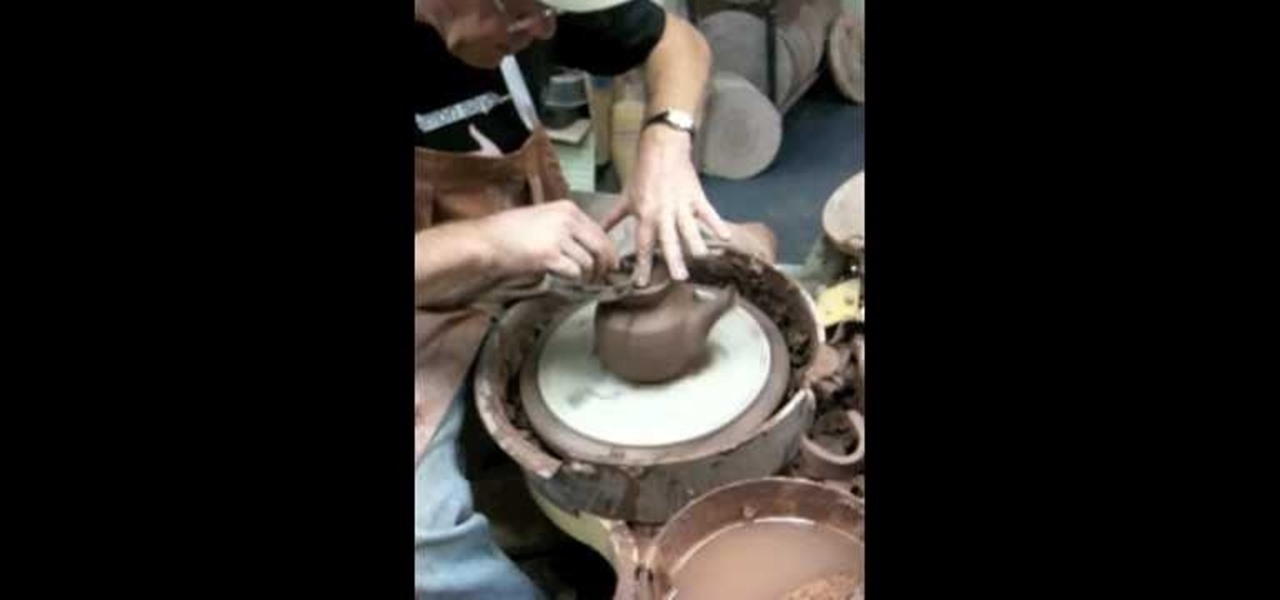
How To: Make a teapot in ceramics
Simon Leach teaches us how to make a teapot in ceramics in this video. After you have created the basic pot for the tea, you will need to poke several small holes into the side of it where it will be poured. After this, you will need to create the spout and mark where it's going to go on the pot while it's still wet. Now, key the area on the pot where the spout is going to go, then apply water to it and push the spout onto the area. Push along the sides gently until the spout is stuck on comp...
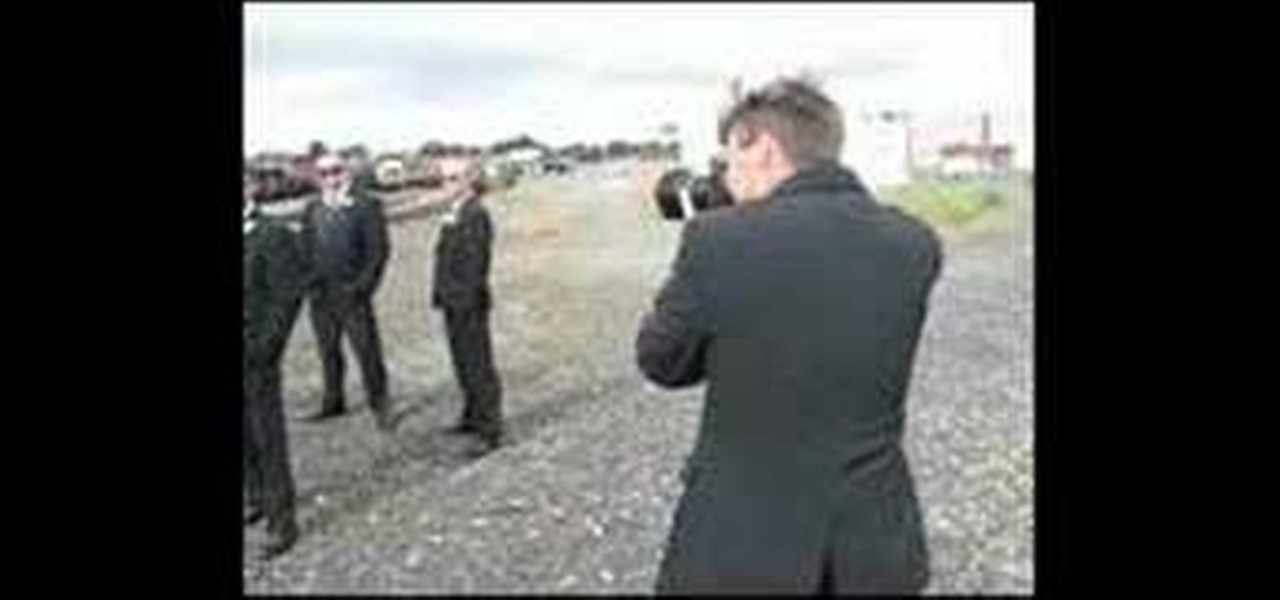
How To: Shoot wedding photography like a pro
In this video, we learn how to shoot wedding photography like a pro. Start off by having the wedding party in front of a clear background. Try taking their picture outside with trees and a clear sky in the background behind them. Use the surroundings to add a special touch to the pictures and use the correct flash so that the wedding party shows more than the background does. Accentuate the background and use white flash absorbers around the wedding party so their faces have more color that s...
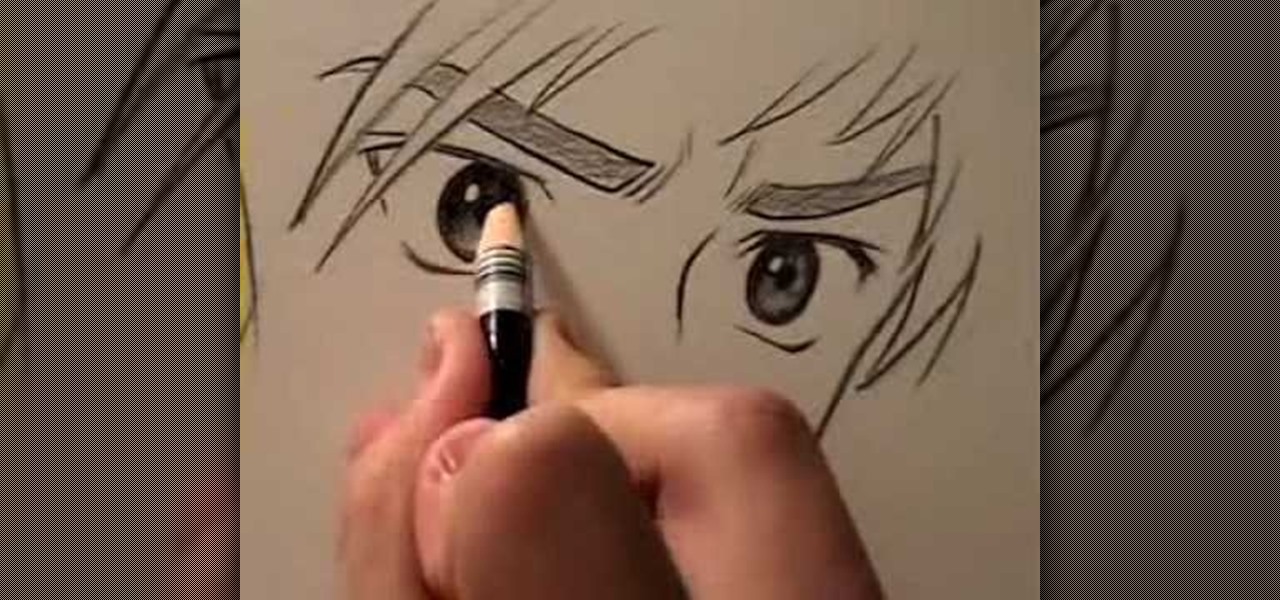
How To: Draw manga eyes four different ways
In this video, Mark Crilley presents viewers with four ways to draw anime eyes. The first set of eyes has an intense look to the them, with the face tilted slightly while the eyes are staring at the viewer. Eyebrows are added in a sloping manner in order to create a more dramatic effect and drawing attention to the eyes. The next set of eyes are more hexagonal in shape and look downwards while wide open, creating more of a surprised expression. Thick eyebrows framing the eyes also bring atten...

How To: Use "fill in" flash
In this video, we learn how to use "fill in" flash. When you are taking a shot of people outside, you will need to have a certain type of aspect on your camera. They will have shine on their face from the sun and it will be washed out with white. When you go to your camera, you need to change the flash settings so that they are compatible with being outside. Now, try taking pictures of your subjects again and you will see a huge difference. The subjects should be easier to see and there shoul...

How To: Do spiral fluting
Simon Leach teaches us how to do spiral fluting in this video. Start on the side of the bowl with a sharp edge. Then, push the edge down from the top until you reach the bottom half of the bowl. Create line next to line very close to each other, not overlapping them. Continue to do this slowly until you have reached all the way around the bowl. Make sure your lines are all equal to each other, they don't have to be perfect though. After you have made lines all the way around, your bowl will b...